Panasonic HDC SD9 Hd Sd Camcorder - Multi Language - Page 17
Lens cover, DC input terminal [DC IN 9.3V] - videos
 |
UPC - 037988832033
View all Panasonic HDC SD9 manuals
Add to My Manuals
Save this manual to your list of manuals |
Page 17 highlights
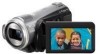
≥ To adjust manually (l 59) ≥ Playback operations (l 64, 69) 7 Face detection button [ ] (l 46) 8 PRE-REC button [PRE-REC] (l 40) 9 DC input terminal [DC IN 9.3V] (l 23) 10 Battery holder (l 21) 11 Battery release lever [BATTERY] (l 21) 12 HDMI mini connector [HDMI] (l 81, 83) 13 Disc copy button [DISC COPY] (l 89) 14 Power LCD Extra button [POWER LCD EXTRA] (l 32) 15 Delete button [ ] (l 72) 16 Audio-video output terminal [A/V] (l 78, 92) ≥ Use the supplied AV cable only. 17 Component terminal [COMPONENT] (l 82) 18 USB terminal [ ] (l 86, 93, 103) 19 Menu button [MENU] (l 27) 20 21 ≥ When fitting the tele conversion lens (VW-T3714H; optional) or the wide conversion lens (VW-W3707H; optional), first remove the lens hood. Be careful about the following. When 2 lens accessories, such as the ND filter and tele conversion lens, are fitted and the zoom lever is pressed toward the W side, the 4 corners of an image will be darkened. (Vignetting) (When fitting 2 lens accessories, first remove the lens hood and then fit them.) 23 Remote control sensor (l 19) 24 Recording lamp (l 28) 25 22 23 24 20 Built-in flash (l 55) 21 Lens (LEICA DICOMAR) Lens cover A ≥The lens cover opens in recording mode. (l 26) 25 Tripod receptacle This is a hole for attaching the unit to the optional tripod. (For details on mounting the tripod, refer to the operating instructions for the tripod.) 22 Lens hood Rotate the lens hood counter-clockwise A to remove it. In order to attach it, place into slot B, and then rotate it clockwise C. A Camera base 17 VQT1N45
-
 1
1 -
2
-
3
-
4
-
5
-
6
-
7
-
8
-
9
-
10
-
11
-
 12
12 -
 13
13 -
 14
14 -
 15
15 -
 16
16 -
 17
17 -
 18
18 -
 19
19 -
 20
20 -
 21
21 -
 22
22 -
23
-
24
-
25
-
26
-
27
-
28
-
29
-
30
-
31
-
32
-
33
-
34
-
35
-
36
-
37
-
38
-
39
-
40
-
41
-
42
-
43
-
44
-
45
-
46
-
47
-
48
-
49
-
50
-
51
-
52
-
53
-
54
-
55
-
56
-
57
-
58
-
59
-
60
-
61
-
62
-
63
-
64
-
65
-
66
-
67
-
68
-
69
-
70
-
71
-
72
-
73
-
74
-
75
-
76
-
77
-
78
-
79
-
80
-
81
-
82
-
83
-
84
-
85
-
86
-
87
-
88
-
89
-
90
-
91
-
92
-
93
-
94
-
95
-
96
-
97
-
98
-
99
-
100
-
101
-
102
-
103
-
104
-
105
-
106
-
107
-
108
-
109
-
110
-
111
-
112
-
113
-
114
-
115
-
116
-
117
-
118
-
119
-
120
-
121
-
122
-
123
-
124
-
125
-
126
-
127
-
128
-
129
-
130
-
131
-
132
-
133
-
134
-
135
-
136
-
137
-
138
-
139
-
140
-
141
-
142
-
143
-
144
 |
 |
