Panasonic Handheld P2 HD Camcorder with AVC-ULTRA Recording Operating Instruct - Page 31
Attaching the front microphone, Attaching a tripod
 |
View all Panasonic Handheld P2 HD Camcorder with AVC-ULTRA Recording manuals
Add to My Manuals
Save this manual to your list of manuals |
Page 31 highlights
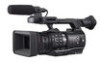
Chapter 3 Preparation - Attaching and adjusting accessories Attaching the front microphone Microphones such as a super-directional microphone AG‑MC200G (optional) can be attached. Screws for tapped hole protection are attached on the camera body. Remove those screws when you attach the microphone holder. Screw for the microphone holder Microphone holder Microphone cable clamp Fig. 1 Fig. 2 terminal Fig. 3 1 Attach the microphone holder. (Fig. 1) 2 Attach the microphone and tighten the microphone holder clamping screw. (Fig. 2) 3 Connect the microphone connecting cable to the terminal on the camera. (Fig. 3) 4 Secure the microphone connecting cable with the microphone cable clamp. 5 Set the switch to match the microphone to be connected. @@NOTE tt The microphone holder cannot be fixed with the screws originally attached on the camera. Use the dedicated screws that came with the camera to fix the microphone holder. Attaching a tripod The tripod attachment holes accept 1/4‑20 UNC and 3/8‑16 UNC screws. Use the hole that matches the diameter of the clamping screw on the tripod. @@NOTE tt Use a tripod in safe locations. tt The depth of the tripod attachment hole is 5.5 mm. When attaching the camera to a tripod, do not over-tighten the tripod screw. - 31 -
-
 1
1 -
2
-
3
-
4
-
5
-
6
-
7
-
8
-
9
-
10
-
11
-
12
-
13
-
14
-
15
-
16
-
17
-
18
-
19
-
20
-
21
-
22
-
23
-
24
-
25
-
 26
26 -
 27
27 -
 28
28 -
 29
29 -
 30
30 -
 31
31 -
 32
32 -
 33
33 -
 34
34 -
 35
35 -
 36
36 -
37
-
38
-
39
-
40
-
41
-
42
-
43
-
44
-
45
-
46
-
47
-
48
-
49
-
50
-
51
-
52
-
53
-
54
-
55
-
56
-
57
-
58
-
59
-
60
-
61
-
62
-
63
-
64
-
65
-
66
-
67
-
68
-
69
-
70
-
71
-
72
-
73
-
74
-
75
-
76
-
77
-
78
-
79
-
80
-
81
-
82
-
83
-
84
-
85
-
86
-
87
-
88
-
89
-
90
-
91
-
92
-
93
-
94
-
95
-
96
-
97
-
98
-
99
-
100
-
101
-
102
-
103
-
104
-
105
-
106
-
107
-
108
-
109
-
110
-
111
-
112
-
113
-
114
-
115
-
116
-
117
-
118
-
119
-
120
-
121
-
122
-
123
-
124
-
125
-
126
-
127
-
128
-
129
-
130
-
131
-
132
-
133
-
134
-
135
-
136
-
137
-
138
-
139
-
140
-
141
-
142
-
143
-
144
-
145
-
146
-
147
-
148
-
149
-
150
-
151
-
152
-
153
-
154
-
155
-
156
-
157
-
158
-
159
-
160
-
161
-
162
-
163
-
164
-
165
-
166
-
167
-
168
-
169
-
170
-
171
-
172
-
173
-
174
-
175
-
176
-
177
-
178
-
179
-
180
-
181
-
182
-
183
-
184
-
185
-
186
-
187
-
188
-
189
-
190
-
191
-
192
-
193
-
194
-
195
-
196
-
197
-
198
-
199
-
200
-
201
-
202
-
203
-
204
-
205
-
206
-
207
-
208
-
209
-
210
-
211
-
212
-
213
-
214
-
215
-
216
-
217
 |
 |
