Panasonic PTDZ8700U PTDS8500U User Guide - Page 81
STANDBY MODE, SCHEDULE, How to enable the SCHEDULE, function, How to assign a program
 |
UPC - 885170010963
View all Panasonic PTDZ8700U manuals
Add to My Manuals
Save this manual to your list of manuals |
Page 81 highlights
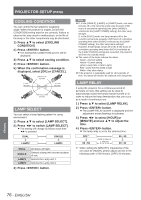
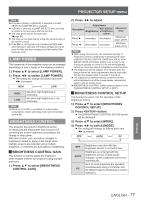
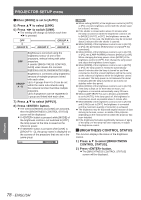
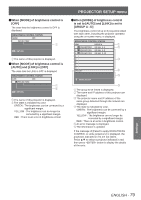
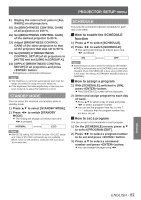
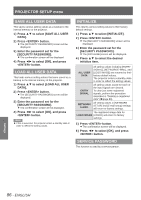
PROJECTOR SETUP menu 9999 Display the internal test pattern [ALL WHITE] on all projectors. 1111 Set [BRIGHTNESS CONTROL GAIN] of all projectors to 100 %. 1111 Set [BRIGHTNESS CONTROL GAIN] of the darkest projector to 90 %. 1111 Adjust [BRIGHTNESS CONTROL GAIN] of the other projectors to that of the projector that was set to 90 %. 1111 Set [MODE] of [BRIGHTNESS CONTROL SETUP] of all projectors to [AUTO] and set [LINK] to [GROUP A]. 1111 [APPLY] [BRIGHTNESS CONTROL SETUP] of all projectors and press button. zzBrightness control will commence. Note zzThe brightness is corrected automatically each time the lamps are turned on using the power switch etc. zzIf the brightness fluctuates significantly or the lamp has been replaced, re-adjust the brightness control. STANDBY MODE You can select the electrical consumption while in standby mode. 1111 Press ▲▼ to select [STANDBY MODE]. 2222 Press ◄► to switch [STANDBY MODE]. zzThe setting will change as follows each time ◄► is pressed. NORMAL ECO Note zzWith [ECO] setting, NETWORK function, RS-232C output and some of RS-232C commands are not available. When switch on the projector, projection will start about 10 seconds late. SCHEDULE This sets the command execution schedule for each day of the week. JJHow to enable the SCHEDULE function 1111 Press ▲▼ to select [SCHEDULE]. 2222 Press ◄► to switch [SCHEDULE]. zzThe setting will change as follows each time ◄► is pressed. ON OFF Note zzIf [SCHEDULE] is set to [ON], the setting for [STANDBY MODE] is automatically set to [NORMAL] and cannot be changed. Even if [SCHEDULE] is then set to [OFF] when in this state, the setting of [STANDBY MODE] remains at [NORMAL]. JJHow to assign a program 1111 With [SCHEDULE] switched to [ON], press button. zzThe [SCHEDULE] screen will be displayed. 2222 Select and assign program to each day of week. zzPress ▲▼ to select a day of week and press ◄► to select a program number. zzYou can set the program from No.1 to No.7. "- - -" indicates that the program number has not been set yet. JJHow to set a program You can set up to 16 commands to each program. 1111 On the [SCHEDULE] screen, press ▲▼ to select [PROGRAM EDIT]. 2222 Press ◄► to select a program number to be set and press button. 3333 Press ▲▼ to select a command number and press button. zzYou can change the page using ◄►. Settings ENGLISH - 81
-
 1
1 -
2
-
3
-
4
-
5
-
6
-
7
-
8
-
9
-
10
-
11
-
12
-
13
-
14
-
15
-
16
-
17
-
18
-
19
-
20
-
21
-
22
-
23
-
24
-
25
-
26
-
27
-
28
-
29
-
30
-
31
-
32
-
33
-
34
-
35
-
36
-
37
-
38
-
39
-
40
-
41
-
42
-
43
-
44
-
45
-
46
-
47
-
48
-
49
-
50
-
51
-
52
-
53
-
54
-
55
-
56
-
57
-
58
-
59
-
60
-
61
-
62
-
63
-
64
-
65
-
66
-
67
-
68
-
69
-
70
-
71
-
72
-
73
-
74
-
75
-
 76
76 -
 77
77 -
 78
78 -
 79
79 -
 80
80 -
 81
81 -
 82
82 -
 83
83 -
 84
84 -
 85
85 -
 86
86 -
87
-
88
-
89
-
90
-
91
-
92
-
93
-
94
-
95
-
96
-
97
-
98
-
99
-
100
-
101
-
102
-
103
-
104
-
105
-
106
-
107
-
108
-
109
-
110
-
111
-
112
-
113
-
114
-
115
-
116
-
117
-
118
-
119
-
120
-
121
-
122
-
123
-
124
-
125
-
126
-
127
-
128
-
129
 |
 |
