Panasonic PV GS12 Digital Video Camcorder
Panasonic PV GS12 - Digital Palmcorder MultiCam Camcorder Manual
 |
UPC - 037988977727
View all Panasonic PV GS12 manuals
Add to My Manuals
Save this manual to your list of manuals |
Panasonic PV GS12 manual content summary:
- Panasonic PV GS12 | Digital Video Camcorder - Page 1
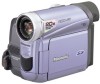
Operating Instructions Digital Video Camcorder Model No. PV-GS120 PV-GS200 Before attempting to connect, operate or adjust this product, please read these instructions thoroughly. Spanish Quick Use Guide is included. Guía para rápida consulta en español está incluida. Mini For USA assistance, please - Panasonic PV GS12 | Digital Video Camcorder - Page 2
Panasonic Camcorder. Be sure to retain this manual as your convenient Camcorder information source. Date of Purchase Dealer Purchased From Dealer Address Dealer Phone No. Model -SERVICEABLE PARTS INSIDE REFER SERVICING TO QUALIFIED SERVICE problems. AC Adaptor ≥The rating plate is on the underside - Panasonic PV GS12 | Digital Video Camcorder - Page 3
B digital device instructions Panasonic Model No.: PV-GS120, PV-GS200 Responsible party: Matsushita Electric Corporation of America One Panasonic Way, Secaucus, NJ 07094 Support Contact: Panasonic THE RECOMMENDED ACCESSORIES ONLY. DANGER OF EXPLOSION IF BATTERY IS INCORRECTLY REPLACED. REPLACE - Panasonic PV GS12 | Digital Video Camcorder - Page 4
Install in accordance with the manufacturer's instructions. 8) Do not install near any from the apparatus. 11) Only use attachments/accessories specified by the manufacturer. 12) Use only . S3125A 14) Refer all servicing to qualified service personnel. Servicing is required when the apparatus has - Panasonic PV GS12 | Digital Video Camcorder - Page 5
serviceable parts inside. Unplug your Camcorder from the power supply before cleaning. CAUTION ≥DO NOT AIM YOUR CAMCORDER AT THE SUN OR OTHER BRIGHT OBJECTS ≥DO NOT LEAVE THE CAMCORDER digital apparatus complies with CANADIAN ICES-003. U.S.A./CANADA CONSUMERS: ATTENTION: A lithium ion/polymer battery - Panasonic PV GS12 | Digital Video Camcorder - Page 6
USB Driver, WebCam Driver and DV STUDIO) You ("Licensee") are granted a license for the Software defined in this End User Software Agreement software, including the information recorded or described on the CD-ROM, instruction manuals, and any other media provided to Licensee (collectively "Software - Panasonic PV GS12 | Digital Video Camcorder - Page 7
comply with any provision of this Agreement. Upon termination you will destroy the Software together with all copies and modifications in any form. 8) The Software has been tested and the documentation has been reviewed. However, THE LICENSOR MAKES NO WARRANTY OR REPRESENTATION INCLUDING THE IMPLIED - Panasonic PV GS12 | Digital Video Camcorder - Page 8
54 With a PC Using the Software with a Computer 56 Using USB Driver 56 Using as a Web Camera 58 Using DV STUDIO 3.1E-SE 60 Using the G.726 Audio Decoder 61 Using the ArcSoft Software 62 To disconnect USB cable safely 64 If you no longer need software or driver (Uninstall 65 Notes 65 -8- - Panasonic PV GS12 | Digital Video Camcorder - Page 9
Notes and Hints 71 Cautions for Use 78 Before Requesting Service (Problems and Solutions 82 Explanation of Terms 83 Specifications 85 Camcorder Accessory System 88 Camcorder Accessory Order Form (For USA Customers 89 Request for Service Notice (USA Only)......... 90 Limited Warranty (For USA - Panasonic PV GS12 | Digital Video Camcorder - Page 10
AC Adaptor. ≥The [CHARGE] Lamp lights up, and charging starts. ≥When the [CHARGE] Lamp goes off, charging is completed. 2 Attach the charged Battery to the Camcorder. 3 3 Close the Card Slot Cover 2 securely. ª Recording on a Tape 1 Set the [OFF/ON] Switch 1 to [ON]. ≥The [POWER] Lamp 2 lights up - Panasonic PV GS12 | Digital Video Camcorder - Page 11
to Picture Playback Mode or MPEG4 Playback Mode. (MPEG4 Playback Mode on PV-GS200 Model only) PC PC SD SD SD 2 Press the Recording Start/Stop Button search the beginning of the file, and when you keep pressing it, review playback is activated.) ∫: Stop playing back ;: Pause playing back SD 3 - Panasonic PV GS12 | Digital Video Camcorder - Page 12
. Power is supplied directly from the Camcorder when using an accessory supported by the Smart Accessory Shoe. (PV-GS200 only) ≥Do not touch the connector part of the Smart Accessory Shoe. (PV-GS200 only) (2) LCD Monitor Open Button [PUSH OPEN] -20- (3) LCD Monitor -20-, -81- VFC3506 VFA0425 Due - Panasonic PV GS12 | Digital Video Camcorder - Page 13
] to [OUT], you may hear noises on the right. (35) Mode Selector Switch [AUTO/MANUAL/FOCUS] -27-, -35-, -38(36) Reset Button [RESET] -70- (37) Speaker -42- (38) Cassette Eject Lever [OPEN/EJECT] -18- PC (39) PV-GS200 PV-GS120 PC (44) (45) OFF SD SD QUICK START POWER ON (40) (41) (42) (43 - Panasonic PV GS12 | Digital Video Camcorder - Page 14
Battery Holder (52) Shoulder Strap Holders -18(53) Grip Belt (One-touch Free Style Grip Belt) -17(54) Tripod Receptacle ≥Used for mounting the Camcorder on an optional tripod. (55) DV Terminal [DV] -53≥Connect this to the digital /P-IN-P] -40-, -46(75) Rewind/Review Button [6] -42-, -45(76) Pause - Panasonic PV GS12 | Digital Video Camcorder - Page 15
PV Camcorder Camcorder instructions. Risk of fire, explosion and burns. Do not recharge, disassemble, heat above 212°F (100°C) or incinerate. Keep the Button-Type battery out of the reach of children. Never put Button-Type battery in mouth. If swallowed, call your doctor. Replace battery with Panasonic - Panasonic PV GS12 | Digital Video Camcorder - Page 16
Power Supply ª Using the AC Adaptor ª Using the Battery Before use, fully charge the Battery. ≥We recommend using a Panasonic Battery. ≥We cannot guarantee the quality of this Camcorder when batteries from other companies are used. 1 Attach the Battery to the AC Adaptor and charge it. ≥Since the - Panasonic PV GS12 | Digital Video Camcorder - Page 17
30 minutes. ≥Battery CGA-DU14 is supplied. (PV-GS200 only) ≥Battery VSB0470 is supplied. (PV-GS120 only) ≥ Camcorder while lighting (31) 1 (30) 2 Detach the end of the Grip Belt. the LCD Monitor up by pressing the [POWER LCD] Button. ≥When you use accessories applicable to the Smart Accessory - Panasonic PV GS12 | Digital Video Camcorder - Page 18
Shoulder Strap We recommend that you attach the Shoulder Strap before going out to avoid dropping the Camcorder. 1 Pull the end of the Shoulder Strap through the Shoulder Strap Holder (52) on the Camcorder. 4 Attach the Grip Belt around your wrist. ≥When returning the Grip Belt to the Grip Belt - Panasonic PV GS12 | Digital Video Camcorder - Page 19
can be used to record pictures. ≥Use a genuine SD Memory Card or MultiMediaCard manufactured by Panasonic only. Before inserting or removing a Card, be sure to turn off the Camcorder. ≥Otherwise, the Camcorder may not function properly or it may cause the loss of recorded data in a Card. ª Inserting - Panasonic PV GS12 | Digital Video Camcorder - Page 20
picture on a card. (moving picture on PV-GS200 Model only) :Picture Playback Mode Use this mode PV-GS200 only) Use this mode when playing back the recorded moving picture on a card. PC :PC Mode Use this mode when you want to connect the Camcorder to your Personal Computer. Using the Viewfinder/LCD - Panasonic PV GS12 | Digital Video Camcorder - Page 21
.) However, if the Battery or AC Adaptor is disconnected before turning off the Camcorder, the selected setup may not be retained. ≥Menu operation flow is shown in this text by >>. ª File Selection in the Picture/MPEG4 Playback Mode (MPEG4 Playback Mode on PV-GS200 Model only) A File Selection - Panasonic PV GS12 | Digital Video Camcorder - Page 22
USB FUNCTION LCD/EVF FLASH INITIAL RED EYE FLASH LEVEL ;/∫:SELECT %:NEXT MENU:EXIT 1) [CAMERA] Camera Setup Sub-Menu [PROG.AE] Auto Exposure Mode -35[EIS] Image Stabilizer -33[D.ZOOM] Digital Zoom -32[SELF TIMER] Self-timer Recording -31[USB FUNCTION] USB Functions Mode -59[FLASH] (PV - Panasonic PV GS12 | Digital Video Camcorder - Page 23
AUDIO DIGITAL AUDIO OUT CARD USB FUNCTION RECORDING DISPLAY LCD/ the camera data of this Camcorder are played back on other DV Terminal. ≥When displaying a list of titles. 7) [LCD/EVF] Adjusting Brightness and Color Level [LCD AI] (PV-GS200 only) Intelligent LCD Monitor -21[LCD/EVF SET] LCD - Panasonic PV GS12 | Digital Video Camcorder - Page 24
69- 6) [LCD/EVF] Adjusting Brightness and Color Level [LCD AI] (PV-GS200 only) Intelligent LCD Monitor -21[LCD/EVF SET] LCD and Viewfinder [PICTURE PLAYBACK MENU] Picture Playback Menu PICTURE DELETE EDITING PRINT DIGITAL DISPLAY LCD/EVF INITIAL PLAYBACK MENU !FILE BY SEL ALL FILES TITLE BY - Panasonic PV GS12 | Digital Video Camcorder - Page 25
[LCD AI] (PV-GS200 only) Intelligent LCD Monitor -21[LCD/EVF SET] LCD and Viewfinder Adjustment -20[EVF ON/AUTO] Using the Viewfinder -205) [INITIAL] Initial Setup Sub-Menu [AV JACK] AV Jack -82[REMOTE] Remote Controller Mode -16- Setting Date and Time Since the internal clock of the Camcorder has - Panasonic PV GS12 | Digital Video Camcorder - Page 26
When the [0] or [--] Indication flashes, the internal lithium battery is near exhaustion. 1 Connect the AC Adaptor to the Camcorder with the power turned off and then connect to the AC Jack. ≥After charging for 4 hours, the built-in lithium battery can power the clock for approximately 3 months. LP - Panasonic PV GS12 | Digital Video Camcorder - Page 27
pictures on a card, set the Mode Dial to Card Recording Mode [ ]. (moving pictures on PV-GS200 Model only) When recording with the [AUTO/MANUAL/FOCUS] Switch (35) set to [AUTO], the Camcorder automatically adjusts the focus and white balance. In some cases, they cannot be adjusted automatically and - Panasonic PV GS12 | Digital Video Camcorder - Page 28
Camcorder. The size of images that are recorded using this Camcorder is approximately 2.3 million pixels (PV-GS200)/1.2 million pixels (PV-GS120), pressed, images become still pictures. When the button is pressed again, the Digital Still Picture Mode is cancelled. (15) STILL s ENTER i FADE 2 - Panasonic PV GS12 | Digital Video Camcorder - Page 29
PV-GS120) 1 Set the Mode Dial (39) to Card Recording Mode. PC (39) SD PC (39) SD 2 Press the [PHOTO SHOT] Button (47) halfway. PHOTO SHOT (47) 1 2 ≥The aperture value and gain are fixed and the Camcorder Shutter Chance Mark does not appear in Manual Focus Mode. 2 Press the [PHOTO SHOT - Panasonic PV GS12 | Digital Video Camcorder - Page 30
shutter speed is set to 1/30 manually, still pictures can be recorded at approximately 0.7 second intervals. (In the case of PV-GS200, you cannot use the RapidFire continuous recording time is approximately 120 minutes. The Camcorder will automatically stop recording when the relevant time listed - Panasonic PV GS12 | Digital Video Camcorder - Page 31
]: approximately 8 minutes ≥These figures vary depending on the scene. ª Recording Yourself By opening the LCD Monitor and rotating it forward (to the lens side), you can let the subject in front of the Camcorder monitor the shot while recording is in progress. To Cancel the Quick Start Keep the - Panasonic PV GS12 | Digital Video Camcorder - Page 32
To Use the Tele-Macro Function With the zoom magnification of 10k, the Camcorder can bring the subject into focus as close as approximately 16 inch ( (13). Z.MIC ≥For other notes concerning this item, see -73-. Digital Zoom Function This function is useful when you want to record close-up shots - Panasonic PV GS12 | Digital Video Camcorder - Page 33
is shaken while recording, the camera shake in the image can be corrected. ≥If the Camcorder shakes too much, the images may not be stabilized. 1 Set [TAPE RECORDING MENU] >> [CAMERA] >> [EIS] >> [ON]. 2 When the image is completely gone, press the Recording - Panasonic PV GS12 | Digital Video Camcorder - Page 34
(14) MENU ≥The [WIND CUT] Indication appears. WIND CUT ≥The screen becomes white and the Viewfinder turns on. ≥The available range of the LCD Monitor light is within approximately 3.9 feet (1.2 meter). To Cancel the Wind Noise Reduction Function Set [TAPE RECORDING MENU] or [CARD RECORDING MENU - Panasonic PV GS12 | Digital Video Camcorder - Page 35
condition, the Automatic White Balance Adjustment Mode may not be able to bring out natural colors. In this case, the white balance can be adjusted manually. When the Camcorder is turned on with the Lens Cap on, the Automatic White Balance Adjustment may not function properly. Please turn on the - Panasonic PV GS12 | Digital Video Camcorder - Page 36
) 2Adjusting the White Balance (Blinking) 3Adjustment is completed. (Lit) Adjusting White Balance Manually White Balance Adjustment recognizes the color of light and adjusts so that white will become pure white. The Camcorder determines the hue of light that comes through the Lens and the White - Panasonic PV GS12 | Digital Video Camcorder - Page 37
≥the Camcorder focuses on the subject manually. ≥When you set the [AUTO/MANUAL/FOCUS] PV-GS120) The standard shutter speed is 1/60 s. Selecting a speed closer to [1/8000] causes the shutter speed to be faster. To Resume Automatic Adjustment Set the [AUTO/MANUAL/FOCUS] Switch to [AUTO]. AUTO MANUAL - Panasonic PV GS12 | Digital Video Camcorder - Page 38
by sensing the surrounding luminosity. 2 Slide the [ßL] Lever (21). ≥The [MF] Indication (Manual Focus Mode) appears. (PV-GS200) ≥The [1MF] Indication (Manual Focus Mode) appears. (PV-GS120) MNL MF MNL MF PV-GS200 PV-GS120 3 (PV-GS200) Turn the Focus Ring (24) to adjust the focus. (21) ≥The - Panasonic PV GS12 | Digital Video Camcorder - Page 39
Recording Mode Red Eye Reduction Function (PV-GS200 only) This function reduces a phenomenon which concerning this item, see -75-. Digital Effect Functions This Camcorder is equipped with Digital Effect Functions that add special effects to the scene. Digital Effects 1 [EFFECT1] 1) MULTI 2) - Panasonic PV GS12 | Digital Video Camcorder - Page 40
] >> [EFFECT1] >> [P-IN-P]. STILL s ENTER i FADE (14) MENU You can manually capture and record 9 small still pictures. 1 Set [TAPE RECORDING MENU] >> [DIGITAL] >> [EFFECT1] >> [MULTI]. 2 Aim the Camcorder at the scene you want to capture and press the [P-IN-P] Button (10) to insert a small - Panasonic PV GS12 | Digital Video Camcorder - Page 41
Recording Mode 1 Set [TAPE RECORDING MENU] >> [DIGITAL] >> [EFFECT1] >> [WIPE] or [MIX]. STILL s ENTER i FADE (14) MENU ≥The [WIPE] or [MIX] Indication appears. 2 Press the Recording Start/Stop Button (42) to start recording. ( - Panasonic PV GS12 | Digital Video Camcorder - Page 42
the Remote Controller in Playback Zoom Mode. (-44-) ≥For other notes concerning this item, see -75-. Finding a Scene You Want to Play Back ª Cue/Review Playback STILL s ENTER i FADE (19) (16) If the [5] Button (16) or [6] Button (19) is pressed during Playback, it turns to Cue Playback A or - Panasonic PV GS12 | Digital Video Camcorder - Page 43
Remote Controller. (-14-) To Resume Normal Playback Press the [1] Button (17). ≥During Cue or Review Playback, fast-moving images may show mosaic-like patterns. ≥The sound is muted during search. Slow Motion Playback This Camcorder can play back at a slow speed. (79) V/REW PLAY FF/W W 61 5 (64 - Panasonic PV GS12 | Digital Video Camcorder - Page 44
[INDEX] Indication flashes for a few seconds.) INDEX ≥If the Camcorder is switched from the Tape Playback Mode to Tape Recording Mode or ∫ L SELECT VAR. SEARCH MENU STORE ENTER OFF/ON (81) (63) P B DIGITAL ≥The center of the image is enlarged by approximately 2 times. (65) V/REW PLAY - Panasonic PV GS12 | Digital Video Camcorder - Page 45
Mode or MPEG4 Playback Mode. (MPEG4 Playback Mode on PV-GS200 Model only) PC PC SD SD (39) To suspend Playback Digital Effect Temporarily Press the [OFF/ON] Button (68) to suspend , and when you keep pressing it, review playback is activated.) ∫: Stop playing back ;: Pause playing back -45- - Panasonic PV GS12 | Digital Video Camcorder - Page 46
To Select a Desired File and Playing Back 1 Set the Mode Dial (39) to Picture Playback Mode or MPEG4 Playback Mode. (MPEG4 Playback Mode on PV-GS200 Model only) (39) 2 Press the [MULTI] Button (10). 3 Folder File Number (When Picture Playback Mode is selected at Step 1) File Name (When MPEG4 - Panasonic PV GS12 | Digital Video Camcorder - Page 47
the image you want to use for creating a title and set the Camcorder to the Still Playback Mode. magenta, yellow and white, after which STILL s ENTER i FADE (14) MENU 3 Press the [PHOTO SHOT] Button (47). 1 Set [DIGITAL] >> [TITLE IN] >> [ON]. STILL s ENTER i FADE (14) MENU 2 Press the [ - Panasonic PV GS12 | Digital Video Camcorder - Page 48
of images to be printed, can be written to the Card. "DPOF" means Digital Print Order Format. 1 Set the Mode Dial (39) to Picture Playback Mode. PC >> [EDITING] >> [FILE LOCK] >> [YES]. ([MPEG4 PLAYBACK MENU] on PV-GS200 Model only) STILL s ENTER i FADE (14) MENU FILE LOCK 2 Set [PICTURE - Panasonic PV GS12 | Digital Video Camcorder - Page 49
Set [PICTURE/MPEG4 PLAYBACK MENU] >> [DELETE] >> [FILE BY SEL] >> [YES]. ([MPEG4 PLAYBACK MENU] on PV-GS200 Model only) STILL s ENTER i FADE Formatting a Card If a Card becomes unreadable by the Camcorder, format it for reuse. Formatting erases all the data recorded on a Card. 1 Set [PICTURE/MPEG4 - Panasonic PV GS12 | Digital Video Camcorder - Page 50
PV-GS200 only) You can enlarge a Moving Picture to full screen size 1 Set [MPEG4 PLAYBACK MENU] >> [DISPLAY] >> [SCREEN] >> [FULL]. STILL s ENTER i FADE (14) MENU Playing Back on Your TV By connecting your Camcorder SCREEN] >> [NORMAL]. MPEG4 MOL-001.ASF DV S-VIDEO IN/OUT AV IN/OUT PHONES ≥ - Panasonic PV GS12 | Digital Video Camcorder - Page 51
a Memory Card from scenes that have already been recorded on a cassette. (moving pictures on PV-GS200 Model only) 1 Set the Mode Dial (39) to Tape Playback Mode. (39) SD PC 2 Still Picture: Start playback and set the Camcorder to Still Playback Mode at the scene you wish to record, and press the - Panasonic PV GS12 | Digital Video Camcorder - Page 52
. [S-VIDEO IN] 2 [VIDEO IN] [AUDIO IN] 1 AV IN/OUT PHONES DV S-VIDEO IN/OUT 1 AV Cable 2 S-Video Cable ≥Be sure to press the external input, tape speed, etc.) are required, please refer to the operating instructions of your VCR. Camcorder: 3 Press the [1] Button (17) to start playback. VCR: 4 - Panasonic PV GS12 | Digital Video Camcorder - Page 53
, see -77-. Using the DV Cable for Recording (Digital Dubbing) By connecting this Camcorder with other digital video equipment (such as another Camcorder of the same format/model) that has a DV input/output terminal, and using a 4-pin to 4-pin DV Interface cable PV-DDC9/PV-DDC9-K (optional) 1, high - Panasonic PV GS12 | Digital Video Camcorder - Page 54
video clips using the DV Interface. Our DVC being OHCI compliant should have no problem working with any OHCI compliant Firewire Card/Video - Editing software package. Printing pictures by directly connecting to the printer (PictBridge) After connecting the Camcorder with a printer compatible with - Panasonic PV GS12 | Digital Video Camcorder - Page 55
Camcorder and the printer are connected in the Tape Recording/Playback Mode, the [WEB ] or the [WEB ] Indication may appear on the LCD properly. ≥Disconnecting the USB cable ≥Removing the Card ≥You cannot set date printing when the printer does not support it. ≥Proceed to the next step if you do - Panasonic PV GS12 | Digital Video Camcorder - Page 56
Microsoft Windows XP Home Edition/ 3 Select the software to be installed from [Setup Menu]. ≥USB Driver -56-: Software for USB Driver allows you to transfer images directly from the Memory Card into the computer. ≥WebCam Driver -58-: If the Camcorder is connected to your personal computer, you can - Panasonic PV GS12 | Digital Video Camcorder - Page 57
≥Reboot the computer to finish installing USB driver. ≥Installation continues after the computer reboots if you selected additional software. ≥A message indicating a conflict between versions may be displayed during the installation. This will not cause a problem. Simply click [Yes] to proceed with - Panasonic PV GS12 | Digital Video Camcorder - Page 58
on the Camcorder.) ≥Do not connect the USB Cable until the USB Driver or WebCam Driver is installed. / http://www.msn.com/ (For download and installation instructions, please refer to Help on the applications supported by previous versions of DirectX may not run. ª Installing WebCam Driver 1 Insert - Panasonic PV GS12 | Digital Video Camcorder - Page 59
Camcorder to Personal Computer (For Use as a Web Camera) 1 Install the supplied WebCam Driver on the provided CD-ROM. 2 Set the Mode Dial to Tape Recording Mode. 3 Set [CAMERA] >> [USB the USB Driver as instructed the video input from the DV terminal to the display of Service] and click [OK]. -59- - Panasonic PV GS12 | Digital Video Camcorder - Page 60
Messenger. ≥Please refer to the instruction manual of your personal computer for how Panasonic DVC Web Camera Device] is selected. ≥Depending on the operating environment, WebCam may not function even if WebCam then turn off the Camcorder. Finally, disconnect the USB Cable. Using DV STUDIO 3.1E-SE - Panasonic PV GS12 | Digital Video Camcorder - Page 61
the Camcorder to the Personal Computer with auxiliary USB Connection Cable. 4 Select [Start] >> [All Programs (Programs)] >> [Panasonic] >> [DV Studio3] >> [DV Studio3]. 3 Click [Next]. ≥After reading the displayed contents, please carry out the installation according to instructions. 4 After - Panasonic PV GS12 | Digital Video Camcorder - Page 62
easy viewing, retrieval, and management. 3 PhotoImpression 4.0 (Windows, Mac) 2 Select the software to be installed from [Setup Menu]. ≥The set up program starts up. ≥Quit all Windows applications. 3 Install it by following the instructions on the screen. ≥Easy-to-use photo editing program to edit - Panasonic PV GS12 | Digital Video Camcorder - Page 63
hard disk space: At least 300 MB ≥This instruction manual describes only the procedures for installation, connection and start-up. Please read the Help messages of your software for how to use the ArcSoft Software Suite. ª Installation of ArcSoft Software Suite For Windows 1 Insert the supplied CD - Panasonic PV GS12 | Digital Video Camcorder - Page 64
" will differ depending on the operating environment of your personal computer.) (When the Camcorder is in PC Mode:) [USB Mass Storage Device] or [Panasonic DV DISK Port Driver] Windows Me: (When the Camcorder is in PC Mode:) [USB Disk] ≥Some Operating Systems, such as Windows 98SE, may not show the - Panasonic PV GS12 | Digital Video Camcorder - Page 65
computer or define any terms. For this information, refer to the Operating Instructions which accompany your personal computer. ≥Do not disconnect USB Connection Cable while the operation light of Camcorder is on. It may freeze the software or destroy the data in transfer. ≥We recommend using the AC - Panasonic PV GS12 | Digital Video Camcorder - Page 66
, or if you do not follow these Operating Instructions, the Camcorder will not be recognized correctly. In this case, delete the USB Driver from [Device Manager] as described below, uninstall the USB Driver, and re-install it. 1 Set the Camcorder to Tape Recording Mode or Tape Playback Mode, connect - Panasonic PV GS12 | Digital Video Camcorder - Page 67
Camcorder, Personal Computer or others. Capacity that can be used as conventional memory: 8 MB Card: about 6,800,000 bytes (Panasonic SD Memory Card) °When you use the model a file and double click. Necessary software is automatically downloaded and starts playing back. (Internet connection - Panasonic PV GS12 | Digital Video Camcorder - Page 68
appears (PV-GS200 only). -28- : External microphone supported by the Smart Accessory Shoe (PV-GS200 only) -12- LOW CUT: External microphone supported by the Smart Accessory Shoe (LOW CUT) (PV-GS200 only) -22Playback -42Still Playback -43Fast-forward/Cue Playback -42Rewind/Review Playback - Panasonic PV GS12 | Digital Video Camcorder - Page 69
Image size (PV-GS200 only) 1280 : [1280k960] Image size (PV-GS120 only) 640 : [640k480] Image size ≥For images not recorded with this Camcorder, the size the following cases. When using Tape Recording Mode ≥Digital Effect Modes in [EFFECT1] ≥Digital Zoom [D.ZOOM] ≥1/750 s or faster shutter - Panasonic PV GS12 | Digital Video Camcorder - Page 70
Audio dubbing or Digital dubbing on a BATTERY): The Battery is low. Recharge it. -160: The built-in battery solve the problem. CARD USB CHANGE MODE: The USB cable is connected to the Camcorder in Card Recording Mode or MPEG4 Playback Mode. (MPEG4 Playback Mode on PV PV-GS200 Model only) -70- - Panasonic PV GS12 | Digital Video Camcorder - Page 71
DISCONNECT USB CABLE: You are attempting to turn the Mode Dial or turn the Camcorder off in PC Mode while connecting the USB cable to the Camcorder. adjust the shutter speed manually to 1/60 or 1/100. Photoshot ≥Sound cannot be recorded. ≥The file format supported by this Camcorder is JPEG. (Not - Panasonic PV GS12 | Digital Video Camcorder - Page 72
this Camcorder. ≥When the [PICTURE SIZE] is set to [1760k1320] (PV-GS200)/[1280k960] (PV-GS120), MPEG4 moving pictures when using line input or DV input, the wide images are recorded in battery, Quick Start Recording Lamp is turned off and Quick Start Mode is canceled. However, if the Camcorder - Panasonic PV GS12 | Digital Video Camcorder - Page 73
Camcorder. not use the Built-in Flash. (PV-GS200 only) ≥White Balance cannot be set. ≥The shutter speed cannot be adjusted. ≥The Image Stabilizer, Program AE or Digital refer to the TV's operating instructions for details. ≥When images on the software in use ≥Adjust the Focus manually. (-37-). ≥Using - Panasonic PV GS12 | Digital Video Camcorder - Page 74
When you set the Zoom to 10k or higher ≥During Digital Still Picture Mode ≥When you display a Menu ≥When Mode Dial and the [AUTO/MANUAL/FOCUS] Switch while the Camcorder is focusing on the subject. will be canceled. ª Using The Built-in Flash (PV-GS200 only) ≥The available range of the Flash is - Panasonic PV GS12 | Digital Video Camcorder - Page 75
Digital Effect item. ≥ Back (PV-GS200 iris manually or ª Digital Effect Digital Still Picture Mode, Digital Effect Functions cannot be set. In the following cases, using the [EFFECT1] on the [DIGITAL Digital the Camcorder switches Camcorder. In this case, no Camcorder Camcorder - Panasonic PV GS12 | Digital Video Camcorder - Page 76
DV STUDIO ≥The file format supported by this Camcorder is ASF. (Not all ASF formatted files will be played back.) (PV-GS200 only) ≥When you set [SCREEN] on the [DIGITAL ]. ≥If the [PICTURE SIZE] is set to [1760k1320] (PV-GS200)/[1280k960] (PV-GS120) and Mode Dial is set to [ ], title cannot be - Panasonic PV GS12 | Digital Video Camcorder - Page 77
moved back, you can. ≥MPEG4 data recorded by another Camcorder image. Analog-Digital Conversion may not be able to cancel the lock setting. (PV-GS200 only) ≥When the Camcorder is connected with other digital video equipment through its DV Terminal, ª Playing Back on Your TV images recorded in - Panasonic PV GS12 | Digital Video Camcorder - Page 78
Terminal. ≥Even if you use a device equipped with DV Terminals, you may not be able to perform Digital Dubbing in some cases. ≥Date or other information to be displayed cannot be displayed if the software of the connected equipment does not support the display function. ≥You cannot record on a tape - Panasonic PV GS12 | Digital Video Camcorder - Page 79
the AC Adaptor and Battery clean. ª Condensation If you turn the Camcorder on when there is PV-GS200 Model only) When [3 DEW] blinks in red ≥The Power Indicator Lamp blinks for about 1 minute and then the Camcorder Mini-DV Format Digital Video Head Cleaner 1 Insert the Head Cleaner into the Camcorder - Panasonic PV GS12 | Digital Video Camcorder - Page 80
conditions, such as temperature, humidity, dust, etc.) Please contact a Panasonic Service Center. ª Optimal Use of the Battery ª Cautions for Storage Before storing the Camcorder, take the Cassette out and detach the Battery. Store all the components in a dry place with a relatively stable - Panasonic PV GS12 | Digital Video Camcorder - Page 81
not affect the recorded picture. (PV-GS120) Extremely high precision technology is employed to produce the LCD Monitor screen featuring a total of to the Camcorder, 4 corners of the image may become dark (vignetting). For details, please refer to the operating instructions of your accessories. -81 - Panasonic PV GS12 | Digital Video Camcorder - Page 82
Others ≥Be sure to keep the Lens Hood attached to the Other Recording Camcorder so as to shut out unnecessary light. 1: Auto Focus Function does not work. Before Requesting Service (Problems and Solutions) • Is Manual Focus Mode selected? If Auto Focus Mode is selected, focus is automatically - Panasonic PV GS12 | Digital Video Camcorder - Page 83
appear on PC. • To disconnect the USB cable safely, double-click the [ ] icon in the task tray and follow the instructions on the screen. (-64-) Explanation of Terms ª Digital Video System In a digital video system, images and sounds are converted into digital signals and recorded on a tape. This - Panasonic PV GS12 | Digital Video Camcorder - Page 84
Please use the Manual Focus Mode instead. 1) Recording a subject whose one end is located close to the Camcorder and the 3 Start playback or recording. 4 After playback or recording has finished: Set the Camcorder to Tape Playback Mode. 5 Rewind the tape. ≥The tape automatically stops approximately - Panasonic PV GS12 | Digital Video Camcorder - Page 85
Power Consumption: Recording (PV-GS200) 6.0 W (PV-GS120) 5.5 W Mic sensitivity -50 dB (0 dB=1 V/Pa, 1 kHz) (Stereo mini jack) USB: Card reader/writer function, USB 2.0 compliant (max. 12 Mbps) No copyright protection support PictBridge-compliant Digital Interface: DV Input/Output Terminal (IEEE1394 - Panasonic PV GS12 | Digital Video Camcorder - Page 86
Adaptor Information for your safety Power Source: AC 110-240 V, 50/60 Hz Power Consumption: 19 W DC Output: DC 7.9 V, 1.4 A (Camcorder Operation) DC 8.4 V, 0.65 A (Battery Charging) Others Dimensions: 2.40 (W)k1.26 (H)k3.58 (D) inch 61 (W)k32 (H)k91 (D) mm Weight: Approx. 0.24 lbs. (110 g) Weight - Panasonic PV GS12 | Digital Video Camcorder - Page 87
an SD Memory Card (optional) PICTURE SIZE 640k480 1760k1320 (PV-GS200) 1280k960 (PV-GS120) PICTURE QUALITY 8 MB 16 MB 32 MB 64 . Maximum recording time of MPEG4 moving picture on an SD Memory Card (optional) (PV-GS200 only) PICTURE SIZE 320k240 (QVGA) 176k144 (QCIF) MPEG4 MODE 8 MB 16 - Panasonic PV GS12 | Digital Video Camcorder - Page 88
to activate it.) Video DC Light (3 W) Stereo Zoom Microphone Carrying Case PV-HB002 (USA only) Carrying Case *Please refer to page -17-, concerning the battery charging time and available recording time. *NOTE: Accessories and/or model numbers may vary by country. Please consult your local dealer - Panasonic PV GS12 | Digital Video Camcorder - Page 89
Others Camcorder Accessory Order Form (For USA Customers) Please photocopy this form when placing an order. 1. Palmcorder Model # 2. Items Ordered Accessory # Description Price Each Quantity Total Price Subtotal Your State & Local Sales Tax Shipping & Handling 6.95 3. Method of payment ( - Panasonic PV GS12 | Digital Video Camcorder - Page 90
is wrong with the unit and any symptom it is exhibiting. Mail this completed form and your Proof of Purchase along with your unit to: Panasonic Services Company 1705 N. Randall Road Elgin, IL. 60123-7847 Attn: Camcorder Repair Please write the displayed above Self Diagnostic number here. -90- - Panasonic PV GS12 | Digital Video Camcorder - Page 91
-Home or Carry-In 1-888-843-9788 Rechargeable Batteries (in exchange for defective item) Tape (in Panasonic Web Site: http://www.panasonic.com For assistance in Puerto Rico call Panasonic Sales Company (787)-750-4300 or fax (787)-768-2910. In-Home service problem with this product develops during or - Panasonic PV GS12 | Digital Video Camcorder - Page 92
; locate your nearest Dealer or Servicenter; purchase Parts and Accessories; or make Customer Service and Literature requests by visiting our Web Site at: http://www.panasonic.com/support or, contact us via the web at: http://www.panasonic.com/contactinfo You may also contact us directly at: 1-800 - Panasonic PV GS12 | Digital Video Camcorder - Page 93
PANASONIC PRODUCT - LIMITED WARRANTY Panasonic Canada Inc. warrants this product to be free from defects in material and workmanship and agrees to remedy any such defect for a period as stated below from the date of original purchase. Camcorder Dry cell batteries are also excluded service is - Panasonic PV GS12 | Digital Video Camcorder - Page 94
Flash 38 ªC Charging the Battery 16 Cinema Mode 35 Condensation 79 Cue Playback 42 Customer Services Directory 92 ªD Date/Time Indication 69 Date/Time Setting 25 Digital Effects 39 Digital Still Picture 28 Digital Zoom 32 DPOF Setting 48 Dubbing 52, 53 DV STUDIO 3.1E-SE 60 ªE Erasure - Panasonic PV GS12 | Digital Video Camcorder - Page 95
Slide Show 46 Slim Mode 39 Slow Motion Playback 43 Smart Accessory Shoe 12 Soft Skin Function 34 Solarisation Mode 39 Sound Volume -Macro Function 32 Time Code 84 Title 47 Trailing Effect Mode 39 ªU USB Connection Kit 56 ªV Variable Speed Search 43 Video Head Clogging 79 Viewfinder - Panasonic PV GS12 | Digital Video Camcorder - Page 96
Others Spanish Quick Use Guide/ Guía española para el uso rápido 1 Una la batería al adaptador de CA y cárguela. ª Inserción de la tarjeta 1 Desplace la palanca [OPEN] 1 para abrir - Panasonic PV GS12 | Digital Video Camcorder - Page 97
i FADE ª Grabación de una imagen en movimiento en una tarjeta (MPEG4) (Sólo PV-GS200) 1 Ajuste el disco del modo al de la grabación. 5 Oprima el bot al de reproducción MPEG4. (El modo de reproducción MPEG4 sólo para el modelo PV-GS200) PC PC SD SD 3 Oprima de nuevo el botón de inicio/parada de - Panasonic PV GS12 | Digital Video Camcorder - Page 98
Company ("PSC") Division of Matsushita Electric of Puerto Rico, Inc. San Gabriel Industrial Park, Ave. 65 de Infanteria, Km. 9.5, Carolina, PR 00985 Panasonic Canada Inc. 5770 Ambler Drive, Mississauga, ON, L4W 2T3 P LSQT0799 A S0204Nm0 ( 7400 A) © 2004 Matsushita Electric Industrial Co., Ltd. - Panasonic PV GS12 | Digital Video Camcorder - Page 99
Manuel d'utilisation Caméscope numérique Modèle PV-GS120 PV-GS200 Il est recommandé de lire attentivement ce manuel avant d'utiliser I'appareil. Mini Pour de I'aide, composez le 1-800-561-5505 ou visitez notre site Internet à www.panasonic.ca LSQT0799 A - Panasonic PV GS12 | Digital Video Camcorder - Page 100
Renseignements Merci d'avoir choisi Panasonic! Vous avez acheté l'un des appareils les plus perfectionnés et les plus fiables actuellement sur le marché. Utilisé selon les directives, il vous apportera ainsi - Panasonic PV GS12 | Digital Video Camcorder - Page 101
borne correspondante de la prise et pousser jusqu'au fond. Attention: Afin de prévenir tout risque d'explosion, ne remplacer le bloc-batterie qu'avec un bloc-batterie identique ou équivalent. AVIS Risque de chocs électriques Ne pas ouvrir Attention: Afin de prévenir des risques de chocs électriques - Panasonic PV GS12 | Digital Video Camcorder - Page 102
7) Ne pas bloquer les évents d'aération. Installer l'appareil selon les instructions du fabricant. 8) Ne pas installer l'appareil près d'un appareil de fabricant. 12) Ne placer l'appareil que dans une baie ou sur un support, trépied, gabarit d'installation, etc., recommandé par le fabricant ou - Panasonic PV GS12 | Digital Video Camcorder - Page 103
appareil numérique de la classe B est conforme à la norme NMB-003 du CANADA. A TTENTION: L'appareil que vous vous êtes procuré est alimenté par une batterie au lithium-ion/lithium-polymère. Pour des renseignements sur le recyclage de la - Panasonic PV GS12 | Digital Video Camcorder - Page 104
ce qui suit. Accord de licence - Utilisateur final (pour pilote USB, pilote WebCam et logiciel DV STUDIO) Il vous est concédé à vous-même (le "Titulaire sur le CD-ROM, dans les manuels d'utilisation et sur les autres supports qui lui ont été fournis (désignés collectivement par le terme "Logiciel"), - Panasonic PV GS12 | Digital Video Camcorder - Page 105
: 1) Vous êtes autorisé à utiliser le Logiciel sur un seul ordinateur en un seul endroit. 2) En tant que Titulaire de licence, vous êtes propriétaire du support physique sur lequel se trouve enregistré le Logiciel, mais le Concédant de licence en conserve le titre et la propriété quelle que soit la - Panasonic PV GS12 | Digital Video Camcorder - Page 106
Table des matières Préface Guide sommaire 10 Remarques préliminaires 12 Accessoires standard 12 Nomenclature 12 Télécommande 15 Source d'alimentation 16 Temps de recharge et autonomie d'enregistrement 17 Courroie de - Panasonic PV GS12 | Digital Video Camcorder - Page 107
périphérique USB...... 58 Utilisation comme caméra Web 60 Utilisation de DV STUDIO 3.1E- USB 67 Désinstallation du pilote ou du logiciel .......... 68 Remarques 68 Autres Indications 71 Modes initiaux 73 Signaux d'avertissement/alarme 73 Notes et précautions 74 Précautions d'emploi 82 Guide - Panasonic PV GS12 | Digital Video Camcorder - Page 108
Guide sommaire 1 Fixer la batterie à l'adaptateur secteur et la charger. ª Mise en place de la carte 1 Glisser le levier [OPEN] 1 pour ouvrir le couvercle de la fente de la carte 2. ≥Charger complètement la batterie avant de l'utiliser. ≥Débrancher le câble c.c., puisque la batterie le support de - Panasonic PV GS12 | Digital Video Camcorder - Page 109
sélection de mode sur le mode de lecture d'image fixe ou MPEG4. (Le mode de lecture MPEG4 est disponible sur le modèle PV-GS200 uniquement.) PC PC SD SD 3 Appuyer de nouveau sur la touche d'enregistrement pour interrompre momentanément l'enregistrement (pause). ª Lecture d'un enregistrement sur - Panasonic PV GS12 | Digital Video Camcorder - Page 110
attentivement les instructions. Accessoires standard Les accessoires fournis avec le caméscope figurent ci-dessous. ≥Afin de piloter le PV-GS120 avec la Fente de la carte -19(6) Levier d'ouverture du couvercle de la 2) Bloc-batterie -17- fente de la carte [OPEN] -19- 3) Télécommande et pile de - Panasonic PV GS12 | Digital Video Camcorder - Page 111
USB [ ] -58(33) Prise pour télécommande câblée avec microphone de narration [REMOTE] (PV- é d'alimenter le caméscope au moyen de la batterie au lieu de l'adaptateur secteur pour réduire la possibilit PV-GS200 seulement) -39- (25) Oeilleton (26) Interrupteur de l'écran à cristaux liquides [POWER LCD] - Panasonic PV GS12 | Digital Video Camcorder - Page 112
[PHOTO SHOT] -30-, -53- (49) (50) (51) (52) (53) (48) (54) DV S-VIDEO IN/OUT (55) (56) (48) Bouton de correction du viseur -21(49) Viseur -21-, -86- (50) Touche d'éjection de la batterie [PUSH BATT] -17- (51) Support de batterie (52) Fixation de la bandoulière -19(53) Courroie de la poign - Panasonic PV GS12 | Digital Video Camcorder - Page 113
∫ L SELECT VAR. SEARCH MENU STORE ENTER OFF/ON P.B.DIGITAL (78) (79) (80) (81) (82) (72) câblée avec microphone de narration (PV-GS200 seulement) Cette unité de commande support de la pile. 1 2 Installer la pile de type bouton en dirigeant sa face (r) vers le haut. 3 Remettre le support - Panasonic PV GS12 | Digital Video Camcorder - Page 114
recommandé par le fabricant. Se débarrasser des piles usagées selon les instructions du fabricant. Risque d'incendie, d'explosion et de brûlures. Ne pas consulter immédiatement un médecin. N'utiliser qu'une pile de rechange Panasonic (pièce numéro CR2025). L'utilisation d'une autre pile peut entra - Panasonic PV GS12 | Digital Video Camcorder - Page 115
batterie Panasonic. ≥Panasonic ne peut garantir le rendement de ce caméscope si une batterie d'une autre marque est utilisée. 1 Fixer la batterie à l'adaptateur secteur et la charger. Temps de recharge et autonomie d'enregistrement PV recommandons le bloc-batterie VSB0470 (PV-GS120 seulement), CGA- - Panasonic PV GS12 | Digital Video Camcorder - Page 116
l'écran à cristaux liquides est activé au moyen de la touche [POWER LCD] lors de l'utilisation du caméscope. ≥Lors de l'utilisation d'accessoires il est plus commode de l'utiliser ainsi avec la télécommande câblée (PV-GS200 seulement). 2 Fixer le capuchon Pour protéger la surface de l'objectif - Panasonic PV GS12 | Digital Video Camcorder - Page 117
de la même manière l'autre extrémité de la bandoulière dans l'autre support de bandoulière. Mise en place d'une cassette 1 Glisser le bouton d'éjection de carte mémoire SD ou une carte MultiMediaCard authentique fabriquée par Panasonic, compatible avec l'appareil. S'assurer de mettre le caméscope - Panasonic PV GS12 | Digital Video Camcorder - Page 118
pour l'enregistrement d'images fixes ou d'images animées sur une carte mémoire. (L'enregistrement d'images animées peut se faire uniquement sur le modèle PV-GS200.) : Mode lecture d'image fixe Utiliser ce mode pour visualiser des images fixes enregistrées sur une carte mémoire. : Mode lecture MPEG4 - Panasonic PV GS12 | Digital Video Camcorder - Page 119
(48) 1122::3300::4455PPMM OOCCTT 1155 22000044 12:30:45PM OCT 15 2004 Utilisation du viseur en même temps que l'écran à cristaux liquides Régler [LCD/EVF] >> [EVF ON/AUTO] à la position [ON]. ≥Le viseur n'est pas désactivé si l'écran à cristaux liquides est ouvert. ≥Lorsque le caméscope est mis - Panasonic PV GS12 | Digital Video Camcorder - Page 120
LCD]. Pour modifier la qualité de l'image à l'écran à cristaux liquides (PV-GS200 seulement) Régler [LCD AI] du sous-menu [LCD (-41-) n'est pas maintenu.) Cependant, si la batterie ou l'adaptateur secteur sont débranchés avant la coupure instructions décrites plus loin dans le présent manuel.) (22) - Panasonic PV GS12 | Digital Video Camcorder - Page 121
RECORDING MENU CAMERA !PROG.AE DIGITAL EIS CARD D.ZOOM RECORDING SELF TIMER DISPLAY USB FUNCTION LCD/EVF FLASH INITIAL RED EYE USB FUNCTION] Mode des fonctions USB -61[FLASH] (PV-GS200 seulement) Lampe-éclair -40[RED EYE] (PV-GS200 seulement) Réduction yeux rouges -40[FLASH LEVEL] (PV - Panasonic PV GS12 | Digital Video Camcorder - Page 122
DIGITAL AUDIO OUT CARD USB FUNCTION RECORDING DISPLAY LCD en utilisant la borne DV. ≥Lors de l' PV-GS200 seulement) Qualité d'image MPEG4 -31- 7) [LCD/EVF] (Écran/viseur) Réglage de la luminosité et de la couleur [LCD AI] (PV-GS200 seulement) Écran à cristaux liquides intelligent -22[LCD - Panasonic PV GS12 | Digital Video Camcorder - Page 123
[WIND CUT] Atténuation bruit du vent -36[H.SHOE MIC] (PV-GS200 seulement) Griffe porte-microphone ≥Cette fonction réduit le son pour PICTURE PLAYBACK MENU] Menu de lecture d'image fixe PICTURE DELETE EDITING PRINT DIGITAL DISPLAY LCD/EVF INITIAL PLAYBACK MENU !FILE BY SEL ALL FILES TITLE BY SEL - Panasonic PV GS12 | Digital Video Camcorder - Page 124
uniquement -57[DATE] Impression avec la date d'enregistrement -574) [DIGITAL] (Numérique) Sous-menu de configuration de la lecture numérique -724) [LCD/EVF] (Écran/viseur) Réglage de la luminosité et de la couleur [LCD AI] (PV-GS200 seulement) Écran à cristaux liquides intelligent -22[LCD/EVF SET] - Panasonic PV GS12 | Digital Video Camcorder - Page 125
Préface Recharge de la pile incorporée au lithium La pile incorporée au lithium assure le fonctionnement de l'horloge. Si I'indication [0] ou [--] clignote, la pile incorporée au lithium est presque épuisée. Mode enregistrement audio La qualité du son enregistré peut être sélectionnée avec [AUDIO - Panasonic PV GS12 | Digital Video Camcorder - Page 126
sur le mode d'enregistrement sur carte [ ]. (L'enregistrement d'images animées peut se faire uniquement sur le modèle PV-GS200.) Si l'enregistrement est fait avec le commutateur [AUTO/MANUAL/FOCUS] (35) réglé sur [AUTO], le caméscope ajuste automatiquement la mise au point et l'équilibre du blanc - Panasonic PV GS12 | Digital Video Camcorder - Page 127
dans le caméscope. La taille des images qui sont enregistrées avec ce caméscope est d'environ 2,3 million de pixels (PV-GS200)/1,2 million de pixels (PV-GS120). L'enregistrement d'images avec une taille plus grande qu'un million de pixels s'appelle enregistrement d'images fixes méga-pixel. À la diff - Panasonic PV GS12 | Digital Video Camcorder - Page 128
. ≥Même si la touche [PHOTO SHOT] est enfoncée à mi-course, l'indicateur de la mise au point n'apparaît pas en mode de mise au point manuelle. (PV-GS120) 1 Régler la molette de sélection de mode (39) sur le mode enregistrement sur carte. (39) SD (39) SD 2 Appuyer sur la touche [PHOTO SHOT] (47 - Panasonic PV GS12 | Digital Video Camcorder - Page 129
faible qualité [ECONOMY]: environ 11 images Avec image de 1280k960 (PV-GS120): Images de haute qualité [FINE]: environ 9 images Images de à la page -75-. Enregistrement d'images animées (MPEG4) sur carte mémoire (PV-GS200 seulement) Il est possible d'enregistrer des images animées sur une carte. Les - Panasonic PV GS12 | Digital Video Camcorder - Page 130
[ ] s'affiche. 2 Appuyer sur la touche [PHOTO SHOT] (47). liquides comme une image dans un miroir, régler [SELF REC] à partir du sous-menu PHOTO SHOT [LCD/EVF] sur [MIRROR] (mode miroir). Les (47) images sont enregistrées normalement et aucune inversion gauche ou droite ne se produit. (32) - Panasonic PV GS12 | Digital Video Camcorder - Page 131
Mode enregistrement ≥Le voyant d'enregistrement (27) et l'indication [ ] clignotent, puis l'enregistrement débute 10 secondes plus tard. ≥Pour désactiver le retardateur lorsque l'indication [ ] clignote, appuyer sur la touche [MENU]. ≥Il est également possible d'utiliser la prise de vues en rafale - Panasonic PV GS12 | Digital Video Camcorder - Page 132
Mode enregistrement 2 Pour utiliser le zoom avant et arrière, appuyer sur la touche [W/T] (46) en direction [W] ou en direction [T]. (46) VOL/JOG W T Fonctions fondu à l'entrée et fondu en sortie Fondu à l'entrée Une entrée en fondu fait apparaître peu à peu les images et les sons à partir du - Panasonic PV GS12 | Digital Video Camcorder - Page 133
brille derrière un sujet qui est filmé.) 1 Appuyer sur la touche [BACK LIGHT] (8). MAGICPIX 0LUX MAGICPIX ≥L'indication [REVERSE THE LCD MONITOR] s'affiche. 2 Tourner l'écran à cristaux liquides vers l'avant (du côté de l'objectif). BACK LIGHT (8) ≥L'indication [ª] clignote et s'affiche ensuite - Panasonic PV GS12 | Digital Video Camcorder - Page 134
optimal de l'exposition dans des situations d'enregistrement particulières. 1 Régler le commutateur de sélection de mode [AUTO/MANUAL/FOCUS] (35) sur [MANUAL]. AUTO MANUAL FOCUS (35) ≥L'indication [MNL] apparaît. 2 Régler [TAPE RECORDING MENU] ou [CARD RECORDING MENU] >> [CAMERA] >> [PROG.AE] >> un - Panasonic PV GS12 | Digital Video Camcorder - Page 135
réglage automatique de I'exposition Régler [PROG.AE] du sous-menu [CAMERA] sur [OFF]. Ou bien, régler le commutateur de sélection de mode [AUTO/MANUAL/FOCUS] sur [AUTO]. ≥Pour d'autres notes, voir à la page -77-. Enregistrement avec des couleurs naturelles (Équilibre du blanc) En fonction de la sc - Panasonic PV GS12 | Digital Video Camcorder - Page 136
rapide. 1 Régler le commutateur [AUTO/MANUAL/FOCUS] (35) sur [MANUAL]. (29) (27) AUTO MANUAL (35) FOCUS ≥Ne pas couvrir le 3 000K Mode enregistrement sur carte: 1/4-1/500 s (PV-GS200) 8) Mode enregistrement sur carte: 1/30-1/500 s (PV-GS120) 2 000K 9) La vitesse standard d'obturation est - Panasonic PV GS12 | Digital Video Camcorder - Page 137
[MNL] apparaît. 2 Régler le commutateur [AUTO/MANUAL/FOCUS] (35) sur [FOCUS]. AUTO MANUAL (35) FOCUS ≥L'indication [MF] (mode de mise au point manuelle) apparaît. (PV-GS200) ≥L'indication [1MF] (mode de mise au point manuelle) apparaît. (PV-GS120) ≥L'indication [MNL] apparaît. 2 Appuyer sur la - Panasonic PV GS12 | Digital Video Camcorder - Page 138
(PV-GS120) Appuyer sur la touche [5] (16) ou [6] (19) pour régler la mise au point. STILL s ENTER i FADE (19) (16) ≥Une pression maintenue sur la touche [5] ou [6] a pour effet d'accélérer la vitesse de réglage. Pour continuer le réglage automatique Régler le commutateur [AUTO/MANUAL/FOCUS - Panasonic PV GS12 | Digital Video Camcorder - Page 139
siré Régler [TAPE RECORDING MENU] >> [DIGITAL] >> [EFFECT1] ou [EFFECT2] >> un effet Annulation de l'effet numérique Régler [TAPE RECORDING MENU] >> [DIGITAL] >> [EFFECT1] ou [EFFECT2] >> [OFF]. ≥Les effets fixes. 1 Régler [TAPE RECORDING MENU] >> [DIGITAL] >> [EFFECT1] >> [MULTI]. STILL s - Panasonic PV GS12 | Digital Video Camcorder - Page 140
multi-images une par une (Lorsque les images étaient capturées dans [MANUAL]) Quand on appuie sur la touche [MULTI] pendant 1 seconde ou plus image fixe) à l'intérieur de l'écran. 1 Régler [TAPE RECORDING MENU] >> [DIGITAL] >> [EFFECT1] >> [P-IN-P]. ≥Une petite image fixe est affichée à l'intérieur - Panasonic PV GS12 | Digital Video Camcorder - Page 141
Mode lecture Mode lecture Lecture d'un enregistrement sur bande La scène enregistrée peut être visionnée immédiatement après l'enregistrement. 1 Régler l'interrupteur [OFF/ON] (43) sur la position [ON]. ≥Le voyant [POWER] s'allume (41). (41) POWER ª Réglage du volume du son Pour régler le volume, - Panasonic PV GS12 | Digital Video Camcorder - Page 142
Mode lecture ª Fonction de recherche à vitesse variable La vitesse de lecture ou de la recherche d'image peut varier. 1 Pendant la lecture, appuyer sur la touche [1] (17). ≥L'indication [1k!] apparaît. (17) STILL s ENTER i FADE 2 Appuyer sur la touche [sVOL/JOGr] (46) pour sélectionner la - Panasonic PV GS12 | Digital Video Camcorder - Page 143
. 1 Pendant la lecture, appuyer sur la touche [P.B. ZOOM] (81) de la télécommande. (63) INDEX STOP INDEX P.B. ZOOM K ∫ L SELECT VAR. SEARCH MENU STORE ENTER OFF/ON P B DIGITAL ≥Le centre de l'image double. (81) (63) ZOOM 2t (45) - Panasonic PV GS12 | Digital Video Camcorder - Page 144
(67) STORE ENTER ≥Pour d'autres notes, voir à la page -79-. (68) OFF/ON P.B.DIGITAL Lecture avec effets numériques Il est possible, pendant la lecture, de conférer des effets numériques est disponible sur le modèle PV-GS200 uniquement.) (39) l'indication de l'effet sélectionné clignote. (46) - Panasonic PV GS12 | Digital Video Camcorder - Page 145
;: Pause Lorsque le mode de lecture MPEG4 est sélectionné à l'étape 1 (PV-GS200 seulement) ≥Le fichier porte un numéro hexadécimal. ≥Lorsque la scè image fixe ou MPEG4. (Le mode de lecture MPEG4 est disponible sur le modèle PV-GS200 uniquement.) PC PC SD SD (39) 2 Appuyer sur la touche [MULTI] - Panasonic PV GS12 | Digital Video Camcorder - Page 146
Mode lecture Diaporama Les photos sauvegardées sur la carte mémoire peuvent être présentées en séquence à la manière d'un diaporama. 1 Régler la molette de sélection de mode (39) sur la position mode de lecture d'image fixe. 1 Mode de lecture sur bande: Chercher l'image devant être utilisée pour - Panasonic PV GS12 | Digital Video Camcorder - Page 147
Format de commande d'impression numérique. 1 Régler la molette de sélection de mode (39) sur le mode de lecture d'image fixe. PC 1 Régler [DIGITAL] >> [TITLE IN] >> [ON]. STILL s ENTER i FADE (14) MENU 2 Appuyer sur la touche [MENU] (14). ≥Le titre s'affiche. 3 Appuyer sur la touche [MULTI - Panasonic PV GS12 | Digital Video Camcorder - Page 148
moire.) 1 Régler [PICTURE/MPEG4 PLAYBACK MENU] >> [EDITING] >> [FILE LOCK] >> [YES]. (Le menu [MPEG4 PLAYBACK MENU] est disponible sur le modèle PV-GS200 uniquement.) STILL s ENTER i FADE (14) MENU STILL s ENTER i FADE (14) MENU ≥Pour effacer un titre dans [PICTURE PLAYBACK MENU], sélectionner - Panasonic PV GS12 | Digital Video Camcorder - Page 149
Régler [PICTURE/MPEG4 PLAYBACK MENU] >> [EDITING] >> [CARD FORMAT] >> [YES]. (Le menu [MPEG4 PLAYBACK MENU] est disponible sur le modèle PV-GS200 uniquement.) STILL s ENTER i FADE (14) MENU ≥Un message de confirmation s'affiche ; sélectionner [YES] pour lancer le formatage. CARD FORMAT FORMAT - Panasonic PV GS12 | Digital Video Camcorder - Page 150
[AV IN/OUT] du caméscope avec les prises d'entrée audio et vidéo du téléviseur. [S-VIDEO IN] 2 [VIDEO IN] [AUDIO IN] 1 AV IN/OUT PHONES DV S-VIDEO IN/OUT ≥Raccorder le caméscope à un téléviseur au moyen du fil AV 1. Si le téléviseur est doté d'une prise S-vidéo, brancher également le - Panasonic PV GS12 | Digital Video Camcorder - Page 151
mémoire des images animées et des images fixes déjà enregistrées sur cassette. (L'enregistrement d'images animées peut se faire uniquement sur le modèle PV-GS200.) 1 Régler la molette de sélection de mode (39) sur le mode de lecture de bande. (39) SD PC 2 Image fixe: Lancer la lecture et - Panasonic PV GS12 | Digital Video Camcorder - Page 152
é le caméscope au magnétoscope, procéder de la manière décrite ci-dessous. [S-VIDEO IN] 2 [VIDEO IN] [AUDIO IN] 1 AV IN/OUT PHONES DV S-VIDEO IN/OUT 1 Fil AV 2 Fil S-vidéo ≥S'assurer d'appuyer sur la touche [OSD] (-14-) de la télécommande avant de copier de manière à ce qu - Panasonic PV GS12 | Digital Video Camcorder - Page 153
avec un autre appareil vidéo numérique (tel qu'un autre caméscope du même format/modèle) qui a une prise d'entrée/sortie DV et qui utilise un câble d'interface DV 4 broches à 4 broches PV-DDC9-K (en option) 1, des images et des sons de haute qualité peuvent être doublés en mode numérique. STILL - Panasonic PV GS12 | Digital Video Camcorder - Page 154
molette de sélection de mode (39) sur le mode lecture d'image. D (39) 2 Raccorder l'imprimante à l'aide du câble USB fourni. REMOTE/MIC (PLUG IN POWER) AV IN/OUT PHONES 1 DV ≥L'ordinateur doit être muni d'une prise DV. ≥Pendant la lecture sur le caméscope, ne pas déconnecter le câble d'interface - Panasonic PV GS12 | Digital Video Camcorder - Page 155
ne pourront pas être correctement imprimées. ≥Débranchement du câble USB ≥Retrait de la carte ≥Changement du mode de fonctionnement ≥Il n'est pas possible de régler l'impression de la date si l'imprimante ne supporte pas cette fonction. ≥Procéder à l'opération suivante si l'impression de - Panasonic PV GS12 | Digital Video Camcorder - Page 156
USB permet de transférer directement des images de la carte mémoire à un ordinateur. ≥Pilote WebCam -60-: Si le caméscope est connecté à un ordinateur, il est possible d'envoyer les enregistrements vidéo effectués sur le caméscope à d'autres personnes via le réseau ou Internet. ≥DV PV instructions - Panasonic PV GS12 | Digital Video Camcorder - Page 157
[InstallShield] s'affiche. ≥Ne pas retirer le CD-ROM. 5 Suivre les instructions qui s'affichent à l'écran pour procéder à l'installation. ≥Cliquer sur en mode PC. 3 Connecter le caméscope au PC à l'aide du câble USB. ≥L'appareil passe dans le mode de connexion PC. 4 Ouvrir [Poste de travail] et - Panasonic PV GS12 | Digital Video Camcorder - Page 158
sur le disque dur. Carte vidéo supportant couleurs 16 bits ou plus ≥Ne pas pas connecter le câble USB avant que le pilote USB ou WebCam n'ait été installé. Cette version antérieure à la version 5.0, télécharger la plus récente version (5.0 ou ulté (Consulter les instructions de téléchargement - Panasonic PV GS12 | Digital Video Camcorder - Page 159
Installation) s'affiche. 2 Cliquer sur [WebCam Driver] (Pilote WebCam). ≥Le programme d'installation démarre. un certain temps. 4 Suivre les instructions qui s'affichent jusqu'à la fin mode d'enregistrement sur bande. 3 Régler [CAMERA] >> [USB FUNCTION] >> [WEB CAMERA]. ≥Entrer "C:\Windows\system" - Panasonic PV GS12 | Digital Video Camcorder - Page 160
Internet. ≥Si le câble de connexion USB est débranché de l'ordinateur personnel, ée vidéo de la prise DV vers l'écran de l'ordinateur. Sélectionner [.NET Messaging Service] et cliquer sur [OK Panasonic DVC Web Camera] (Caméra Web DVC Panasonic contenu et suivre les instructions. 4 L'installation termin - Panasonic PV GS12 | Digital Video Camcorder - Page 161
branché à la prise USB sur le clavier, le fonctionnement normal peut ne pas être possible. ≥Le présent manuel ne décrit que les marches à suivre d'installation, de raccordement et de démarrage. Lire attentivement les instructions en format PDF sur l'utilisation du logiciel DV STUDIO 3.1E-SE. ≥Pour - Panasonic PV GS12 | Digital Video Camcorder - Page 162
4 Sélectionner [Démarrer] >> [Tous les programmes (Programmes)] >> [Panasonic] >> [DV Studio3] >> [DV Studio3]. ≥Si une icône de raccourci a été créée sur en suivant les instructions qui s'affichent. ≥Lire attentivement le contrat de licence dans la fenêtre [Software License Agreement] ( - Panasonic PV GS12 | Digital Video Camcorder - Page 163
Macintosh SE: Mac OS 9 à X UCT: PowerPC Écran graphique: Carte vidéo supportant couleurs 16 bits ou plus Résolution de 800k600 points ou plus *QuickTime et(ou d'aide concernant l'utilisation des logiciels de la suite ArcSoft Software. ≥Programme permettant de monter des images de tailles diverses - Panasonic PV GS12 | Digital Video Camcorder - Page 164
) ou [PhotoPrinter Installer] (Installateur PhotoPrinter)). 8 Suivre les instructions sur l'écran de l'ordinateur jusqu'à ce que l'installation soit terminée. ª Lancement d'un logiciel de la suite ArcSoft Software 1 Sélectionner [Démarrer] >> [Tous les programmes (Programmes)] >> [ArcSoft - Panasonic PV GS12 | Digital Video Camcorder - Page 165
.) (Avec le caméscope en mode accès au PC) [USB Mass Storage Device] (Périphérique USB de stockage de masse portable) ou [Panasonic DV DISK Port Driver] Avec Windows Me: (Avec le caméscope en mode accès au PC) [USB Disk] (Disque USB) ≥Certains systèmes d'exploitation, tel Windows 98 Deuxième - Panasonic PV GS12 | Digital Video Camcorder - Page 166
) présentes instructions ne sont pas suivies, le lorsqu'un ensemble de raccordement USB est caméscope ne sera pas reconnu correctement. connecté. En effet, des données pourraient être Le cas échéant, supprimer le pilote USB sous perdues dans le cas où la batterie deviendrait [Gestionnaire - Panasonic PV GS12 | Digital Video Camcorder - Page 167
le caméscope en mode enregistrement ou lecture sur bande, le raccorder à l'ordinateur personnel et supprimer [Panasonic DVC USB-SERIAL Driver for Win XX (COM X)] (ou [Panasonic Serial USB Driver]) sous [Gestionnaire de périphériques]. Le chiffre après "Win XX" peut différer selon l'environnement de - Panasonic PV GS12 | Digital Video Camcorder - Page 168
sans fonction MPEG4, il n'est pas possible de créer les dossiers suivants. Capacité mémoire disponible: Carte 8 Mo: environ 6 800 000 octets (Panasonic carte mémoire SD) [100CDPFP]: Les images de ce dossier (IMGA0001.JPG, etc.) sont enregistrées au format JPEG. [MISC]: Ce dossier contient des - Panasonic PV GS12 | Digital Video Camcorder - Page 169
. r: Autonomie de la batterie ≥Lorsque la batterie est faible, l'indication change. Lorsque la batterie est complètement décharg sur carte -30- : Mode lecture d'image fixe -46- : Mode lecture MPEG4 (PV-GS200 seulement) -46- PC : CINEMA: Mode PC -59Fonction cinéma -36- D.ZOOM - Panasonic PV GS12 | Digital Video Camcorder - Page 170
-31- : Verrouillage -50- ¥ (Blanc): Paramétrage DPOF terminé (1 image ou plus) -49- 1760 : [1760k1320] format image (PV-GS200 seulement) 1280 : [1280k960] format image (PV-GS120 seulement) 640 : [640k480] format image ≥Pour ce qui est des images enregistrées sur un appareil autre que - Panasonic PV GS12 | Digital Video Camcorder - Page 171
disponible sur le modèle PV-GS200 seulement.) Signaux d'avertissement NOT INSERTED) Du fait que le support est protégé contre le piratage, batterie est faible. La recharger. -160: La pile au lithium est faible. -27: (NEED HEAD CLEANING) La touche d'enregistrement a été pressée sans que le câble USB - Panasonic PV GS12 | Digital Video Camcorder - Page 172
est disponible sur le modèle PV-GS200 seulement.) UNABLE TO WRITE é sur [LOCK]. DISCONNECT USB CABLE (Débrancher le câble USB): La molette de sélection ne s'allume pas bien que la batterie soit fixée à l'adaptateur secteur, la butée. ≥Pendant le déplacement du support de la cassette, ne rien toucher - Panasonic PV GS12 | Digital Video Camcorder - Page 173
] (PV-GS120), la de prises de vues en rafale RapidFire ne peut pas être utilisée. ≥Les intervalles des images enregistrées peuvent devenir plus longs en fonction de la carte utilisée. Il est recommandé d'utiliser la carte mémoire SD Panasonic. ª Enregistrement d'images animées (MPEG4) (PV-GS200 - Panasonic PV GS12 | Digital Video Camcorder - Page 174
. (Avec le modèle PV-GS120, le mode d'attente ≥Si des images plein écran telles que des n'est pas annulé même sur pression de la images animées MPEG4 sont enregistrées via touche d'enregistrement en mode l'entrée ligne ou DV retrait de la batterie, le voyant d' - Panasonic PV GS12 | Digital Video Camcorder - Page 175
pas être modifiées. ª Fonction atténuation bruit du vent ≥Cette fonction ne peut être utilisée avec un micro externe ni le microphone de narration (PV-GS200 seulement). ≥Lorsque cette fonction est activée [ON], la directivité du microphone est ajustée en fonction de la force du vent en vue d'en att - Panasonic PV GS12 | Digital Video Camcorder - Page 176
détermine automatiquement si elle Mode d'obturation lente en mode enregistrement sur carte (PV-GS200 seulement) ≥Le sujet peut ne pas être mis au point dans [OFF/ON], la molette de sélection de mode et le commutateur [AUTO/MANUAL/FOCUS] lorsque le caméscope fait la mise au point sur le sujet. - Panasonic PV GS12 | Digital Video Camcorder - Page 177
Fonction réduction yeux rouges Mode volet et mode mixage (PV-GS200 seulement) Si l'une des opérations suivantes est les effets numériques [EFFECT1] du [12bit] avec sélection de réglage sur sous-menu [DIGITAL]. ≥Lorsque le mode MagicPix est activé. (-35-) [AUDIO REC] du sous-menu [RECORDING], - Panasonic PV GS12 | Digital Video Camcorder - Page 178
images qui sortent de la prise DV (-14-) ne recul), lecture tentée sur un autre caméscope Panasonic, l'image ne sera pas affich (PV-GS200 seulement) ≥Lorsque la rubrique [SCREEN] dans le sous-menu [DIGITAL] est réglé sur [1760k1320] (PV-GS200)/[1280k960] (PV-GS120) et que la molette de sélection - Panasonic PV GS12 | Digital Video Camcorder - Page 179
mode de lecture MPEG4, il n'est pas possible d'insérer des titres. (PV-GS200 seulement) ≥Les fonctions d'insertion de titre et d'effets numériques ne peuvent affiché en mode lecture sur bande, le titre n'est pas sorti de la prise DV. ≥Il n'est pas possible, à la suite de l'insertion d'un titre, d' - Panasonic PV GS12 | Digital Video Camcorder - Page 180
été utilisées, ces effets ne sortent pas de la prise DV. ≥Même si un appareil avec prises DV est utilisé, dans certains cas, il ne sera pas possible d' l'enregistrement d'images au format MPEG4 provenant d'une source externe. (PV-GS200 seulement) ≥Il n'est pas possible d'enregistrer sur une carte - Panasonic PV GS12 | Digital Video Camcorder - Page 181
déformer et la finition pourrait s'écailler. ≥Avant de nettoyer le caméscope, retirer la batterie ou débrancher le câble c.a. de la prise secteur. ≥Nettoyer le caméscope avec il y a lieu. ≥L'ouverture du support de la cassette prend environ 20 secondes. Cela n'est le signe (83) d'aucune anomalie. - Panasonic PV GS12 | Digital Video Camcorder - Page 182
de la Utilisation d'une cassette Mini-DV cassette et laisser le caméscope mode de lecture MPEG4 est disponible sur le modèle PV-GS200 uniquement.) Clignotement en rouge de [3 DEW] ≥Le la poussière, etc.) Contacter un centre de service agréé Panasonic. têtes sont extrêmement sales, les performances - Panasonic PV GS12 | Digital Video Camcorder - Page 183
était manipulée à ce moment-là, elle provoquerait des brûlures sérieuses. ≥Ranger la batterie lorsqu'elle est complètement déchargée. Pour conserver une batterie pendant longtemps, nous recommandons de la charger au moins une fois par an et de la ranger seulement après l'avoir à nouveau décharg - Panasonic PV GS12 | Digital Video Camcorder - Page 184
ª Écran à cristaux liquides/viseur/ parasoleil Écran à cristaux liquides (LCD) ≥Dans un endroit où la température change brusquement, de la condensation la partie 1 dans la rainure 2 et tourner dans le sens horaire. (PV-GS120) Une technologie de très haute précision est utilisée pour la fabrication - Panasonic PV GS12 | Digital Video Camcorder - Page 185
Autres Guide de dépannage Alimentation 1: Le caméscope ne peut être mis en marche. • La indication de présence de condensation s'éteigne. (-83-) Batterie 1: La batterie se décharge rapidement. • La batterie est-elle pleinement chargée? La charger avec l'adaptateur secteur. (-16-) • La température - Panasonic PV GS12 | Digital Video Camcorder - Page 186
disque Ensuite, retirer la batterie ou débrancher dur d'un [PLAYBACK] du menu adéquatement. (PV-GS200 seulement) [TAPE PLAYBACK MENU] a la • Pour débrancher un câble USB en toute piste d'origine est effac barre de tâches et suivre les instructions qui moment de l'enregistrement. s'affichent - Panasonic PV GS12 | Digital Video Camcorder - Page 187
Autres Explication des termes ª Système vidéo numérique Dans un système vidéo numérique, les images et les sons sont transformés en signaux numériques et enregistrés sur une bande. Cet enregistrement numérique complet est en mesure d'enregistrer et lire les images et les sons avec une distorsion - Panasonic PV GS12 | Digital Video Camcorder - Page 188
Autres ª Fonction arrêt mémoire La fonction arrêt mémoire est utile pour les opérations suivantes. Rebobiner ou avancer une bande à la position désirée 1 Régler [DISPLAY] >> [C.DISPLAY] >> [MEMORY]. 2 Remettre le compteur de la cassette à zéro à la position où le point de départ de la lecture est - Panasonic PV GS12 | Digital Video Camcorder - Page 189
) Niveau de sortie vidéo: 1,0 V c.-à-c., 75 ohms Nombre guide 5,5 Dimensions: Environ 70 (L)k75 (H)k126 (P) mm Environ 2,76 (L)k2,95 (H)k4,96 (P) po Poids: (PV-GS200) Environ 470 g (1,04 Ib) (PV-GS120) Environ 450 g (0,99 Ib) (sans batterie ni cassette DV et Capuchon de l'objectif) Température de - Panasonic PV GS12 | Digital Video Camcorder - Page 190
pour votre sécurité Source d'alimentation: 110-240 V c.a., 50/60 Hz Consommation d'énergie: 19 W Sortie c.c.: 7,9 V c.c., 1,4 A (Caméscope) 8,4 V c.c., 0,65 A (Chargement de la batterie) Dimensions: 61 (L)k32 (H)k91 (P) mm 2,40 (L)k1,26 (H)k3,58 (P) po Poids: Environ 110 g (0,24 Ib) Les poids et les - Panasonic PV GS12 | Digital Video Camcorder - Page 191
32 Mo 64 Mo 128 Mo 256 Mo 512 Mo 640k480 1760k1320 (PV-GS200) 1280k960 (PV-GS120) FINE NORMAL ECONOMY FINE NORMAL ECONOMY FINE NORMAL ECONOMY 45 95 enregistrement au format MPEG4 sur une carte mémoire SD (vendue séparément) (PV-GS200 seulement) FORMAT DE L'IMAGE MODE MPEG4 8 Mo 16 Mo 32 Mo - Panasonic PV GS12 | Digital Video Camcorder - Page 192
Bloc-batterie rechargeable au lithium-ion 2040 mAh PV-DDC9-K RP-SD064BPPA RP-SD032BPPA RP-SD016BPPA BN-SDCAPU/1B BN-SDABPU/1B N2QCBD000030 Câble d'interface DV (i.LINK) (4 broches à 4 broches) Carte mémoire SD de 64 Mo Carte mémoire SD de 32 Mo Carte mémoire SD de 16 Mo Lecteur/Enregistreur USB SD - Panasonic PV GS12 | Digital Video Camcorder - Page 193
pourra vous renseigner sur le centre de service agréé le plus près de votre domicile; ≥notre service à la clientèle au (905) 624-5505 ou www.panasonic.ca; ≥un de nos centres de service de la liste ci-dessous: Richmond, Colombie-Britannique Panasonic Canada Inc. 12111 Riverside Way Richmond, BC - Panasonic PV GS12 | Digital Video Camcorder - Page 194
G.726 64 Diaphragme 39 Diaporama 48 Doublage 54, 55 Doublage audio 53 DV STUDIO 3.1E-SE 63 ªE Écran à cristaux liquides 21, 86 Enregistrement automatique 32 Enregistrement d'images animées (MPEG4 31 Ensemble de connexion USB 58 Équilibre du blanc 37 ªF Fonction cinéma 36 Fonction de - Panasonic PV GS12 | Digital Video Camcorder - Page 195
Autres ªR Recharge de la batterie 17 Recherche à vitesse variable 44 Recherche de l'index 45 Réglage automatique de I'exposition 36 Réglage de la date et de l'heure 26 Retardateur 32 ªS Stabilisation - Panasonic PV GS12 | Digital Video Camcorder - Page 196
R Montréal: 3075 Louis A. Amos, Lachine, Québec H8T 1C4 (514) 633-8684 Panasonic Canada Inc. 5770 Ambler Drive, Toronto: 5770 Ambler Drive, Mississauga, Ontario L4W 2T3 (905) 238-2181 Calgary: 6835 8th Street N.E., Calgary, Alberta T2E 7H7 (403)
-
 1
1 -
 2
2 -
 3
3 -
 4
4 -
 5
5 -
 6
6 -
 7
7 -
8
-
9
-
10
-
11
-
12
-
13
-
14
-
15
-
16
-
17
-
18
-
19
-
20
-
21
-
22
-
23
-
24
-
25
-
26
-
27
-
28
-
29
-
30
-
31
-
32
-
33
-
34
-
35
-
36
-
37
-
38
-
39
-
40
-
41
-
42
-
43
-
44
-
45
-
46
-
47
-
48
-
49
-
50
-
51
-
52
-
53
-
54
-
55
-
56
-
57
-
58
-
59
-
60
-
61
-
62
-
63
-
64
-
65
-
66
-
67
-
68
-
69
-
70
-
71
-
72
-
73
-
74
-
75
-
76
-
77
-
78
-
79
-
80
-
81
-
82
-
83
-
84
-
85
-
86
-
87
-
88
-
89
-
90
-
91
-
92
-
93
-
94
-
95
-
96
-
97
-
98
-
99
-
100
-
101
-
102
-
103
-
104
-
105
-
106
-
107
-
108
-
109
-
110
-
111
-
112
-
113
-
114
-
115
-
116
-
117
-
118
-
119
-
120
-
121
-
122
-
123
-
124
-
125
-
126
-
127
-
128
-
129
-
130
-
131
-
132
-
133
-
134
-
135
-
136
-
137
-
138
-
139
-
140
-
141
-
142
-
143
-
144
-
145
-
146
-
147
-
148
-
149
-
150
-
151
-
152
-
153
-
154
-
155
-
156
-
157
-
158
-
159
-
160
-
161
-
162
-
163
-
164
-
165
-
166
-
167
-
168
-
169
-
170
-
171
-
172
-
173
-
174
-
175
-
176
-
177
-
178
-
179
-
180
-
181
-
182
-
183
-
184
-
185
-
186
-
187
-
188
-
189
-
190
-
191
-
192
-
193
-
194
-
195
-
196
 |
 |

Spanish Quick Use Guide is included.
Guía para rápida consulta en español está incluida.
LSQT0799 A
For USA assistance, please call: 1-800-211-PANA(7262) or, contact us via the web at: http://www.panasonic.com/contactinfo
For Canadian assistance, please call: 1-800-561-5505 or visit us at www.panasonic.ca
Digital Video Camcorder
Operating Instructions
Model No.
PV-GS120
PV-GS200
Mini
Before attempting to connect, operate or adjust this product,
please read these instructions thoroughly.