Panasonic PVDV203 PVDV203 User Guide
Panasonic PVDV203 - DIGITAL VIDEO CAMERA Manual
 |
View all Panasonic PVDV203 manuals
Add to My Manuals
Save this manual to your list of manuals |
Panasonic PVDV203 manual content summary:
- Panasonic PVDV203 | PVDV203 User Guide - Page 1
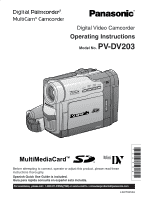
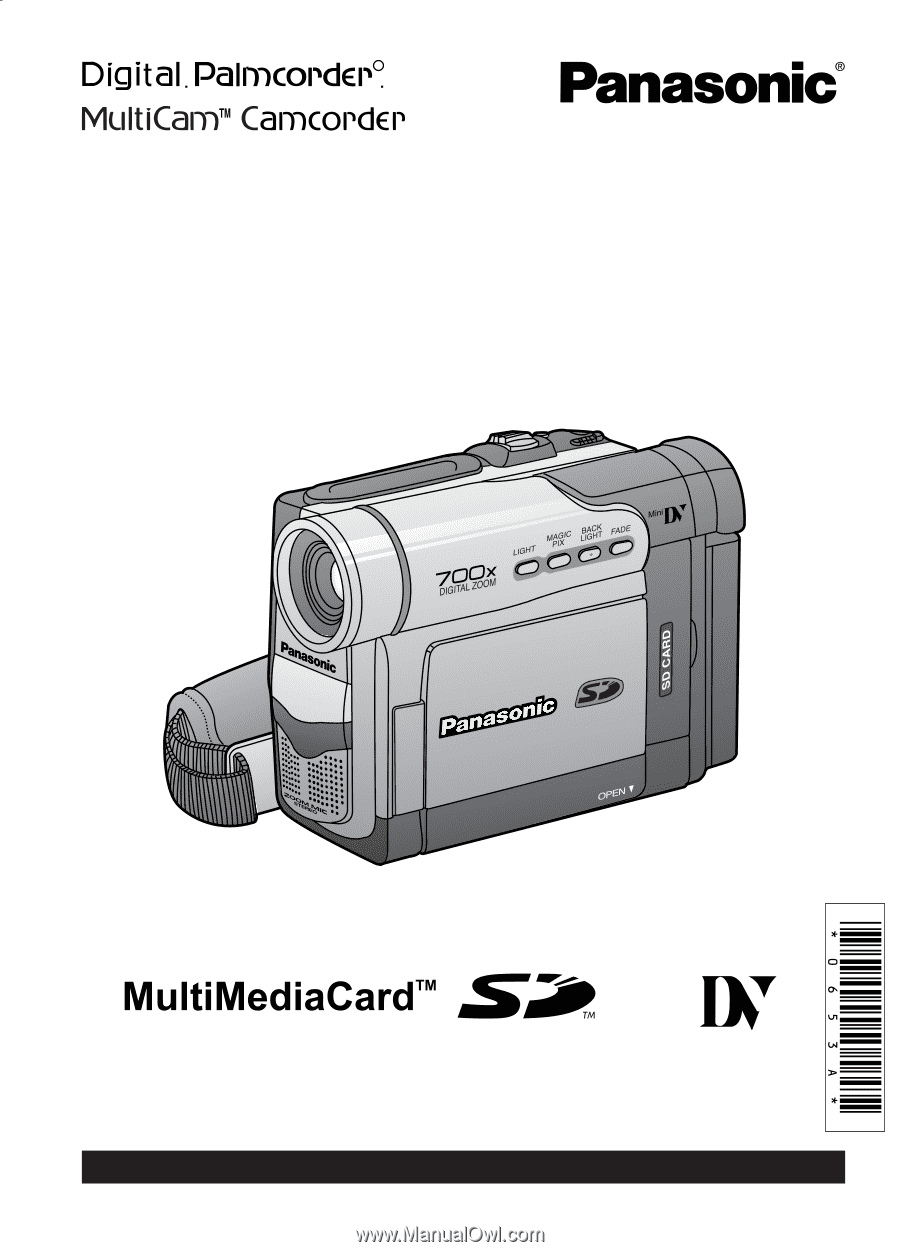
R Digital Video Camcorder Operating Instructions Model No. PV-DV203 Mini Before attempting to connect, operate or adjust this product, please read these instructions thoroughly. Spanish Quick Use Guide is included. Guía para rápida consulta en español está incluida. For assistance, please call : 1- - Panasonic PVDV203 | PVDV203 User Guide - Page 2
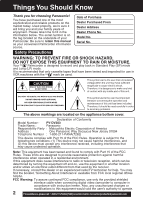
problems. The above markings are located on the appliance bottom cover. Declaration of Conformity Model Number : PV-DV203 Trade Name : Panasonic shielded interface cable when connecting digital video camcorder to computer in accordance with instruction herein. Also, any unauthorized changes or - Panasonic PVDV203 | PVDV203 User Guide - Page 3
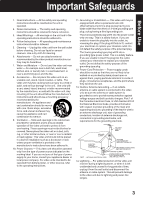
manufacturer's instructions and should use a mounting accessory recommended by from battery power, or other sources, refer to the operating instructions. grounding of the mast and supporting structure, grounding of the SECTION 810-21) GROUND CLAMPS POWER SERVICE GROUNDING ELECTRODE SYSTEM (NEC ART - Panasonic PVDV203 | PVDV203 User Guide - Page 4
following the operating instructions. Adjust only those controls that are covered by the operating instructions, as an serviceable parts inside. Unplug your Palmcorder from the power supply before cleaning. • DO NOT AIM YOUR PALMCORDER AT THE SUN OR OTHER BRIGHT OBJECTS • DO NOT LEAVE THE PALMCORDER - Panasonic PVDV203 | PVDV203 User Guide - Page 5
73 • Palmcorder USB Device Driver/SD Drive 75 • Palmcorder File Converter 78 • Web Camera (For Windows XP users/For Windows 98SE, Me, 2000 users 80 • Warning Indications 89 PC Connection • Transferring Your Images (Macintosh 90 Palmcorder Accessory System 92 Palmcorder Accessory Order Form - Panasonic PVDV203 | PVDV203 User Guide - Page 6
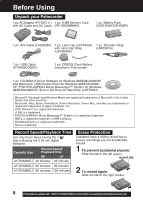
Using Unpack your Palmcorder 1 pc. AC Adaptor (PV-DAC11) 1 pc. 8 MB Memory Card with AC Cable and DC Cable (RP-SD008BMK0) 1 pc. Battery Pack (CGR- Battery (installed in Palmcorder) 1 pc. CD-ROM of Driver Software for Windows 98SE/Me/2000/XP and Macintosh; USB Device Driver for Windows panasonic.com - Panasonic PVDV203 | PVDV203 User Guide - Page 7
insert or eject. Loosen Hand Strap if necessary. Before you begin • Connect the Palmcorder to a power source. (pp. 15, 16) 1 Slide TAPE EJECT to open the Cassette Compartment Cover. 2 Insert a cassette record tab up, window side facing out. 3 Press PUSH CLOSE to close the Cassette Compartment Cover - Panasonic PVDV203 | PVDV203 User Guide - Page 8
set. 1 LED Light ON GAIN UP ON Press LIGHT Before you begin • Connect the Palmcorder to a power source. (pp. 15, 16) • Set POWER to CAMERA or M- turns OFF. • Pressing LIGHT again returns to 1 . Note • Using Light reduces battery time. • Set LIGHT to OFF when not in use. • Do not look panasonic.com - Panasonic PVDV203 | PVDV203 User Guide - Page 9
IR Remote Control toward the front of the Palmcorder and press the desired buttons (Remote Sensor is Battery Tray out with your fingernail. 2 Insert the battery into the Battery Tray with the + mark facing down. Do not reverse the polarity. 3 Insert the Battery Tray. Replace battery with Panasonic - Panasonic PVDV203 | PVDV203 User Guide - Page 10
.) • After replacing the Remote Control Battery, the remote will default to VCR 1. • When the Palmcorder and remote are not set to the same mode (VCR1 or VCR2), "CHECK REMOTE MODE (REMOTE)" will appear. 10 Forassistance,pleasecall:1-800-211-PANA(7262)orsende-mailto:[email protected] - Panasonic PVDV203 | PVDV203 User Guide - Page 11
its function. To turn it off, follow steps 1~4 below. [ EVF or LCD Monitor ] 3, 4 JOG KEY 2MENU 1POWER Before Using Before you begin • Connect the Palmcorder to a power source. (pp. 15, 16) 1 Set POWER to CAMERA. 2 Press MENU to display the CAMERA FUNCTIONS menu screen. 3 Rotate JOG KEY to select - Panasonic PVDV203 | PVDV203 User Guide - Page 12
Quick Guide Insert the Battery Pack Before you begin • Charge the Battery. (p. 15) 2 1 1 Insert the Battery Pack and slide it up until it locks with a click. Insert Cassette These Palmcorders are equipped with the Easy Cassette Eject System so it is easy to insert or remove tapes, even when the - Panasonic PVDV203 | PVDV203 User Guide - Page 13
Viewfinder automatically turns OFF. 1 Set POWER to CAMERA. Quick Guide 2 Adjust the Vision Adjustment Control to your eyesight. Viewfinder 180 open, the Viewfinder automatically turns OFF. 180° 90° Before you begin • Charge the Battery. (p. 15) 1 Set POWER to VCR. 2 Use OPEN tab on underside of - Panasonic PVDV203 | PVDV203 User Guide - Page 14
Guide Insert Memory Card* Before you begin • Charge the Battery. (p. 15) *Memory Card: MultiMediaCard or SD Memory Card (p. 94) • Be sure to insert the Memory Card before using Card PhotoShot. (p. 49) Below is a list of memory cards which can be used in this Palmcorder @panasonic.com - Panasonic PVDV203 | PVDV203 User Guide - Page 15
1 Connect and plug in the Power Cord as shown. • POWER Lamp will light. • Remove the DC Cable, if attached, from the adaptor. 2 Attach the Battery as shown to charge. CHARGE Lamp Note • CHARGE Lamp lights up. It goes out when charging is complete (approx. 1 hour). Expect approx. 1 hour 50 minutes - Panasonic PVDV203 | PVDV203 User Guide - Page 16
Battery. • Use the Battery with specified models only. • If the Battery is used in extremely high temperatures, a safety device will automatically prevent operation. To ensure longer battery life: • While not in use, remove Battery from the Palmcorder )orsende-mailto:[email protected] - Panasonic PVDV203 | PVDV203 User Guide - Page 17
2089. 2, 3, 4 JOG KEY 1MENU Setting the Clock Before you begin • Connect the Palmcorder to a power source. (pp. 15, 16) • Set POWER to CAMERA or VCR. to an item and correct. • If "CLOCK BATTERY" indication appears, please refer to "Replacing Clock Battery" on page 95. When CLOCK SET setting is - Panasonic PVDV203 | PVDV203 User Guide - Page 18
the Menu screen cannot be displayed. • During playback, the Menu screen can be displayed. Before you begin • Connect the Palmcorder to a power source. (pp. 15, 16) • Set POWER to CAMERA or VCR. 2, A, B, C JOG Forassistance,pleasecall:1-800-211-PANA(7262)orsende-mailto:[email protected] - Panasonic PVDV203 | PVDV203 User Guide - Page 19
Try to avoid this whenever possible. 4REC/PAUSE WARNING: • Do not leave the Palmcorder with the EVF aimed directly at the sun as this may cause damage to the internal parts of the EVF. • Do not lift, or carry, the Palmcorder by the EVF or the LCD Monitor. • Do not pull hard on the EVF - Panasonic PVDV203 | PVDV203 User Guide - Page 20
the LCD/ EVF BRIGHTNESS or COLOR" below. 3 Start recording. Note • Using the LCD monitor will reduce battery operating time. • Close the LCD monitor completely when not in use. To adjust the LCD/EVF BRIGHTNESS or ,pleasecall:1-800-211-PANA(7262)orsende-mailto:[email protected] - Panasonic PVDV203 | PVDV203 User Guide - Page 21
Camera Recording Digital PhotoShot™ Mode Use this feature to record a seven second (approx.) still image on the tape from the current camera picture. Audio is also recorded for on-the-spot narration. Or, you can add narration later with the Audio Dubbing feature to make an interesting slide show, - Panasonic PVDV203 | PVDV203 User Guide - Page 22
• The Zoom Microphone Function may not work effectively if the surrounding noise is too loud. 22 Forassistance,pleasecall:1-800-211-PANA(7262)orsende-mailto:[email protected] - Panasonic PVDV203 | PVDV203 User Guide - Page 23
1RECORDING CHECK 1 Press RECORDING CHECK briefly in the REC/PAUSE mode. The [CHK] indication appears. After checking, the Palmcorder returns to the REC/PAUSE mode. • For Recording Check, the Palmcorder must be in the same mode (SP or LP) as was used for recording, otherwise the playback picture is - Panasonic PVDV203 | PVDV203 User Guide - Page 24
appear in the EVF or LCD monitor when OFF is selected in the DISPLAY menu. 24 Forassistance,pleasecall:1-800-211-PANA(7262)orsende-mailto:[email protected] - Panasonic PVDV203 | PVDV203 User Guide - Page 25
a variety of scene situations. 4, 5 JOG KEY 3MENU 1POWER 2AUTO/ MANUAL (No display) SPORTS PORTRAIT LOW-LIGHT SPOT-LIGHT SURF&SNOW Note SPORTS mode flicker if this mode is used indoors. 1 Set POWER to CAMERA. 2 Press AUTO/MANUAL so that the "MNL" indication appears in the EVF or 3 the LCD monitor. - Panasonic PVDV203 | PVDV203 User Guide - Page 26
, hold down FADE until the picture fades out. B Press REC/PAUSE to pause the recording. 26 Forassistance,pleasecall:1-800-211-PANA(7262)orsende-mailto:[email protected] - Panasonic PVDV203 | PVDV203 User Guide - Page 27
current scene in a wiping motion. MIX : The photo title is replaced with the current scene in a gradual mixing effect. Before you begin • Connect the Palmcorder to a power source. (pp. 15, 16) • Set POWER to OFF before inserting a recorded Memory Card. (pp. 49, 50) 1 Set POWER to CAMERA. 2 Press - Panasonic PVDV203 | PVDV203 User Guide - Page 28
manual adjustment. 3, 4, A, B JOG KEY 1POWER 1 Set POWER to CAMERA. 2 Press AUTO/MANUAL MANUAL to cancel the setting. * For manual White Balance adjustment: A. Rotate JOG KEY to select " " . 2AUTO/MANUAL Palmcorder is turned on, the previous manual not be attainable manually in poor lighting - Panasonic PVDV203 | PVDV203 User Guide - Page 29
the EVF or the LCD monitor. 3 Press FOCUS so that the "MF" (Manual Focus) indication appears in the EVF or the LCD monitor. • a scene with fast motions, like a golf swing. Re-focusing may be required • when your Palmcorder is aimed at a new scene. 4 Press and hold POWER ZOOM, "T" side (Telephoto - Panasonic PVDV203 | PVDV203 User Guide - Page 30
speed motion (e.g. tennis stroke) with improved STILL or SLOW MOTION playback when watching the tape on this Palmcorder. Manual Selection 3, 4 JOG KEY 1POWER 1 Set POWER to CAMERA. 2 Press AUTO/MANUAL so that the "MNL" indication appears in the EVF or the LCD monitor. 3 Press JOG KEY repeatedly - Panasonic PVDV203 | PVDV203 User Guide - Page 31
Adjusting the Iris Manually Normally, the Palmcorder adjusts the exposure automatically. However, when the background is extremely bright, or when the subject is backlit, you can compensate by adjusting the iris manually. 3, 4 JOG KEY 1POWER 1 Set POWER to CAMERA. 2 Press AUTO/MANUAL so that the - Panasonic PVDV203 | PVDV203 User Guide - Page 32
to play back your recording. Before you begin • Connect the Palmcorder to a power source. (pp. 15, 16) • Insert Using the LCD monitor reduces battery operating time. • You can place the Palmcorder on a table, etc. for swing it up against the Palmcorder body as shown. Connecting Earphone - Panasonic PVDV203 | PVDV203 User Guide - Page 33
will go into Repeat Playback mode when the tape reaches its end. • The letter "R " will appear in the EVF and LCD monitor. 2 Turn the Palmcorder OFF to exit the Repeat Playback mode. Adjusting the Volume 1, 2 VOLUME EVF/LCD 1 Slide VOLUME to adjust the volume of the built-in speaker in - Panasonic PVDV203 | PVDV203 User Guide - Page 34
(PLAY) or (PAUSE) to release. Note • To protect the tape and video heads, your Palmcorder's operating modes will revert as follows: STILL STOP (after 3 minutes.) Fast Forward/Rewind Check Monitor 34 Forassistance,pleasecall:1-800-211-PANA(7262)orsende-mailto:[email protected] - Panasonic PVDV203 | PVDV203 User Guide - Page 35
Slow: Press SLOW/F.ADV during play. 2 Press PLAY to release. (During reverse slow motion playback, time code indication may not change regularly.) Note • Palmcorder will automatically STOP when in slow motion for more than 10 minutes. • During slow motion playback, picture may move up and down. This - Panasonic PVDV203 | PVDV203 User Guide - Page 36
slow mode. • During frame by frame advance, a few frames may move automatically, and the picture may become bluish for an instant. When using Palmcorder 1JOG KEY 1 During Still mode, rotate JOG KEY to advance or reverse the picture one frame at a time. 36 Forassistance,pleasecall:1-800-211-PANA - Panasonic PVDV203 | PVDV203 User Guide - Page 37
few seconds of each. To cancel this function, press PLAY or STOP. Note • Search will not work if there is a succession of PhotoShots. A Place the Palmcorder in the VCR STOP mode. B Press INDEX SEARCH fast forward or rewind for the number of recordings (indexes) forward or back you want to view - Panasonic PVDV203 | PVDV203 User Guide - Page 38
playback will stop. EVF/LCD • Press (PLAY) to start playback. Press (STOP) to stop playback. 38 Forassistance,pleasecall:1-800-211-PANA(7262)orsende-mailto:[email protected] - Panasonic PVDV203 | PVDV203 User Guide - Page 39
TV ON and set it to LINE INPUT or S-VIDEO. Check your TV operating instructions for further information. A/V Cable (Supplied) Audio In Video In 3 Start playback or begin a recording. To Audio In • Make sure the Palmcorder and TV are turned off while connecting. To Video In • Please connect the - Panasonic PVDV203 | PVDV203 User Guide - Page 40
zooming function will resume. • Focus distance becomes 1.2 m (4 feet) if the lens is in full telephoto. 40 Forassistance,pleasecall:1-800-211-PANA(7262)orsende-mailto:[email protected] - Panasonic PVDV203 | PVDV203 User Guide - Page 41
Digital Zoom (Continued) 3, 4 JOG KEY 2MENU 1POWER 5PLAY Digital Features VCR mode 1 Set POWER to VCR. 2 Press MENU to display the VCR FUNCTIONS menu screen. 3 Rotate JOG KEY to select DIGITAL EFFECT , then press JOG KEY to display the DIGITAL EFFECT menu screen. 4 Rotate JOG KEY to select D. ZOOM - Panasonic PVDV203 | PVDV203 User Guide - Page 42
D.E.I.S. is turned off when not needed. 1, A POWER D.E.I.S. may not function when... • Palmcorder movement is too extreme. • Recording a subject with distinct horizontal or vertical stripes. • Recording 42 Forassistance,pleasecall:1-800-211-PANA(7262)orsende-mailto:[email protected] - Panasonic PVDV203 | PVDV203 User Guide - Page 43
Digital Features Other Digital Functions Use the following features to add interest and professionalism to your recordings or playback. Select from twelve special effects. 3, 4, 5 JOG KEY 2MENU 1POWER Types of Digital Functions MIRROR Symmetrical image from the current camera picture. STROBE The - Panasonic PVDV203 | PVDV203 User Guide - Page 44
PinP image in PhotoShot mode. • Press (CAMERA STILL) again to remove PinP image. 5, 6, 7 CAMERA STILL 44 Forassistance,pleasecall:1-800-211-PANA(7262)orsende-mailto:[email protected] - Panasonic PVDV203 | PVDV203 User Guide - Page 45
portion, the 12 bit audio will also be completely replaced. 1 Set POWER to VCR. • If you have the optional Remote Control, you can set the Palmcorder to stop automatically at a specific point on the tape. See "Memory-Stop 2 Editing" on page 46. Press (PLAY). Then press (PAUSE) where you want dubbing - Panasonic PVDV203 | PVDV203 User Guide - Page 46
DUB feature. 4 Press (PAUSE) to start Audio Dubbing. "A.DUB " indication appears. • Connect the Palmcorder to the TV in order to monitor the sound. (p. 39) Only NTSC (National Television Standards Committee) Forassistance,pleasecall:1-800-211-PANA(7262)orsende-mailto:[email protected] - Panasonic PVDV203 | PVDV203 User Guide - Page 47
tab in place, into the target VCR (Recorder). 2 Press (PLAY) on the Palmcorder. When the tape reaches the point from which you want to start dubbing, press PAUSE. 3 Place the VCR into REC/PAUSE mode. (See VCR manual.) 4 Simultaneously, press PAUSE on both units to begin copying. 5 Press STOP on - Panasonic PVDV203 | PVDV203 User Guide - Page 48
to start dubbing, press (PAUSE). 4 Hold down (REC) and press (PLAY) on the target (recording) Palmcorder. Press (PAUSE) to pause the tape at the starting point of the dub. 5 Simultaneously, press (PAUSE) 48 Forassistance,pleasecall:1-800-211-PANA(7262)orsende-mailto:[email protected] - Panasonic PVDV203 | PVDV203 User Guide - Page 49
and click sound. If set to OFF, the still image will be displayed only. Warning • While "PROCESSING" is displayed, DO NOT turn off the Palmcorder or unplug the AC Adaptor (supplied) because this will cause irreversible damage to the memory. • When recording DV Tape playback output to the Memory Card - Panasonic PVDV203 | PVDV203 User Guide - Page 50
can record still images from a cassette tape to a Memory Card. 4PHOTOSHOT 2POWER 3PLAY Before you begin • Connect the Palmcorder to a power source. (pp. 15, 16) • Set POWER to OFF before inserting a Memory Card. (p. ,pleasecall:1-800-211-PANA(7262)orsende-mailto:[email protected] - Panasonic PVDV203 | PVDV203 User Guide - Page 51
Still Cameras that are compliant with DCF can be viewed on this product. Warning • While "PLEASE WAIT" is displayed, DO NOT turn off the Palmcorder or unplug the AC Adaptor (supplied) because this may cause irreversible damage to the Memory Card. "PLEASE WAIT" is displayed. • Press MENU to display - Panasonic PVDV203 | PVDV203 User Guide - Page 52
selected image is underlined in pink. Warning • While deleting image, DO NOT turn off the Palmcorder or unplug the AC Adaptor (supplied) because this may cause irreversible damage to the Memory Card, 4~5. 52 Forassistance,pleasecall:1-800-211-PANA(7262)orsende-mailto:[email protected] - Panasonic PVDV203 | PVDV203 User Guide - Page 53
WAIT" is displayed on the screen, and then "NO PICTURE" is displayed. Warning • While deleting images, DO NOT turn off the Digital Video Camcorder or unplug the AC Adaptor (supplied) because this may cause irreversible damage to the Memory Card, resulting in reduced image storage capacity. • Press - Panasonic PVDV203 | PVDV203 User Guide - Page 54
when "NO PICTURE" is displayed. Warning • While deleting image, DO NOT turn off the Palmcorder or unplug the AC Adaptor (supplied) because this may cause irreversible damage to the Memory Card, (p. 49). 54 Forassistance,pleasecall:1-800-211-PANA(7262)orsende-mailto:[email protected] - Panasonic PVDV203 | PVDV203 User Guide - Page 55
Order Format, and since printing data can be added to images on the Memory Card, the Memory Card can be used with any system that supports DPOF. VARIABLE: You can select images recorded on the Memory Card and set the number of prints desired. ALL1: The number of prints recorded on - Panasonic PVDV203 | PVDV203 User Guide - Page 56
in your PC, please download and install Windows Media Player from the Microsoft Home Page: http://www.microsoft.com/ *Satisfy the conditions recommended by Microsoft for Windows XP. Palmcorder USB Device Driver/Web Camera/SD Drive Install Palmcorder USB Device Driver. You can transfer motion - Panasonic PVDV203 | PVDV203 User Guide - Page 57
Computer) and start up Windows. 2 Insert the supplied Software CD-ROM into the CD-ROM drive. 3 Click the icon you want to install. Please install the Palmcorder USB Device Driver first and follow the instructions listed under "Caution". Palmcorder USB Device Driver • For Movie Messenger • For - Panasonic PVDV203 | PVDV203 User Guide - Page 58
Panel." 2 Double-click on "System", verify [Panasonic Digital Palmcorder] is displayed in [Universal Serial Bus controllers] of [Device Manager] of [Hardware]. Palmcorder USB Device Driver/Web Camera (CAMERA Mode) [ This screen is an example (Windows 2000) ] 1 Click "Start," "Settings," and "Control - Panasonic PVDV203 | PVDV203 User Guide - Page 59
Images (Windows) Palmcorder USB Device Driver/SD Drive, Palmcorder File Converter (M-CARD Mode) [ This screen is an example (Windows 2000) are using Windows 98SE, [MATSUSHITA USB Storage Device Controller] will be displayed. Uninstalling Application Software [ This screen is an example (Windows 2000) - Panasonic PVDV203 | PVDV203 User Guide - Page 60
supplied) 2 Set the Palmcorder POWER to VCR. For Windows XP users 3 Connect the Palmcorder to your PC (Windows) using the USB Cable (supplied). • "CAPTURE" appears in the EVF or the LCD monitor. • The "Found New Hardware Wizard" screen of Windows is displayed. Follow the instructions as they appear - Panasonic PVDV203 | PVDV203 User Guide - Page 61
you can disconnect the cable safely. [ This screen is an example (Windows 2000) ] 1 Double-click the tray. icon in the task 2 Select [Panasonic Digital Palmcorder] and click [Stop]. 3 Verify [Panasonic Digital Palmcorder] is selected and click [OK]. 4 Click [OK]. • You can safely disconnect - Panasonic PVDV203 | PVDV203 User Guide - Page 62
Palmcorder POWER to VCR. 2 Connect the Palmcorder to your PC using the USB Cable (supplied) or DV Interface Cable (i.LINK) (not supplied). (pp. 60, 61, 72) 3 Click on "Start," "(All) Programs," "Panasonic window. • Turn the Palmcorder power switch ON or OFF while connecting the Palmcorder - Panasonic PVDV203 | PVDV203 User Guide - Page 63
not USB, please confirm the connection. Then, close 2 and restart the software. Click (PLAY) on PC screen to playback the DV tape. • The playback screen cannot be viewed on the PC. Please use the LCD monitor on the Palmcorder for confirmation. To capture Motion images 3 Click on [Movie Capture] at - Panasonic PVDV203 | PVDV203 User Guide - Page 64
. • The image captured last is displayed in the VideoGift screen. Caution for Windows 2000 users • If "Unable To Locate DLL" warning indication is displayed, please be opened, please refer to the software Help menu. 64 Forassistance,pleasecall:1-800-211-PANA(7262)orsende-mailto:consumerproducts - Panasonic PVDV203 | PVDV203 User Guide - Page 65
PHOTOVU/MPEG4 Movie Messenger™ System VideoGift Screen You can use these features using the VideoGift Screen. PC Connection 13 1 9 14 2 10 3 11 15 4 5 12 6 78 16 1 Slider Drag the pointer of the playback start position. 2 Movie Mode You can display motion images. 3 Open Movie You - Panasonic PVDV203 | PVDV203 User Guide - Page 66
saved motion images on your PC hard disk. You can also select the file by dragging and dropping from Windows Explorer. • You can use the VideoGift features (p. 65) on the VideoGift screen. Using a Still Image Forassistance,pleasecall:1-800-211-PANA(7262)orsende-mailto:[email protected] - Panasonic PVDV203 | PVDV203 User Guide - Page 67
e-mail Software must support MAPI (Messaging Application Programming Interface). Below are some e-mail Software programs which support MAPI: • The image captured last is displayed in the VideoGift screen. Caution for Windows 2000 users • If "Unable To Locate DLL" warning indication is displayed, - Panasonic PVDV203 | PVDV203 User Guide - Page 68
Palmcorder POWER to VCR. 1 Repeat steps 1~4 on page 62 to run the PHOTOVU/MPEG4 Movie 2 Messenger™ System. Click [VideoGift] to display the VideoGift screen. • The image captured last is displayed in the VideoGift screen. Caution for Windows If your e-mail software is not supported by MAPI, pressing - Panasonic PVDV203 | PVDV203 User Guide - Page 69
to display the VideoGift screen. • The image captured last is displayed in the VideoGift screen. Caution for Windows 2000 users • If "Unable To Locate DLL" warning indication is displayed, please see 3 page 89. -show Edit" screen is 5 displayed. Edit slides. • Use "Help" for detailed instructions. 69 - Panasonic PVDV203 | PVDV203 User Guide - Page 70
the VideoGift screen. • The image captured last is displayed in the VideoGift screen. Caution for Windows 2000 users • If "Unable To Locate DLL" warning indication is displayed, please see page 89 Low). 70 Forassistance,pleasecall:1-800-211-PANA(7262)orsende-mailto:[email protected] - Panasonic PVDV203 | PVDV203 User Guide - Page 71
Movie Messenger™ System. 2 Click [VideoGift] to display the VideoGift screen. • The image captured last is displayed in the VideoGift screen. Caution for Windows 2000 users • If "Unable To Locate DLL" warning indication is displayed, please see page 89. 3 Click [View Manager] to display the View - Panasonic PVDV203 | PVDV203 User Guide - Page 72
and edit video clips using the DV Interface (i.LINK). Our DVC being OHCI compliant should have no problem working with any OHCI compliant Firewire Card/video - Editing software package. PC Connector DV Input/Output (i.LINK) Connector DV Interface Cable (i.LINK) (6-to-4 pin) (not supplied) Note - Panasonic PVDV203 | PVDV203 User Guide - Page 73
to insert the DV Interface Cable (i.LINK) A Set Palmcorder POWER to VCR. B Connect the Palmcorder to your PC using the DV Interface Cable C Then, close and restart the software. • When using Windows XP, "Windows Movie Maker" may open automatically. If so, close "Windows Movie Maker" and "Movie - Panasonic PVDV203 | PVDV203 User Guide - Page 74
to the PC, and you can playback the saved images on the View Manager. (P. 64) 74 Forassistance,pleasecall:1-800-211-PANA(7262)orsende-mailto:[email protected] - Panasonic PVDV203 | PVDV203 User Guide - Page 75
POWER to M-CARD. For Windows XP users 3 Connect the Palmcorder to your PC (Windows) using the USB Cable (supplied). • "CONNECT WITH PC" and "STORAGE" appears in the EVF or the LCD monitor. • The "Found New Hardware Wizard" screen of Windows is displayed. Follow the instructions as they appear on - Panasonic PVDV203 | PVDV203 User Guide - Page 76
Driver/SD Drive For Windows 98SE/Me/2000 users 3 Connect the Palmcorder to your PC (Windows) using the USB Cable (supplied). • "CONNECT WITH PC" and "STORAGE" appears in the EVF or the LCD monitor. • The "Found New Hardware" screen of Windows -PANA(7262)orsende-mailto:[email protected] - Panasonic PVDV203 | PVDV203 User Guide - Page 77
to your PC. Before you begin • Install the Palmcorder USB Device Driver. (p. 57) • Set POWER to OFF before inserting a recorded Memory Card. (pp. 49, 50) • Make Palmcorder-PC connections. (pp. 75, 76) • Turn your PC on. (p. 75) • Set POWER to M-CARD. For Windows 98SE/Me/2000 users 1 Connect the - Panasonic PVDV203 | PVDV203 User Guide - Page 78
then "File Converter 3.0." 4 Select and click "To resize the image" or "To convert format for Panasonic Digital Palmcorder." • To resize the image: The size of images captured with the Palmcorder can be increased or decreased to make them suitable for Internet and e-mail use. • To convert format - Panasonic PVDV203 | PVDV203 User Guide - Page 79
which the converted file is to be saved. • The Conversion results screen is displayed. 7 Use "Help" for detailed instructions. When selecting "To convert format for Panasonic Digital Palmcorder" 5 Select the file to be converted. 6 Select the drive to which the converted file is to be saved. • The - Panasonic PVDV203 | PVDV203 User Guide - Page 80
Messenger Service. For Windows XP users Connect the Palmcorder to the PC. For Windows 98SE/Me/2000 users Connect the Palmcorder to the PC. Connect to the provider with dial-up network. Connect to the provider with dial-up network. Connect to provider with exclusive connection software. Connect - Panasonic PVDV203 | PVDV203 User Guide - Page 81
of this Palmcorder with Windows XP. Click [Continue Anyway] and proceed. Follow the instructions as they Windows XP, the OS installation CD may be required. Follow the instructions as they appear on your PC screen. • Do not disconnect the USB Cable while in use. This could be a source of trouble - Panasonic PVDV203 | PVDV203 User Guide - Page 82
USB Cable while in use. This could be a source of trouble. For more details, please read the respective Help file. • Close the application, then disconnect the USB Cable. For Windows 98SE/Me users 3 Connect the Palmcorder to your PC (Windows) using the USB Cable (supplied). • "CONNECT WITH PC" and - Panasonic PVDV203 | PVDV203 User Guide - Page 83
time the software is run. Before you begin • Be sure you have a dial-up connection. • Referring to pages 81~82, connect the Palmcorder and PC. http://www.msn.com/ • For download and installation instructions, please refer to Help on the Home Page. 4 The first time Windows Messenger is run, etc., the - Panasonic PVDV203 | PVDV203 User Guide - Page 84
can set the volume for playback or mic volume, etc. • Also, confirm that the Palmcorder and PC are connected correctly. The person you wish to access needs to do settings 1~6 also -on to Windows Messenger. 84 Forassistance,pleasecall:1-800-211-PANA(7262)orsende-mailto:[email protected] - Panasonic PVDV203 | PVDV203 User Guide - Page 85
, click [Decline]. 10At this point you may proceed with a voice/video conversation. Note • For other information about Windows Messenger, please refer to Help. 11When access is finished, close Windows Messenger, then set Palmcorder POWER to OFF. Finally, disconnect the USB Cable. 85 PC Connection - Panasonic PVDV203 | PVDV203 User Guide - Page 86
http://www.msn.com/ 1 Turn on your PC. 2 Download the latest version MSN Messenger Service (4.5 or later) and Windows NetMeeting (3.01 or later) from the Microsoft Home Page: http://www.microsoft.com/ http://www.msn.com/ • For download instructions, please 3 refer to Help on the Home Page. Install - Panasonic PVDV203 | PVDV203 User Guide - Page 87
Panasonic USB Microphone]* in the [Recording] menu. * If you are using Windows 2000, select [USB Audio Device] in the [Recording] menu. Note • You can set the volume for playback or mic volume, etc. • Also, confirm that the Palmcorder not signed-on to MSN Messenger Service. 8 The person calling ( - Panasonic PVDV203 | PVDV203 User Guide - Page 88
Windows Service and Windows 14 NetMeeting, please refer to Help. When access is finished, close MSN Messenger Service and Windows NetMeeting, then set Palmcorder POWER to OFF. Finally, disconnect the USB Cable. 88 Forassistance,pleasecall:1-800-211-PANA(7262)orsende-mailto:consumerproducts@panasonic - Panasonic PVDV203 | PVDV203 User Guide - Page 89
Media Player (7.1 or later), go to http://www.microsoft.com/windows/ mediaplayer (current as of Oct. 9, 2002). • "Windows Media. com: Download" is opened. Click [Download Now!] on the screen. • The "File Download" screen is displayed. Then, follow the instructions on the screen. PC Connection 89 - Panasonic PVDV203 | PVDV203 User Guide - Page 90
are met, there is no guarantee that the included software will work on all personal computers. Connection 2 USB Terminal 3 USB Cable (supplied) USB Terminal 1 Turn on your PC. 2 Set the Palmcorder POWER to M-CARD. 3 Connect the Palmcorder to your Macintosh using the USB Cable (supplied). Note - Panasonic PVDV203 | PVDV203 User Guide - Page 91
save them to your hard disk. 4 Follow the instructions as they appear on your Macintosh section screen. Note • Please do not change file or folder names on the computer. The images on the Memory Card may not be able to be viewed on the Palmcorder. • When "ACCESS" is displayed in the EVF - Panasonic PVDV203 | PVDV203 User Guide - Page 92
Palmcorder Accessory System Accessory # Figure Description Price PV-DAC11A CGR-D08A/1B CGR-D16A/1B CGP-D28A/1B AC Adaptor with AC Cable and DC Cable $119.95 800mAh / 1 h 30 min, Battery Pack $69.95 1 600mAh / 3 h, Battery Pack $99.95 2 800mAh/ 5 h, Battery Pack $129.95 CGR-D53A/1K PV- - Panasonic PVDV203 | PVDV203 User Guide - Page 93
OBTAIN ANY OF OUR PALMCORDER ACCESSORIES YOU CAN DO ANY OF THE FOLLOWING: VISIT YOUR LOCAL PANASONIC DEALER OR CALL PANASONIC'S ACCESSORY ORDER LINE AT 1-800-332-5368 [6 AM-5 PM M-F, 6 AM-10:30 AM SAT, PACIFIC TIME] OR MAIL THIS ORDER TO: PANASONIC SERVICES COMPANY ACCESSORY ORDER OFFICE 20421 84th - Panasonic PVDV203 | PVDV203 User Guide - Page 94
Alliance: About the Memory Card (MultiMediaCard or SD Memory Card) • Model PV-DV203 can be used with either a MultiMediaCard or a SD Memory Card. • Both of these exterior if desired. 94 Forassistance,pleasecall:1-800-211-PANA(7262)orsende-mailto:[email protected] - Panasonic PVDV203 | PVDV203 User Guide - Page 95
Set POWER to OFF or disconnect the Palmcorder from a power source. 4 1 While pinching the 2 tabs, pull Battery Tray out. 2 Bend middle tab out and remove Battery. 3 Snap new Battery ( + mark down) into Battery Tray. • Do not reverse the polarity. 4 Insert Battery Tray so the triangle marks meet - Panasonic PVDV203 | PVDV203 User Guide - Page 96
footcandles (5 lx). The table below shows the color temperature for reference. PALMCORDER SETTINGS NATURAL LIGHT CONDITIONS KELVIN COLOR ARTIFICIAL LIGHT SOURCE COLOR TINT TEMPERATURE MIXTURE Reddish 96 Forassistance,pleasecall:1-800-211-PANA(7262)orsende-mailto:[email protected] - Panasonic PVDV203 | PVDV203 User Guide - Page 97
) 7.8 V DC (AC Adaptor) AC Adaptor: 110/120/220/240 V AC, 50/60 Hz Battery: Lithium-Ion Type DC 7.2 V Power Consumption: Palmcorder : 7.2 V/7.8 V DC 5.5 W AC Adaptor : 18 W 1 W (when not in use.) Digital Interface USB/i.LINK (IEEE1394) Video Signal: EIA Standard (525 lines, 60 fields) NTSC - Panasonic PVDV203 | PVDV203 User Guide - Page 98
Self Diagnostic System If any of the following numbers appear on-screen, the camcorder may need service. Do not remove the battery (if attached) and write down the displayed number on page 101. Then, take the camcorder to a servicenter for repair. Error No. Description U11 Card Error U12 Card - Panasonic PVDV203 | PVDV203 User Guide - Page 99
Service If you have a problem with your Palmcorder 32) • Check the Dew Indicator. (p. 100) • Make sure the Battery is fully charged. (p. 15) • Make sure all necessary cables are . (pp. 15, 16) • Insert the cassette record tab up, window side facing out. (p. 12) • Make sure the Power source is - Panasonic PVDV203 | PVDV203 User Guide - Page 100
indicator no longer flashes when your Palmcorder is turned ON again. When a battery recharge is necessary, "WARNING" will flash, "LOW BATTERY" will appear, and the Palmcorder will automatically turn OFF in 15 Forassistance,pleasecall:1-800-211-PANA(7262)orsende-mailto:[email protected] - Panasonic PVDV203 | PVDV203 User Guide - Page 101
In this case, remove the USB Cable from the Palmcorder. When making DV connection at the time of M- When making DV connection at the time of USB Device Driver/SD Drive mode. (Blink during 3 seconds.) In : Panasonic Services Company 1705 N. Randall Road Elgin, IL. 60123-7847 Attn: Camcorder Repair - Panasonic PVDV203 | PVDV203 User Guide - Page 102
-Home or Carry-In 1-888-843-9788 Rechargeable Batteries (in exchange for defective item) Ten (10) Panasonic Web Site: http://www.panasonic.com For assistance in Puerto Rico call Panasonic Sales Company (787)-750-4300 or fax (787)-768-2910. In-Home service problem with this product develops during or - Panasonic PVDV203 | PVDV203 User Guide - Page 103
Site. Accessory Purchases: 1-800-332-5368 (Customer Orders Only ) For hearing or speech impaired TTY users, TTY: 1-866-605-1277 Panasonic Services Company 20421 Factory Servicenter Panasonic Services Company MAIL TO : 1705 N. Randall Road, Elgin, IL 60123-7847 Attention: Camcorder Repair Please - Panasonic PVDV203 | PVDV203 User Guide - Page 104
Quick Use Guide/Guía Para Uso Rápido Precauciones para su seguridad ADVERTENCIA: PARA EVITAR INCENDIOS Y DESCARGAS ELÉCTRICAS, NO EXPONGA ESTE EQUIPO A LA LLUVIA NI A LA HUMEDAD. Su Mini Palmcorder está dise Forassistance,pleasecall:1-800-211-PANA(7262)orsende-mailto:[email protected] - Panasonic PVDV203 | PVDV203 User Guide - Page 105
Spanish Quick Use Guide/Guía Para Uso Rápido Inserte de la batería Antes de comenzar • Cargue la battería. (Página 15.) 2 1 1 Coloque la batería y deslícela hacia arriba hasta que - Panasonic PVDV203 | PVDV203 User Guide - Page 106
Spanish Quick Use Guide/Guía Para Uso Rápido Grabación con la cámara Cuando el monitor LCD se enchuentra totalmente abjerto, el visor se 5 Presione el botón de parada (STOP) para detener la reproducción. 106 Forassistance,pleasecall:1-800-211-PANA(7262)orsende-mailto:[email protected] - Panasonic PVDV203 | PVDV203 User Guide - Page 107
Spanish Quick Use Guide/Guía Para Uso Rápido Introducir la Tarjeta de memoria* Antes de comenzar • Cargue la battería. (Pàgina 15.) *Tarjeta de Memoria: Tarjeta MultiMedia o Tarjeta de Memoria - Panasonic PVDV203 | PVDV203 User Guide - Page 108
set to ON, the microphone's directional angle and sensitivity vary according to the zoom operation. 108 Forassistance,pleasecall:1-800-211-PANA(7262)orsende-mailto:[email protected] - Panasonic PVDV203 | PVDV203 User Guide - Page 109
SOUND Set to ON to hear beep when starting and stopping camera recording or when unusual conditions occur. To cancel the beep, set to OFF. Palmcorder will beep: Once when you start recording Twice when you stop recording Repeatedly when warning of unusual conditions. (pp. 100, 101) 18 SHTR EFFECT - Panasonic PVDV203 | PVDV203 User Guide - Page 110
) Set to AUDIO DUB "ON" in the Menu OSD to use the Audio Dub feature. 110 Forassistance,pleasecall:1-800-211-PANA(7262)orsende-mailto:[email protected] - Panasonic PVDV203 | PVDV203 User Guide - Page 111
MENU OSD 10 DATE/TIME (p. 113) The date and time can be set and displayed on the screen. 10 11 C. DISPLAY (p. 114) To select the desired type of counter 11 indication displayed on the LCD Monitor or in the viewfinder. 12 12 C. RESET (p. 114) Setting to ON resets the counter to zero. 13 13 - Panasonic PVDV203 | PVDV203 User Guide - Page 112
1. 7 ALL0 (p. 55) When set to ON, the currently set number of prints is set to 0. 112 Forassistance,pleasecall:1-800-211-PANA(7262)orsende-mailto:[email protected] - Panasonic PVDV203 | PVDV203 User Guide - Page 113
which will appear on the Palmcorder EVF and LCD Monitor. Only Date and Time indications will be recorded onto the tape. CAMERA/VCR Mode a h i b c d e f g a Battery Remaining FULL EMPTY b Tape (SP or LP). i MNL Indication (pp. 28~31) This display appears when AUTO/ MANUAL is pressed to - Panasonic PVDV203 | PVDV203 User Guide - Page 114
OSD: pp. 109, 111) Linear Time Counter Memory Counter Time Code Memory Counter M 0:00.00 The Palmcorder will stop whenever it reaches the point where the counter was previously set to M 0:00.00 during . 114 Forassistance,pleasecall:1-800-211-PANA(7262)orsende-mailto:[email protected] - Panasonic PVDV203 | PVDV203 User Guide - Page 115
appears when EIS is pressed. p Backlight Indication (p. 24) This display appears when BACK LIGHT is pressed. q PROGRAM-AE Indication (p. 25) r Manual Focus Indication (p. 29) s White Balance Indication (p. 28) t Shutter Mode Indication (p. 30) u Iris Indication (p. 31) no pq r s t u vw xy v Z.MIC - Panasonic PVDV203 | PVDV203 User Guide - Page 116
) f DPOF Indication (p. 55) g Multi Image Playback page number h Currently selected image is underlined in green 116 Forassistance,pleasecall:1-800-211-PANA(7262)orsende-mailto:[email protected] - Panasonic PVDV203 | PVDV203 User Guide - Page 117
Front View Lens EfficiBright™ LED Light p. 8. Remote Sensor p. 9. Built-in Twin Capsule 2-Way Microphone System Rear View POWER ZOOM pp. 22, 40. VOLUME p. 33. TAPE EJECT pp. 7, 12. MENU pp. 17, 18. REC/PAUSE pp. 13, 19. POWER (VCR•OFF• CAMERA•M-CARD) pp. 12, 13, 49. Side View LCD (Liquid Crystal - Panasonic PVDV203 | PVDV203 User Guide - Page 118
Battery Tray p. 95. DV Input/Output (i.LINK) Connector pp. 48, 72. A/V Output Connector pp. 39, 47. PHONE p. 32. Side View MAGIC PIX p. 41. LIGHT p. 8. REW pp. 13, 32. RECORDING CHECK p. 23. REC p. 48. FOCUS p. 29. AUTO/MANUAL pp. 51~54. Underside View BATTERY RELEASE pp. 15, 16. Shoulder - Panasonic PVDV203 | PVDV203 User Guide - Page 119
V AC. Please contact either a local or foreign electrical parts distributor for assistance in selecting an alternate AC plug. We recommend using the accessory power plug adaptor (VJSS0070/ KZDB4ZE00001) in an area which has special AC outlets. Remote Control (Optional) DATE/TIME pp. 9, 113. DISPLAY - Panasonic PVDV203 | PVDV203 User Guide - Page 120
Clock Battery 95, 100 Clock Set 17 Connecting Earphone ......... 32 Copying from Digital Equipment 48 Copying your Tapes 47 Customer Services Directory (OSD 100, 101 P Palmcorder Accessory Order Form 93 Palmcorder File Converter 78, 79 Palmcorder USB Device Driver/SD Drive 75~77 Photo
-
 1
1 -
 2
2 -
 3
3 -
 4
4 -
 5
5 -
 6
6 -
 7
7 -
8
-
9
-
10
-
11
-
12
-
13
-
14
-
15
-
16
-
17
-
18
-
19
-
20
-
21
-
22
-
23
-
24
-
25
-
26
-
27
-
28
-
29
-
30
-
31
-
32
-
33
-
34
-
35
-
36
-
37
-
38
-
39
-
40
-
41
-
42
-
43
-
44
-
45
-
46
-
47
-
48
-
49
-
50
-
51
-
52
-
53
-
54
-
55
-
56
-
57
-
58
-
59
-
60
-
61
-
62
-
63
-
64
-
65
-
66
-
67
-
68
-
69
-
70
-
71
-
72
-
73
-
74
-
75
-
76
-
77
-
78
-
79
-
80
-
81
-
82
-
83
-
84
-
85
-
86
-
87
-
88
-
89
-
90
-
91
-
92
-
93
-
94
-
95
-
96
-
97
-
98
-
99
-
100
-
101
-
102
-
103
-
104
-
105
-
106
-
107
-
108
-
109
-
110
-
111
-
112
-
113
-
114
-
115
-
116
-
117
-
118
-
119
-
120
 |
 |
Before attempting to connect, operate or adjust this product, please read these
instructions thoroughly.
Spanish Quick Use Guide is included.
Guía para rápida consulta en español está incluida.
LSQT0653A
Model No.
PV-DV203
Digital Video Camcorder
Operating Instructions
Mini
R
For assistance,
please call :
1-800-211-PANA(7262) or send e-mail to : [email protected]