Panasonic WVCW974 WVCW974 User Guide - Page 47
Special settings, Using the Special Setup Menu
 |
UPC - 791871505373
View all Panasonic WVCW974 manuals
Add to My Manuals
Save this manual to your list of manuals |
Page 47 highlights
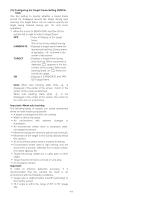
Special settings ■ Using the Special Setup Menu Display the special setup menu from the setup menu to adjust picture quality. First, display the special setup menu. 1. Display the setup menu (page 24), move the cursor to SPECIAL O, and then press the CAM (SET) button. This will display the special setup menu. **SPECIAL SETUP** CHROMA GAIN I••160 AP GAIN ••I 89 PEDESTAL ••I••••101 HUE •••I•••137 - + DISPLAY →ALARM PIX OFF REFRESH →PUSH SET CAMERA RESET →PUSH SET SER.NO. BFB03964 RET TOP q w r e t * This section explains items q through t on the special setup menu in that order. (1) Adjusting Picture Quality Use the following procedure to adjust picture quality. 1. Move the cursor to CHROMA GAIN, and then tilt the joystick left or right to adjust the CHROMA GAIN level. 2. Move the cursor to AP GAIN, and then tilt the joystick left or right to adjust the aperture level. 3. Move the cursor to PEDESTAL, and then tilt the joystick left or right to adjust the PEDESTAL level. 4. Move the cursor to HUE, and then tilt the joystick left or right to adjust the chroma phase (color tone). (2) Setting the display [DISPLAY] 1. Move the cursor to DISPLAY, and then tilt the joystick left or right to select a display setting. OFF : Pan, tilt, zoom position displays and alarm are not displayed. POSITION : Only pan, tilt and zoom are displayed. Alarm is not displayed. ALARM : Only alarm is displayed. Pan, tilt and zoom positions are not displayed. This is the factory default setting. ALL : Pan, tilt, zoom position displays and alarm are all displayed. 360°/ 90°/X001 Pan position Zoom ratio Tilt position* The names and types of displays for the alarm display are shown in the table below. Name of display MOTION DET1 MOTION DET2 ALARM IN1 ALARM IN2 ALARM IN3 ALARM IN4 Type of alarm MOTION DET (MODE1) MOTION DET (MODE2) ALARM IN 1 ALARM IN 2 ALARM IN 3 ALARM IN 4 MOTION DET1 Type of alarm Notes: • Use a shortcut (page 52) to switch between displaying or not displaying the pan, tilt, zoom positions (during pan, tilt and zoom operation) and type of alarm on the monitor screen. * The tilt position is displayed ranging from -5˚ to 90˚ to -5˚. • When the Light Control is in ALC, "IRIS CLOSE" is displayed below the pan/tilt/zoom position display when the iris is completely closed. When the Light Control is in MANUAL, "IRIS CLOSE" is not displayed. • Note that auto tracking alarm (page 42) cannot be displayed. (3) Compensating for Blemishes (PIX OFF) 1. Move the cursor to PIX OFF O, and then press the CAM (SET) button. This will display the PIX OFF menu. Perform the following steps to perform blemish compensation on the pixels. 2. Select a position that has a blemish with the PIX OFF number, and then press the CAM (SET) button. This will display the blemish compensation pattern setting screen. (1) Use the joystick to move the cross cursor ( ) to the location of the defective pixels. (2) Move the cursor around the display until there are no more white spots (blemishes) visible, and then press the CAM (SET) button. This will store the blemish compensation pattern. -47-
-
 1
1 -
2
-
3
-
4
-
5
-
6
-
7
-
8
-
9
-
10
-
11
-
12
-
13
-
14
-
15
-
16
-
17
-
18
-
19
-
20
-
21
-
22
-
23
-
24
-
25
-
26
-
27
-
28
-
29
-
30
-
31
-
32
-
33
-
34
-
35
-
36
-
37
-
38
-
39
-
40
-
41
-
 42
42 -
 43
43 -
 44
44 -
 45
45 -
 46
46 -
 47
47 -
 48
48 -
 49
49 -
 50
50 -
 51
51 -
 52
52 -
53
-
54
-
55
-
56
-
57
-
58
-
59
-
60
-
61
-
62
-
63
-
64
-
65
-
66
-
67
-
68
-
69
-
70
-
71
-
72
-
73
-
74
-
75
-
76
-
77
-
78
-
79
-
80
-
81
-
82
-
83
-
84
-
85
-
86
-
87
-
88
-
89
-
90
-
91
-
92
-
93
-
94
-
95
-
96
-
97
-
98
-
99
-
100
-
101
-
102
-
103
-
104
-
105
-
106
-
107
-
108
-
109
-
110
-
111
-
112
-
113
-
114
-
115
-
116
-
117
-
118
-
119
-
120
-
121
-
122
 |
 |
