Pfaff 16 Owner's Manual - Page 10
Darning
 |
View all Pfaff 16 manuals
Add to My Manuals
Save this manual to your list of manuals |
Page 10 highlights
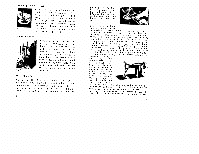
rows of stitches iii any desir ed direction, without pre viously niark rig the mate n1 .o Fix the quilter guide support over the presser bar so that it is immedia tely above the foot and encircles it. Now push the straight guide rod from right to left thi ouqh the holes ri the bow, and tighten the screws, Make your first ro,v of stitches, then move lie material to the right to give the required spacing between hi st rind ecaisd stitch row. When making your second row 01 stitches let the guide glide over the first tine of stitches, i. e. after you hove adjusted the guide to give the desired spacing. The second 'ow then acts as a guide for the third and fourth row, etc. I4 1 4. - Darning I Feed Caver Plate (Darning Plate) No. OK 4465 (Fig. 17). Embroidery Hoop V ii No Presser Foot C Fq t7 Open the front and rear hedplnte slides, take the clam mg plate in your right hand, and place it next to the slide with the small lug ii inserted into the left hole in bedplnte slide. Swivel the darning plate anti-clockwise ant if it covers the needle plate, and the small catches 6 and i clip aver the plate. Then close both bectplate slides. Move the stitch regulating lever to "0", and tower tlse presser bar lifter. Draw the part to he darned over the hoop, and place the work under the needle. Draw the under thread upwards through the material and hold the ends of both tlsreads while you make the first few st itch es, Start the line of stitches about /r from the left edge of the hale. Work the machine fast and with an even rhythm, and, at the some time, move the hoop stea di ly to and Ira under the needle, laying the stitches clo sely side by side across the hale, and about i/4 beyond the right edge. At the start and finish of erich stitch line ninke I ai 2 crass-stitches, to ensure the lines (ire laid pa ro the I. 15
-
 1
1 -
2
-
3
-
4
-
 5
5 -
 6
6 -
 7
7 -
 8
8 -
 9
9 -
 10
10 -
 11
11 -
 12
12 -
 13
13 -
 14
14 -
 15
15
 |
 |
