Pfaff expression 150 Owner's Manual - Page 29
To make piping from your fabric
 |
View all Pfaff expression 150 manuals
Add to My Manuals
Save this manual to your list of manuals |
Page 29 highlights
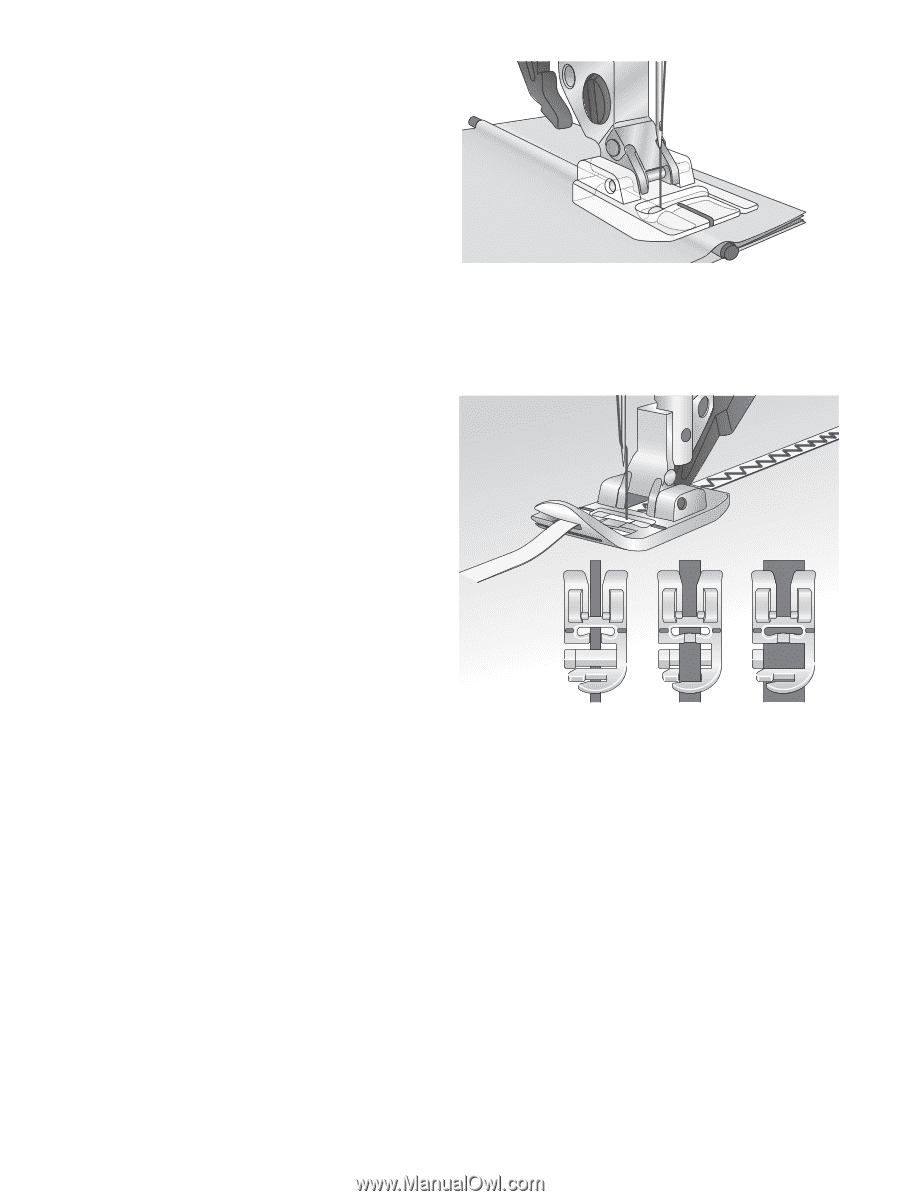
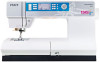
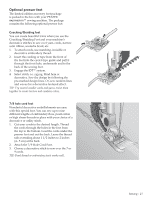
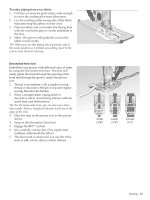
To make piping from your fabric: 1. Cut bias or crosswise grain strips, wide enough to cover the cording plus seam allowances. 2. Lay the cording on the wrong side of the fabric strip and wrap the fabric over the cord. 3. Place the fabric and cord under the Piping Foot with the cord in the groove on the underside of the foot. 4. Stitch. The groove will guide the cord so the fabric covers evenly. TIP: When you sew this piping into a garment, adjust the needle position so it stitches one setting closer to the cord to cover the Àrst stitching. Decorative trim foot Embellish your project with different types of trims by using the Decorative trim foot. This foot will easily guide the trims through the opening at the front and through the groove under the presser foot. 1. Thread your machine with a regular sewing thread or decorative thread on top and regular sewing thread in the bobbin. 2. Select a straight stitch, zigzag stitch or decorative stitch. Avoid using stitches with too much back and forth motion. Tip: For the 6mm wide trims, you can also use a 6mm twin needle. Select a straight stitch and it will sew at the edges of the trim. 3. Place the trim in the presser foot as the picture shows. 4. Snap on the Decorative Trim Foot. 5. Engage the IDT™ system. 6. Sew carefully, not too fast. (You might need stabilizer underneath the fabric) 7. The best result is achieved if you use Áat trims, such as silk, velvet, satin or cotton ribbons. 3 mm (1/8") 6 mm (1/4") 12 mm (1/2") Sewing - 29
-
 1
1 -
2
-
3
-
4
-
5
-
6
-
7
-
8
-
9
-
10
-
11
-
12
-
13
-
14
-
15
-
16
-
17
-
18
-
19
-
20
-
21
-
22
-
23
-
 24
24 -
 25
25 -
 26
26 -
 27
27 -
 28
28 -
 29
29 -
 30
30 -
 31
31 -
 32
32 -
 33
33 -
 34
34 -
35
-
36
 |
 |