Pfaff expression 2048 Owner's Manual - Page 58
Free-motion embroidery, Automatic tapering, Free-motion monograms
 |
View all Pfaff expression 2048 manuals
Add to My Manuals
Save this manual to your list of manuals |
Page 58 highlights
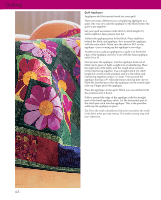
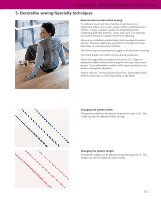
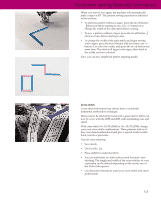
Decorative sewing/Specialty techniques Free-motion monograms Use stitch 3 (adjust stitch width and stitch length) to create wonderful monogram initials of your own design. Transfer the initials with a fabric marker to the area to be embroidered. Attach the darning foot and bring it into the darning position. Lower the feed dog. Place a tear-away stabilizer under your fabric. Then place a piece of water-soluble stabilizer on the right side of the fabric. Place the fabric in an embroidery hoop and use the zigzag stitch, in varying widths, to follow your traced lines. Do not forget to use the darning position. Knot the threads on the back of your project and remove the stabilizers. The remaining water-soluble stabilizer will dissolve in water. Free-motion embroidery These striking embroidery designs can easily be sewn with your expression. Set your expression as for free-motion monograms. Draw the outline of the embroideries on fabric where you want to stitch them. Follow the instructions and tips for free-motion monograms to stitch your embroideries. Automatic tapering You can use both stitch No. 3 and stitch No. 11 for automatic tapering. If you would like to embroider the corners of a border, select zigzag stitch No. 11. Press the tie-off button (36) three times. A dense zigzag stitch appears in the expression window and beside it the word "tapering" with an arrow pointing to the taper of the corner on the left. Start sewing the point. Continue to sew to the length you desire, then press the reverse sewing button (33) while sewing. The taper will be sewn automatically at an angle of 45°. When using tapering the machine shall, unless the needle down function is selected, stop with the needle in up-right position. If needle down is selected the machine stops at the taper and the needle remains in the fabric so that you can turn the fabric 90°. 5:2
-
 1
1 -
2
-
3
-
4
-
5
-
6
-
7
-
8
-
9
-
10
-
11
-
12
-
13
-
14
-
15
-
16
-
17
-
18
-
19
-
20
-
21
-
22
-
23
-
24
-
25
-
26
-
27
-
28
-
29
-
30
-
31
-
32
-
33
-
34
-
35
-
36
-
37
-
38
-
39
-
40
-
41
-
42
-
43
-
44
-
45
-
46
-
47
-
48
-
49
-
50
-
51
-
52
-
 53
53 -
 54
54 -
 55
55 -
 56
56 -
 57
57 -
 58
58 -
 59
59 -
 60
60 -
 61
61 -
 62
62 -
 63
63 -
64
-
65
-
66
-
67
-
68
 |
 |
