Pfaff hobbylock 4762 Owner's Manual - Page 19
Insert
 |
View all Pfaff hobbylock 4762 manuals
Add to My Manuals
Save this manual to your list of manuals |
Page 19 highlights
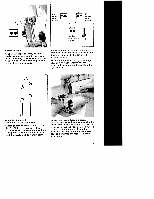
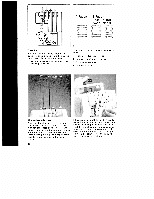
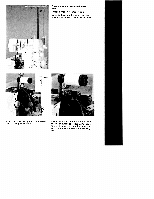
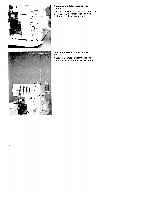
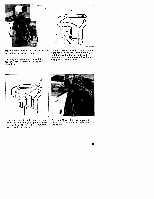
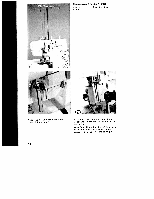
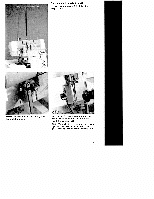
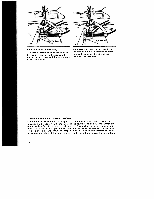
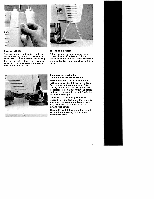
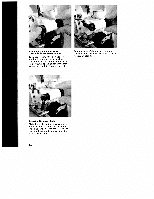
4 Insert the thread along the path marked in yellow through guides 4 to 8. The diagrams to be found behind the looper cover illustrate the principles of threading. Lay the thread from back to front over the right-hand side of the looper. Carefully pull the thread to the left and slightly down until it slips into notch B (= threa ding point 9) of the looper. C Insert the thread from the front through ihe eye of left overedge looper C (= threa ding point 10). The thread must run along the groove in the looper. Pull about 10 cm of thread through the looper and lay it to the left underneath the sewing foot. 15
-
 1
1 -
2
-
3
-
4
-
5
-
6
-
7
-
8
-
9
-
10
-
11
-
12
-
13
-
 14
14 -
 15
15 -
 16
16 -
 17
17 -
 18
18 -
 19
19 -
 20
20 -
 21
21 -
 22
22 -
 23
23 -
 24
24 -
25
-
26
-
27
-
28
-
29
-
30
-
31
-
32
-
33
-
34
-
35
-
36
-
37
-
38
-
39
-
40
-
41
-
42
-
43
-
44
-
45
-
46
-
47
-
48
-
49
-
50
-
51
-
52
-
53
-
54
-
55
-
56
-
57
-
58
-
59
-
60
-
61
-
62
-
63
-
64
-
65
 |
 |

Insert
the
thread
along
the
path
marked
in
yellow
through
guides
4
to
8.
The
diagrams
to
be
found
behind
the
looper
cover
illustrate
the
principles
of
threading.
Lay
the
thread
from
back
to
front
over
the
right-hand
side
of
the
looper.
Carefully
pull
the
thread
to
the
left
and
slightly
down
until
it
slips
into
notch
B
(=
threa
ding
point
9)
of
the
looper.
C
Insert
the
thread
from
the
front
through
ihe
eye
of
left
overedge
looper
C
(=
threa
ding
point
10).
The
thread
must
run
along
the
groove
in
the
looper.
Pull
about
10
cm
of
thread
through
the
looper
and
lay
it
to
the
left
underneath
the
sewing
foot.
4
15