Pfaff hobbylock 4762 Owner's Manual - Page 57
necessary.
 |
View all Pfaff hobbylock 4762 manuals
Add to My Manuals
Save this manual to your list of manuals |
Page 57 highlights
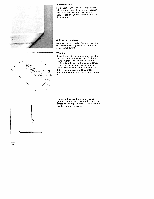
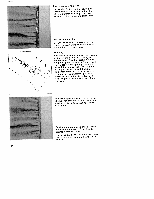
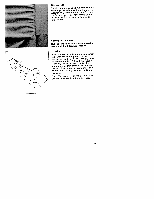
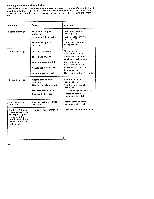
Bead sewing foot This sewing foot is used for sewing on beads, sequins, strass bands, lead and ordinary cords. Setting the machine Set your machine to 3-thread overedge seam (narrow or wide depending on bead size). Stitch length should be between 3 and 4. Working 2 Raise the needle to its uppermost position and insert the bead sewing foot. Insert the string of beads into guide 1 and beneath guide 2 approx, 5 cm behind the sewing foot. Hold the beads in place with a few stitches, then lay the fabric face up under I the sewing foot and sew the beads onto the selvedge. Note: For sewing on lead beading, we recommend threading the two overedge loopers with bulk thread and correcting the tension if necessary. Ii you wish to sew the beading into the fabric as shown to the left, the needle thread tension must be loose (approx. -5). Lay the material reverse side to reverse side and guide the crease past the upper knife while sewing. Pull the fabric apart; the beading is now on top. Sew a test seam. 53
-
 1
1 -
2
-
3
-
4
-
5
-
6
-
7
-
8
-
9
-
10
-
11
-
12
-
13
-
14
-
15
-
16
-
17
-
18
-
19
-
20
-
21
-
22
-
23
-
24
-
25
-
26
-
27
-
28
-
29
-
30
-
31
-
32
-
33
-
34
-
35
-
36
-
37
-
38
-
39
-
40
-
41
-
42
-
43
-
44
-
45
-
46
-
47
-
48
-
49
-
50
-
51
-
 52
52 -
 53
53 -
 54
54 -
 55
55 -
 56
56 -
 57
57 -
 58
58 -
 59
59 -
 60
60 -
 61
61 -
 62
62 -
63
-
64
-
65
 |
 |
