Philips 220S2CB User manual (English) - Page 16
Black Level,White Point, Color Calibration
 |
View all Philips 220S2CB manuals
Add to My Manuals
Save this manual to your list of manuals |
Page 16 highlights
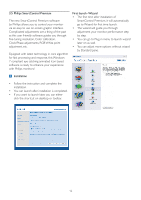
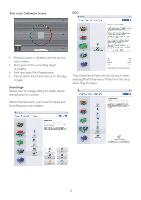
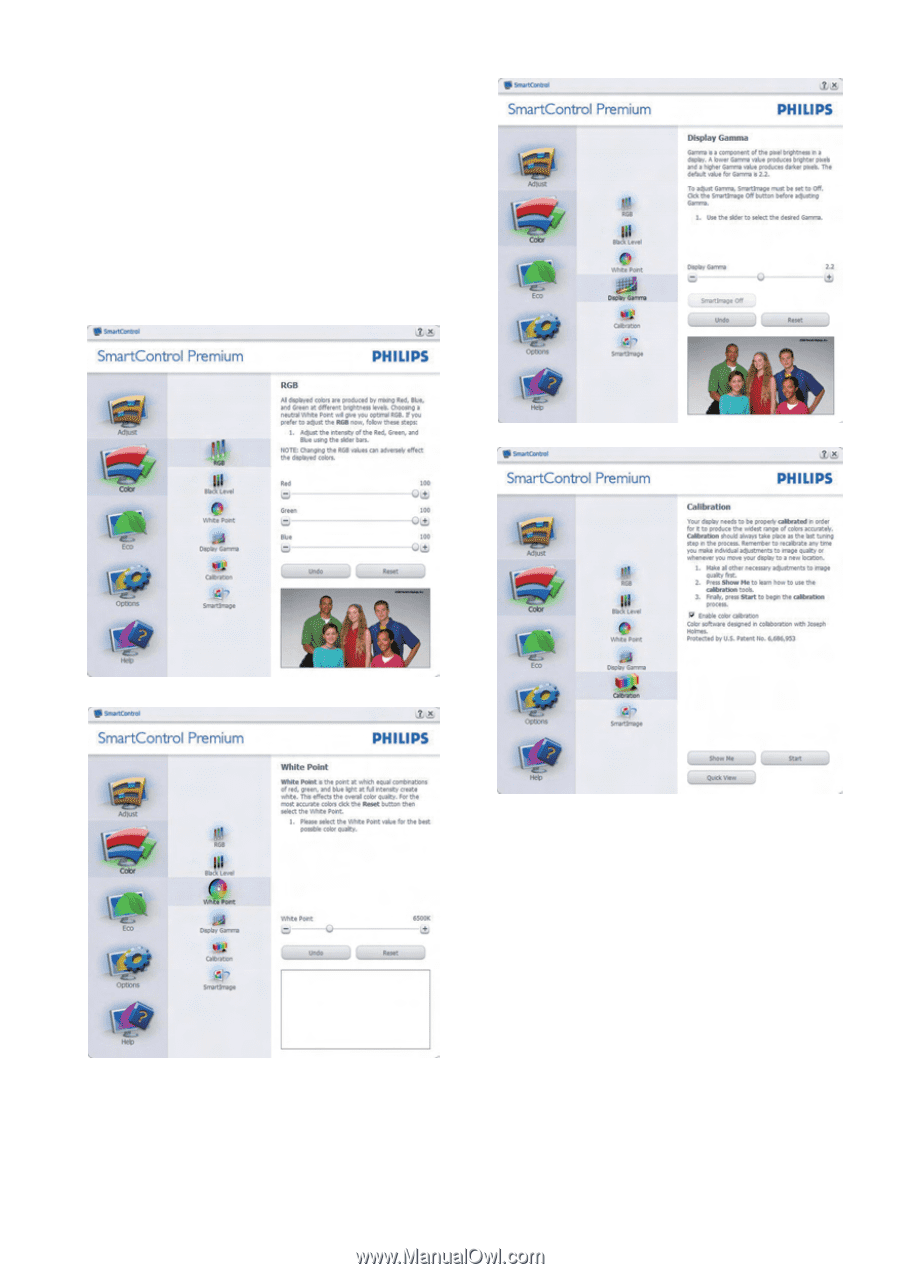
Color menu: • Color Menu allow you to adjust RGB, Black Level, White Point, Color Calibration, and SmartImage (Please refer to SmartImage section). • You can follow the instruction and do the adjustment. • Refer to below table for sub-menu item base on your input. • Example for Color Calibration 1. "Show Me" starts color calibration tutorial. 2. Start - starts the 6-step color calibration sequence. 3. Quick View loads the before/after images. 4. To return to Color home pane, click the Cancel button. 5. Enable color calibration - by default is on. If unchecked, does not allow for color calibration to happen, dimes out start and quick view buttons. 6. Must have patent info in calibration screen. 14
-
 1
1 -
2
-
3
-
4
-
5
-
6
-
7
-
8
-
9
-
10
-
 11
11 -
 12
12 -
 13
13 -
 14
14 -
 15
15 -
 16
16 -
 17
17 -
 18
18 -
 19
19 -
 20
20 -
 21
21 -
22
-
23
-
24
-
25
-
26
-
27
-
28
-
29
-
30
-
31
-
32
-
33
-
34
-
35
-
36
-
37
-
38
-
39
-
40
-
41
-
42
-
43
-
44
-
45
-
46
-
47
-
48
-
49
-
50
-
51
-
52
-
53
 |
 |
14
Color menu:
•
Color Menu allow you to adjust RGB,
Black Level,White Point, Color Calibration,
and SmartImage (Please refer to SmartImage
section).
•
You can follow the instruction and do the
adjustment.
•
Refer to below table for sub-menu item base
on your input.
•
Example for Color Calibration
1.
"Show Me" starts color calibration tutorial.
2.
Start - starts the 6-step color calibration
sequence.
3.
Quick View loads the before/after images.
4.
To return to Color home pane, click the
Cancel button.
5.
Enable color calibration - by default is
on. If unchecked, does not allow for color
calibration to happen, dimes out start and
quick view buttons.
6.
Must have patent info in calibration screen.