Philips 32PF9630 User Guide - Page 11
Source, Clock
 |
View all Philips 32PF9630 manuals
Add to My Manuals
Save this manual to your list of manuals |
Page 11 highlights
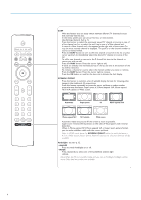
Clock Settings Clock Time Day Source Source Settings AV1 AV2 HDMI Side Center input (Center In Vol.) Demo TV Settings Demo Install Auto demo ........... Dealer demo - Digital processing - Light sensor - 3D Y/C Comb filter & Select Clock with the cursor right and press the cursor down to select Time or Day. é With the cursor buttons, enter the correct time and day, which afterwards can be selected with the CLOCK button on the remote control, see p. 3. & Select Source with the cursor right. é Press the cursor down to select one of the external AV inputs. " Press the cursor right to enter the list of types of devices attached to the selected input. ' Select the accessory device with the cursor up/down. Once you have named the source, e.g.VCR, this source will automatically be selected when your remote control is in VCR mode, see p. 3, and when you press the AV+ button on the remote control. ( Press the MENU button on the remote control to turn off all menus on screen. § Keep the AV+ button on the remote control pressed and then press this button repeatedly. The Source Select menu appears in which you may select a source or peripheral connected to be displayed on screen. Center input - Center in volume When you have connected a multichannel surround receiver to the TV, the loudspeakers of the monitor can act as center speaker, making a separate center speaker unnecessary. Select Center input On. When having selected On you can adjust the Center In Vol. with the cursor left/right to correct volume level differences of the external audio receiver and speakers. & Select Demo in the Main menu with the cursor down. é Select Auto demo or one of the features with the cursor right and press the OK button on the remote control. If Auto demo has been selected the demo will automatically present all the features sequentially in a loop. Press one of the cursor buttons to stop the Auto demo. If one of the features has been selected, this particular feature demo will run one time only, until activated again, and the Demo menu will reappear. Digital processing, Light sensor and 3D Y/C Comb filter On or Off Select Digital processing, Light sensor and 3D Y/C Comb filter On or Off to really see the difference in picture quality. In Dealer Demo mode it is possible to change channels with - CH + and to adjust the volume. Note: the Dealer Demo is not part of the automatic sequence and can only be activated separately. 9
-
 1
1 -
2
-
3
-
4
-
5
-
 6
6 -
 7
7 -
 8
8 -
 9
9 -
 10
10 -
 11
11 -
 12
12 -
 13
13 -
 14
14 -
 15
15 -
 16
16 -
17
-
18
-
19
-
20
-
21
-
22
-
23
-
24
-
25
-
26
-
27
-
28
 |
 |
