Philips DVDR520H User manual
Philips DVDR520H Manual
 |
View all Philips DVDR520H manuals
Add to My Manuals
Save this manual to your list of manuals |
Philips DVDR520H manual content summary:
- Philips DVDR520H | User manual - Page 1
Thank you for choosing Philips. Need help fast? Read your Quick-Use Guide and/or Owner's Manual first for quick tips that make using your Philips product more enjoyable. If you have read your instructions and still need assistance, you may access our online help at www.p4c.philips.com or call 1-800- - Philips DVDR520H | User manual - Page 2
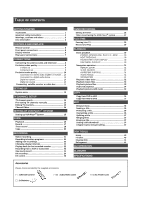
menu 12 TV CHANNEL SETUP TV channel search 13 Fine-tuning TV channels manually 13 Editing TV channels 13 Channel Editor 14 SETTING UP VCR PLUS+® SYSTEM Setting up VCR Plus+® System 15 GUIDE Playback 16 Record 17 Timer record 18 Copy 20 RECORDING Before recording 21 Recording television - Philips DVDR520H | User manual - Page 3
Install in accordance with the manufacturer's instructions. 8. Do not install near any Conformity Model number: DVDR520H Trade Name: Philips Responsible party: Philips Consumer Electronics NA time. 14. Refer all servicing to qualified service personnel. Servicing is required when the apparatus - Philips DVDR520H | User manual - Page 4
can be controlled from the remote. PRODUCTS PROBLEMS, IT IS RECOMMENDED THAT THE USER SWITCH THE CONNECTION TO THE "STANDARD DEFINITION" OUTPUT. IF THERE ARE QUESTIONS REGARDING OUR TV SET COMPATIBILITY WITH THIS MODEL 525P DVD PLAYER, PLEASE CONTACT OUR CUSTOMER SERVICE with the instructions, may - Philips DVDR520H | User manual - Page 5
This unit can playback DVD-Video discs and the region code is printed on the rear of the unit. DVD R, DVD RW and DVD R, DVD RW, discs written in the DVD-Video format and finalized. Video with CD sound, VHS quality & MPEG-1 compression technology. CD is recorded as a Digital Signal with better audio - Philips DVDR520H | User manual - Page 6
remote control. CAUTION! - Remove batteries of they are exhausted or if the Remote Control HDD/DVD button (HDD/DVD) 10) Disk Tools button (DISK TOOLS) 11) Source button (SOURCE) 12) Record button (RECORD) 21) Flex Timer button (FLEX TIME) 22) Guide button ( GUIDE) 23) VCR Plus+ button (VCR Plus+) 24) - Philips DVDR520H | User manual - Page 7
only) Names of parts and controls 1) POWER ON/OFF Button Turns the recorder on and off. 2) DISC TRAY Holds discs securely during recording or playback 3) DV-LINK (IEEE-1394) Jack Connects digital video camcorders to this DVD Recorder. 4) DVD Indicator Lights up when DVD is set as the target - Philips DVDR520H | User manual - Page 8
CONTROLS AND DISPLAYS Rear panel connections (for reference only) Names of parts 1) TUNER(TV/ANTENNA) Jacks Connects TV/ANTENNA for signal output/input. Note: Playback signals don't go through here. Make proper connections before using this DVD Recorder. 2) LINE IN (S-VIDEO) Jack S-Video signal - Philips DVDR520H | User manual - Page 9
TV. Connecting VIDEO OUT of the unit to a TV via a VCR may cause a viewing problem when playing back a copy-protected disc. You may also have a viewing problem when connecting the unit to an integrated TV Cable and Satellite TV users please connect your decoder's output to this unit's input. 8 - Philips DVDR520H | User manual - Page 10
, the Red and White audio cable connections are required (refer to the section titled "For better Audio Quality".) 2. Connecting to a TV via COMPONENT out Connecting to a TV with component jacks Use COMPONENT cables (not supplied) to connect the COMPONENT output on the unit to the COMPONENT input on - Philips DVDR520H | User manual - Page 11
input on a stereo amplifier or a receiver. Connecting to a digital audio device Connect an amplifier with Dolby Digital and DTS decoders to enjoy surround sound. Digital out optical Use a fiber-optic cable (not supplied) to connect the DIGITAL OUT OPTICAL (digital optical output) on the unit to the - Philips DVDR520H | User manual - Page 12
Connecting the cable box/satellite box and television Before using the unit, follow the steps below to connect the unit to the cable box and TV. Connecting to a satellite box or a cable box with COMPOSITE jacks Use AUDIO/VIDEO cables to connect the AUDIO/VIDEO output of the unit to the - Philips DVDR520H | User manual - Page 13
SYSTEM MENU Remote Control & System menu Follow the steps below to reset personal preferences for using the DVD recorder. Confirm that all TV, you may lose the video signal on your TV instantly. To get the picture back, press [u] and the numbered buttons "5," "0," "2" and "0" on the remote control - Philips DVDR520H | User manual - Page 14
of this DVD Recorder , the scan will be discontinued. The maximum receivable channel numbers are: Antenna: 68 (chs) Cable: 125 (chs) Auto: 125 (chs) Fine-tuning TV channels manually After you have performed the channel scanning, you may like to fine-tune the TV channel signal manually. Follow the - Philips DVDR520H | User manual - Page 15
you press [p] [q] and the item changes as follows: Swapping TV channels This function allows you to manually swap the TV channel order stored in the unit to match the TV channel order stored in your TV set. 1. Press [p] [q] to select a TV Channel and press [u]. 2. Press [p] [q] to select "Swap with - Philips DVDR520H | User manual - Page 16
TV channels. This function allows turning on the channel not found at channel scanning or turning off the channel found manually. 1. Press [p] [q] to select a TV Guide Channel Number (GCN) on this recorder. (check with your local provider for TV ] button to set TV as the input signal source. 2. Press - Philips DVDR520H | User manual - Page 17
GUIDE MENU: PLAYBACK Guide menu is an unique user interface to guide you through basic functions of this recorder. By using the Guide menu, it is less time-consuming to operate this system. Users no longer need to go through normal operations that may require far more steps and different interfaces. - Philips DVDR520H | User manual - Page 18
the Guide menu. 2. Press [p] [q] to select "Playback" and then press [ENTER]. 3. Press [p] [q] to select HDD and press [OK]. 4. Press [p] [q] to select "Last Record" and press [OK]. Playback of the title last recorded on your HDD will begin. 3. Press [p] [q] to select the Signal- Input ( TV, AV1 - Philips DVDR520H | User manual - Page 19
on DVD 1. Press [ GUIDE] to display the Guide menu. 2. Press [p] [q] to select "Record" and then press [OK]. Timer Record (Date/Time Setting) 1. Press [ GUIDE] to display the Guide menu. 2. Press [p] [q] to select "Timer Record" and then press [OK]. 3. Press [p] [q] to select the Signal-Input (TV - Philips DVDR520H | User manual - Page 20
Record function. Timer Record (VCR Plus+ Setting) 1. Press [ GUIDE] to display the Guide menu. 2. Press [p] [q] to select "Timer Record" and then press [OK]. 3. Press [p] [q] to select "VCR Plus+ Setting" and press [OK]. Note: For Timer Record, there are seven recording modes for recording on DVD - Philips DVDR520H | User manual - Page 21
and press [OK]. 10.Press [u] and [ OK] to exit the timer record settings for VCR Plus+® . 11. Press [ STANDBY] to turn the recorder off to activate Timer Record function. Copy (From HDD to DVD) 1. Press [ GUIDE] to display the Guide menu. 2. Press [p] [q] to select "Copy" and press [OK]. Note: You - Philips DVDR520H | User manual - Page 22
[ STOP] , it may take a few moments for recording to stop and the session to close. To pause recording Press [ PAUSE] to pause recording, and press [ PAUSE] again to resume recording. 3. Press [SOURCE] and press [p] [q] to select "TV" as the signal-input source. 4. Press [ CH +] [ CH - ] or press - Philips DVDR520H | User manual - Page 23
add chapter mark(s) in the recorded session manually. 2. You can also start recording using the "Guide Menu." Press [ GUIDE], select "RECORD" and press [OK]. Follow the steps to set the recording mode. 3. Before you start, please ensure that the DVD disc or hard disk has enough available space for - Philips DVDR520H | User manual - Page 24
VCR. Examples of use include archiving videotapes or transferring from a Video Cassette Recorder or Camcorder to a recordable DVD disc or hard disk drive. This DVD recorder allows basic DV control with the DVD Recorder's remote control when connected via the DV Link. The front panel and rear panel - Philips DVDR520H | User manual - Page 25
. Simply move the screen cursor to the desired function on the DV input screen and press [OK] on the remote control. Use "Guide Menu" to record DV signal 1. Power on your TV and this DVD recorder. 2. Connect the DV cable (IEEE-1394 4-pin to 4-pin cable) to both the DV Camcorder and the DVDRecorder - Philips DVDR520H | User manual - Page 26
"Signal-Input source" and select "DV." 7. Resume DV Camcorder playback and press [RECORD] on the DVD Recorder to start recording. DV control After recording is stopped, a DV control bar will appear on the screen. This allows basic DV control utilizing this DVD recorder's remote control. 1. Press - Philips DVDR520H | User manual - Page 27
record Please ensure that the recordable DVD disc or the HDD has enough available space for the Timer Record function. Before you start to record, follow the steps to set the date, time, picture quality and channel of the program or input source manually select the "Source (Signal Source)," and then - Philips DVDR520H | User manual - Page 28
Record function is active, the "Timer LED" on the DVD Recorder front panel will illuminate. 2. The DVD recorder must be turned off to activate the Timer Record the timer record item and go back to the Timer Record list. Press [p] [q] [t] [u] to [RESET] if you want to reset the timer record item. 12 - Philips DVDR520H | User manual - Page 29
" is set as the target device, press [ OPEN/CLOSE] to open the disc tray and insert a recordable DVD disc. 7. Press [t] [u] [p][q] to select the "Quality (Recording Quality)," and then press [OK] to bring up the list. Press [p] [q] [t] [u] and [OK] to make your selection. Press [t] [u] to re-select - Philips DVDR520H | User manual - Page 30
CH+] [CH-] buttons on the recorder's remote control to select the desired channel. Since the TV's video input is set to be the recorder, channel selection HAS to be made with the recorder's remote control. To turn the audio volume up and down, use the TV's remote control. 4. When you choose to leave - Philips DVDR520H | User manual - Page 31
the correct settings, you are now ready to use the DVD recorder to enjoy DVDs, Video CDs, and CDs. Basic playback Turn on the television MENU ] to display the thumbnail icons menu on the TV screen. Press Press [ DISC MENU ] to return to the DVD's title or disc root menu for the current title during - Philips DVDR520H | User manual - Page 32
repeatedly to choose a repeat option. Depending on the type of Disc, you may choose to play the Track, Title, file or Note: Disc repeatedly. For DVD, the repeat options are: repeat one repeat off For VCD and SVCD, the repeat options are: repeat one repeat all repeat off For CDDA - Philips DVDR520H | User manual - Page 33
unit can play video titles recorded on the HDD or the recordable DVD disc. Playing back video title 1. Place a disc with recorded video titles on the tray or make sure that the video titles are saved on the HDD. 2. Press the [HDD/DVD] button to select HDD or DVD. 3. Press the [BROWSER] button and - Philips DVDR520H | User manual - Page 34
residing on the HDD can be played from the hard disk. 2. Press the [HDD/DVD] button to select HDD or DVD. 3. Press the [BROWSER] button on the list , 2. The unit cannot support ID3 tag. 3. The unit does not support MP3-Pro or WMA files. 4. The unit supports discs recorded with multiple sessions. 5. - Philips DVDR520H | User manual - Page 35
saved onto the HDD. The saved audio and music files can be played from the hard disk. 2. Press [ GUIDE] for the Guide Menu. 3. Press [p] [q] to go to the "PLAYBACK" icon and press [OK]. 4. Press [p] [q] to select HDD or DVD to play the files from and press [OK]. Note: Music and picture files can be - Philips DVDR520H | User manual - Page 36
is then copied to your HDD. Copying from HDD to DVD 1. Press [ STANDBY] to turn the unit and your TV on. 2. Press [ OPEN/CLOSE ] to open the disc tray and place a recordable DVD disc with the label side up. Make sure to insert a recordable DVD disc. Press the button again to close the tray. When - Philips DVDR520H | User manual - Page 37
protect the recorded title(s) on a DVD+R disc if the disc is finalized. Overwriting a title (DVD only) 1. Press [HDD/DVD] to select the "DVD." 2. delete characters. 4. Use [t] [u] [p] [q] and [OK] on the remote control to select desired characters. 5. When you finish entering the title, press [t] - Philips DVDR520H | User manual - Page 38
exit the setting. Note: You can NOT erase recorded title(s) on a DVD+R disc if the disc is finalized. Setting a title thumbnail (HDD and DVD) Normally the first picture of a recording is used as the index picture. However, press [p] [q] to select "EXIT" and then press [OK] to exit the setting. 37 - Philips DVDR520H | User manual - Page 39
title you want to edit, and then press [EDIT] to go to the edit screen. Note: You can NOT set the thumbnail for the recorded title(s) on a DVD+R disc if the disc is finalized. Inserting chapter mark During playback you can set and erase chapter mark(s) within a title. 1. Press [BROWSER] to display - Philips DVDR520H | User manual - Page 40
Or press [p] [q] to select "EXIT" and then press [OK] to exit the setting. Note: Note: 1. You can NOT hide chapters within recorded title(s) on a DVD+R disc if the disc is finalized. 2. This function is not applicable to titles without chapter marks. 3. After performing this function, the chapters - Philips DVDR520H | User manual - Page 41
+R disc: Finalizing is necessary when you want to play discs recorded with this unit on other DVD players or PCs with a DVD drive. Once the disc has been finalized, you can not add recording(s) to it or edit it. Notes: For DVD+RW discs, finalizing is NOT required. 1.Press [Disk Tools] to display the - Philips DVDR520H | User manual - Page 42
DISK TOOLS CleanUp Disk (HDD only) 1. Press [Disk Tools] to display the "Disk Tools Menu." 2. Press [p] [q] to select the "CleanUp Disk," and then press [OK]. Defragment (HDD only) The "Defragment"process reorganizes the contents of the HDD creating continuous blocks of available space. 1. Press [ - Philips DVDR520H | User manual - Page 43
GUI OPERATION System Video Output Switch video output signal. Component (default) Progressive Clock Format Select playing back. 16:9 Wide 4:3 Pan 4:3 L.Box Parental Set content control for supported DVD. Set Level (Off , 1~8 ) The parental control levels are: 1: Kid Safe 2: G 4: PG-13 5: PG-R - Philips DVDR520H | User manual - Page 44
of chapter auto-insertion while recording. Off 5/10/15/20/25/30 mins (Default: 5mins) TV Tuner TV Signal ---> Antenna or Cable or channel frequency manually) 1) Press [SYSTEM MENU] to display the system menu. 2) Press [p] [q] to select "System," "Language," "Playback," "Record," "Audio," "TV Tuner" - Philips DVDR520H | User manual - Page 45
rate, 50 Hz field frequency. PBC Playback Control. A special feature on a Video CD or Super VCD that enables interactive use. S-Video A video signal which improves picture quality over standard composite connections. Used on Super VHS, DVD, high end TV monitors, etc. Track SVCD, VCD, Audio CD - Philips DVDR520H | User manual - Page 46
recognizable : 9999 files 7) BMP Maximum number of pictures recognizable : 9999 files RECORDABLE MEDIA SUPPORTED: 1) DVD+R ( DVD+VR Mode ) 2) DVD+RW ( DVD+VR Mode ) 3) Bulit-in 80GB HDD (DVD+VR mode) VIDEO RECORDING MODE Mode DVD M1 1hr M2 2hrs M2x 2.5hrs M3 3hrs M4 4hrs M6 6hrs - Philips DVDR520H | User manual - Page 47
-
 1
1 -
 2
2 -
 3
3 -
 4
4 -
 5
5 -
 6
6 -
 7
7 -
8
-
9
-
10
-
11
-
12
-
13
-
14
-
15
-
16
-
17
-
18
-
19
-
20
-
21
-
22
-
23
-
24
-
25
-
26
-
27
-
28
-
29
-
30
-
31
-
32
-
33
-
34
-
35
-
36
-
37
-
38
-
39
-
40
-
41
-
42
-
43
-
44
-
45
-
46
-
47
 |
 |

Thank you for choosing Philips.
Need help fast?
Read your Quick-Use Guide and/or Owner's Manual first for quick
tips that make using your Philips product more enjoyable.
If you have read your instructions and still need assistance,
you may access our online help at www.p4c.philips.com
or call 1-800-531-0039 while with your product.