Philips FWM70 User manual - Page 22
Tape Operation/Recording
 |
View all Philips FWM70 manuals
Add to My Manuals
Save this manual to your list of manuals |
Page 22 highlights
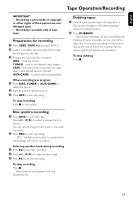
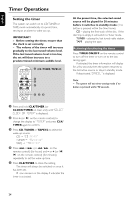
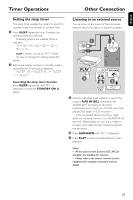
English Tape Operation/Recording IMPORTANT! - Before playing a tape, check and tighten slack tape with a pencil. Slack tape may get jammed or may burst in the mechanism. - Store tapes at room temperature and do not put them too close to a magnetic field (for example, a transformer, TV set or speaker). Tape playback 1 Press 5 to open the tape deck door. 2 Insert a recorded tape and close the tape door. ● Load the tape with the open side down and the full spool to the left. Rewinding or forwarding fast when playback is stopped 1 Press and hold 4 or ¢ on the front panel (or press 1 or ¡ on the remote control). 2 Press 7 when you reach the desired passage. General information on recording ● If you don't intend to record via the microphone, unplug it to avoid unwanted recording source. ● For recording, only use tape of IEC type I(normal tape). ● The recording level is set automatically, regardless of the position of the Volume,Vocal, Key control and so forth. ● The type is secured at both ends with leader tape. At the beginning and end of the tape, nothing will be recorded for seven seconds. ● To prevent accidental recording, break out the tab on the left shoulder of the tape side you want to protect. 3 Press TAPE or TAPE1/2 on the remote control repeatedly to select tape deck 1 or tape deck 2. ➜ The selected tape deck number is displayed. 4 Press 38 to start playback. Stopping playback ● Press 7. Changing the playback mode ● Press AUTO REPLAY repeatedly to select: ONCE, AUTO REPLAY. The default setting is AUTO REPLAY. AUTO REPLAY ... the tape will rewind automatically at the end of playback and replay. It will replay up to max. 10 times or until you press 9. ONCE the selected side will be played once. ● Press REC in Tuner, Disc or AUX mode, press REC, and "CHECK TAPE" will scroll on the display if there is no recordable tape in tape deck 2. 22
-
 1
1 -
2
-
3
-
4
-
5
-
6
-
7
-
8
-
9
-
10
-
11
-
12
-
13
-
14
-
15
-
16
-
 17
17 -
 18
18 -
 19
19 -
 20
20 -
 21
21 -
 22
22 -
 23
23 -
 24
24 -
 25
25 -
 26
26 -
 27
27 -
28
 |
 |
