Philips FWP900 User manual - Page 28
Clock/Timer
 |
View all Philips FWP900 manuals
Add to My Manuals
Save this manual to your list of manuals |
Page 28 highlights
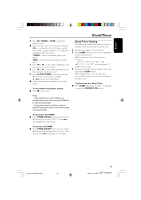
English Clock/Timer STANDBY-ON MINI HIFI SYSTEM ECO POWER IR SENSOR VEC C BASS/TREBLE CD 1•2•3 FM•AM TAPE 1•2 CDR/DVD C1C•D2 • 3 SEARCH•TUNING BTAUNNDER TAPE DEMO STOP STOP•CLEAR PLAY PAUSE L ACUDRX PRESET L PREV SIDE NEXT PROG CLOCK/ TIMER DIM AUTO REVERSE DUB (HSD) RECORD PERSONAL DS JOG CONTROL BASS DYNAMIC BASS BOOST TREBLE LEFT CENTER RIGHT SURR SURR PRO LOGIC VOLUME TV/AV 2 CD 123 TUNER TAPE 1/2 AUX/CDR 1 23 4 56 7 CLOCK 89 AUTO REV. 0 VOLUME ÉÅ í ë TV VOL Ç TV VOL à á REPEAT DIM SHUFFLE DPL TEST TONE BALANCE L R CENTER -+ REAR -+ PER DSC VEC TIMER ON/OFF SLEEP MUTE BTC DBB View Clock The clock (if it is set) will be shown in Standby mode. To view the clock in any source mode (CD or TUNER for example) G Press CLOCK/TIMER briefly (or CLOCK on the remote control). ➜ The clock will be displayed for a few seconds. ➜ If the clock has not been set, "--:--" will be displayed. Note: - When in Eco Power Standby mode, the clock will not be displayed. Clock Setting The clock can be set in either 12-hour or 24-hour mode ("AM 12:00" or "00:00" for example) 1 Press CLOCK/TIMER twice. 2 Press PROG on the system repeatedly to select clock mode. ➜ If 12-hour mode is selected, "AM 12:00" will start flashing. ➜ If 24-hour mode is selected, "00:00" will start flashing. 3 Press à or á on the system repeatedly to set the hour. 4 Press í or ë on the system repeatedly to set the minute. 5 Press CLOCK/TIMER again to store the setting. ➜ The clock will start working. To exit without storing the setting G Press Çon the system. Notes: - The clock settings will be cancelled when the power cord is disconnected or if a power failure occurs. - When in Eco Power Standby mode, the clock/ timer function will not operate. - During clock setting, if no button is pressed within 90 seconds, the system will exit clock setting mode automatically. Timer Setting The system can switch on to CD,TUNER, or TAPE 2 mode automatically at a preset time and it can serve as an alarm to wake you up. IMPORTANT! - Before setting the timer, ensure that the clock is set correctly. - The timer will always be switched on after it has been set. - The timer will not start if a recording is in progress. - The volume of the timer will increase from the minimum level until the last tuned volume level is reached. 1 Press and hold CLOCK/TIMER for more than two seconds to select timer mode. ➜ "AM 12:00" or "00:00" or the last timer setting will start flashing. ➜ TIMER will start flashing. ➜ The selected source will be lighted while other available sources are flashing. 28 pg 001-033/P900/37-Eng 28 12/8/00, 1:53 PM 3139 115 20411
-
 1
1 -
2
-
3
-
4
-
5
-
6
-
7
-
8
-
9
-
10
-
11
-
12
-
13
-
14
-
15
-
16
-
17
-
18
-
19
-
20
-
21
-
22
-
 23
23 -
 24
24 -
 25
25 -
 26
26 -
 27
27 -
 28
28 -
 29
29 -
 30
30 -
 31
31 -
 32
32 -
 33
33
 |
 |
