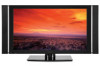
Pioneer PRO-930HD Owner's Manual
Pioneer PRO-930HD Manual
 |
View all Pioneer PRO-930HD manuals
Add to My Manuals
Save this manual to your list of manuals |
Pioneer PRO-930HD manual content summary:
- Pioneer PRO-930HD | Owner's Manual - Page 1
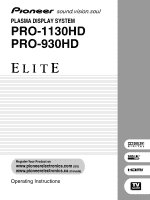
PLASMA DISPLAY SYSTEM PRO-1130HD PRO-930HD Register Your Product on www.pioneerelectronics.com (US) www.pioneerelectronics.ca (Canada) Operating Instructions - Pioneer PRO-930HD | Owner's Manual - Page 2
card provided by your cable operator is required to view encrypted digital programming. Certain advanced and interactive digital cable services such as video-ondemand, a cable operator's enhanced program guide and data-enhanced television services may require the use of a set-top box. For more - Pioneer PRO-930HD | Owner's Manual - Page 3
operation. Product Name: Plasma Display System (Plasma Display) (Media Receiver) Model Number: PRO-1130HD PRO-930HD (PRO-506PU) (PRO-436PU) (PRO-R06U) (PRO-R06U) Product Category: Class B Personal Computers & Peripherals Responsible Party Name: PIONEER ELECTRONICS SERVICE, INC. Address: 1925 - Pioneer PRO-930HD | Owner's Manual - Page 4
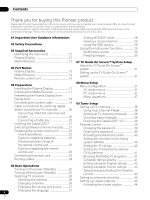
POD service 29 Using the multiscreen functions 29 Splitting the screen 29 Freezing images 30 07 TV Guide On Screen™ System Setup About the TV Guide On Screen™ system 31 Setting up the TV Guide On Screen™ system 31 05 Preparation Installing the Plasma Display 17 Installing the Media Receiver - Pioneer PRO-930HD | Owner's Manual - Page 5
mode only 64 10 TV Guide On Screen™ System Operation Using the TV Guide On Screen™ system 46 Screen components 46 TV Guide On Screen™ icons 46 TV Guide On Screen™ navigation ....... 47 The Listings screen 47 Recording programs 48 Setting program reminders 50 Manual image position and clock - Pioneer PRO-930HD | Owner's Manual - Page 6
a D-VHS image 73 Useful and important notification ........73 Setting up for controlling a D-VHS recorder 74 Editing the i.LINK 84 Receiver control buttons 84 Cable control buttons 85 SAT control buttons 86 VCR control buttons 87 DVD/DVR control buttons 88 14 Appendix Troubleshooting - Pioneer PRO-930HD | Owner's Manual - Page 7
lifetime, the luminosity of the Pioneer PRO-1130HD/PRO-930HD Plasma Display System will diminish very slowly, such as with all phosphor-based screens (for example, a traditional tube-type television). To enjoy beautiful and bright images on your Pioneer Plasma Display System for many years to come - Pioneer PRO-930HD | Owner's Manual - Page 8
Guidance Information CAUTION PIONEER bears no responsibility for any damage arising from incorrect use of the product by you or other people, malfunctions when in use, other product related problems, and use of the product except in cases where the company must be liable. Plasma Display protection - Pioneer PRO-930HD | Owner's Manual - Page 9
you switch between television and an not indicate a problem with your Plasma Display system. CAUTION Panel set to help prevent damage from screen burning (see page 63). About operations through i.LINK PIONEER shall not always assure normal video/audio THE MANUFACTURER'S INSTRUCTIONS WHEN INSTALLING - Pioneer PRO-930HD | Owner's Manual - Page 10
ensure your safety and prolong the service life of your product, please read the following precautions carefully before using the product. 1. Read instructions-All operating instructions must be read and understood before the product is operated. 2. Keep this manual in a safe place-These safety and - Pioneer PRO-930HD | Owner's Manual - Page 11
see the instruction manual that comes Plasma Display Mounting bracket (or equivalent item) M8 screw 12 to 18 mm (0.5 to 0.7 inches) SYSTEM CABLE Plasma Display to or from the stand, with speakers attached. NOTE • It is strongly recommended to use the optional PIONEER mounting products. • PIONEER - Pioneer PRO-930HD | Owner's Manual - Page 12
table to check that you have received the correct Media Receiver and Plasma Receiver models. Model Name of the Entire Plasma Display System PRO-1130HD PRO-930HD Model Name of the Main Unit Media Receiver Plasma Display PRO-R06U PRO-506PU PRO-436PU The speakers are available as options - Pioneer PRO-930HD | Owner's Manual - Page 13
mode. (page 25) 3 POWER ON indicator Lights blue when the Plasma Display is operating. (page 25) 4 Remote control sensor 4 5 SYSTEM CABLE WHITE BLACK SYSTEM CABLE WHITE BLACK 6 5 SPEAKER (R/L) terminals 6 SYSTEM CABLE terminal (BLACK) 7 8 7 SYSTEM CABLE terminal (WHITE) 8 AC IN terminal 13 En - Pioneer PRO-930HD | Owner's Manual - Page 14
Media Receiver Front view 123 STANDBY/ON REC ON STANDBY TIMER PULL OPEN Pull this section to open the door. STANDBY/ON REC ON STANDBY TIMER TV GUIDE PC terminals (AUDIO) 15 PC INPUT terminal (ANALOG RGB) The buttons with asterisks (*) can operate the TV Guide On Screen™ system. 14 En - Pioneer PRO-930HD | Owner's Manual - Page 15
A IN INPUT 2 G-LINK INPUT 3 S400 (TS) R-AUDIO-L OPTICAL DIGITAL OUT SUB WOOFER Cable CARD I N OUT CONTROL ANT B IN SERVICE ONLY R-AUDIO-L VIDEO S-VIDEO INPUT 1 Y CB / PB COMPONENT VIDEO CR / PR INPUT 1 INPUT 3 HDMI BLACK WHITE SYSTEM CABLE AC IN 17 9 10 11 12 13 14 1516 18 19 - Pioneer PRO-930HD | Owner's Manual - Page 16
Menu screen. 24 ENTER: Executes a command. 25 TV GUIDE: Displays the TV Guide On Screen™ system. 26 DAY +/-: Jumps to the next or previous day of program listings in the TV Guide On Screen™ Listing 1 TV a: Turns on the power to the Plasma Display or service. places it into standby mode. 27 - Pioneer PRO-930HD | Owner's Manual - Page 17
Preparation Preparation Installing the Plasma Display 05 Installing the Media Receiver Plasma Display Over 50 cm (19 11/16 inches) Over 10 cm (3 15/16 inches) Media Receiver STANDBY/ON REC ON STANDBY TIMER PULL OPEN System cable (approx. 3 m/9.8 feet) Location • Avoid direct sunlight. - Pioneer PRO-930HD | Owner's Manual - Page 18
A table or an area of the floor with adequate strength should always be used to support the Plasma Display. Failure to do so could result in personal injury and physical damage. When installing the Plasma Display, please take the necessary safety measures to prevent it from falling or overturning in - Pioneer PRO-930HD | Owner's Manual - Page 19
the instruction manual that came with the speaker. (WHITE) Connecting the system cable to the Media Receiver Media Receiver (rear view) MONITOR OUT ANT/ CABLE A IN INPUT 2 G-LINK INPUT 3 S400 (TS) R-AUDIO-L OPTICAL DIGITAL OUT SUB WOOFER Cable CARD I N OUT CONTROL ANT B IN SERVICE ONLY - Pioneer PRO-930HD | Owner's Manual - Page 20
OUT CONTROL ANT B IN SERVICE ONLY R-AUDIO-L VIDEO S-VIDEO INPUT 1 COM V Connecting VHF/UHF antennas and a Cable VHF antenna UHF antenna U/Vmixer AV cable (commercially available) Cable TV Coaxial ANT B IN ANT/ CABLE A IN Media Receiver (rear) Cable TV Coaxial Cable box NOTE • You can - Pioneer PRO-930HD | Owner's Manual - Page 21
Preparation 05 Inserting the CableCARD™ The Media Receiver is equipped with a slot for inserting a CableCARD™. When you are watching digital and/or High Definition TV channels over cable, the card allows you to use the POD service provided by the cable TV company; the POD stands for Point of - Pioneer PRO-930HD | Owner's Manual - Page 22
is the case, place that equipment at a location far enough from the Plasma Display. • Depending on the installation environment, infrared rays from the Plasma Display may not allow this system to properly receive commands from the remote control unit or may shorten allowable distances between the - Pioneer PRO-930HD | Owner's Manual - Page 23
been completed. Plasma Display (rear view) SYSTEM CABLE WHITE BLACK SYSTEM CABLE WHITE BLACK Power cord Noise filter Partially eliminates noise caused by the power source. Media Receiver (rear view) MONITOR OUT ANT/ CABLE A IN INPUT 2 G-LINK INPUT 3 S400 (TS) R-AUDIO-L OPTICAL DIGITAL OUT - Pioneer PRO-930HD | Owner's Manual - Page 24
Attach the speed clamps using the 2 holes marked with below, depending on your routing system. SYSTEM CABLE WHITE BLACK Attaching and removing speed clamps Insert [1] into an appropriate hole on the rear of the Plasma Display and snap [2] into the back of [1] to lock the clamp. Speed clamps are - Pioneer PRO-930HD | Owner's Manual - Page 25
red, and then press TV a on the remote control unit or STANDBY/ ON on the Media Receiver to turn the system on. • The POWER ON indicators on the Plasma Display and Media Receiver light up blue. NOTE • In this manual, "system" means the Plasma Display Panel and Media Receiver. Plasma Display STANDBY - Pioneer PRO-930HD | Owner's Manual - Page 26
the channel banner, press INFO. • If you do not setup the TV Guide On Screen™ system, the channel banner may not display certain types of program information. Media Receiver (front view) STANDBY/ON REC ON STANDBY TIMER TV GUIDE ENTER DOWN UP LEFT RIGHT INPUT DOWN UP VOLUME DOWN UP - Pioneer PRO-930HD | Owner's Manual - Page 27
the language If you have selected a digital TV program that provides multilanguage services, you can switch among the languages by pressing MTS on the remote control unit. Media Receiver (front view) STANDBY/ON REC ON STANDBY TIMER TV GUIDE ENTER DOWN UP LEFT RIGHT INPUT DOWN UP - Pioneer PRO-930HD | Owner's Manual - Page 28
VHF/ UHF frequencies or conventional cable TV channels. • When stereo sound is difficult to hear, you may manually switch to the MONO mode to obtain clearer sound. • Once the MONO mode is selected, the Plasma Display System sound remains mono even if the system receives a stereo broadcast. You must - Pioneer PRO-930HD | Owner's Manual - Page 29
setup the TV Guide On Screen™ system, the channel banner may not display certain types of program information. Using the POD service If you have watched digital and/or High Definition TV channels over cable, you can use the POD service provided by the cable TV company. This service presents various - Pioneer PRO-930HD | Owner's Manual - Page 30
the desired input source, press the appropriate input source button. • If watching TV programs, press CH +/- to change the channel. NOTE • The SPLIT button is disabled while the TV Guide On Screen™ system is displayed. • The multiscreen function cannot display images from the same input source - Pioneer PRO-930HD | Owner's Manual - Page 31
may take up to one week (see Screen 14). • If you connect a cable box through the TV Guide On Screen™ system you should leave the cable box On and the TV Off in order to receive updated TV program listings (see Screen 23). Welcome Screen Initial TV set up leads you to the Welcome screen. Or press - Pioneer PRO-930HD | Owner's Manual - Page 32
another field. • Press ENTER to display Screen 3. NOTE If you decide not to set up the Guide now, this reminder screen will appear each time you power on the TV (except if you selected "Don't remind me again"). System Setup Screens NOTE • Once you start the setup procedure, you cannot return to the - Pioneer PRO-930HD | Owner's Manual - Page 33
TV Guide On Screen™ System Setup 07 Screen 3: Do you have Cable? • If you select "Yes", you see Screen 4. • If you select "No", you see Screen 12. Screen 6: Cable Box Output Channel • Select the channel used for the cable box. • Press ENTER to display Screen 7. Screen 4: Do you have a Cable Box? - Pioneer PRO-930HD | Owner's Manual - Page 34
07 TV Guide On Screen™ System Setup Screen 9: Cable Box Preparation • Follow the on-screen instructions, and press ENTER to display Screen 10. Screen 12: Do you have an antenna connected? • If you select "Yes", you see Screen 13. Screen 10: Cable Box Code Testing • When testing is done, Screen 11 - Pioneer PRO-930HD | Owner's Manual - Page 35
TV Guide On Screen™ System Setup 07 Screen 15: Is a VCR Connected? • If you select "Yes", you see Screen 16. • If you select "No", you see Screen 21. Screen 18: VCR Preparation • Follow the on-screen instructions cable from the back of the device to the recording device. Make sure the G-LINK cable - Pioneer PRO-930HD | Owner's Manual - Page 36
07 TV Guide On Screen™ System Setup Screen 20: Did your VCR stop playing? Screen 21: Confirming Your Settings Verify the Setup information is correct. • If it is, select "Yes, Helpful Information • This screen tells you valuable information on using your Guide. • Press ENTER to watch TV. 36 En - Pioneer PRO-930HD | Owner's Manual - Page 37
Selection Contrast Brightness Color Tint Sharpness Pro Adjust Reset Sound Treble Bass Mode Side Mask HDMI Input Monitor Out Digital Audio Out Language Tuner Setup Parental Control Favorites Channel Manual Setup 65 Menu operations The following describes the typical procedure for setting - Pioneer PRO-930HD | Owner's Manual - Page 38
strength as possible. 6 Press HOME MENU to exit the menu. NOTE • This function is available only when receiving digital broadcasting signals over air. • When you use the TV Guide On Screen™ system with a cable service, select "Cable" for "Auto Channel Preset". • Executing more than one scan for - Pioneer PRO-930HD | Owner's Manual - Page 39
television. For the rating system in Canada, see pages 41 and 42. NOTE • In the U.S. TV Parental Guideline Rating System Service Announcements • Religious • Sports • Weather Voluntary movie rating system changing Parental Control settings. A default password (1234) has been set before shipment. Use - Pioneer PRO-930HD | Owner's Manual - Page 40
6 Press HOME MENU to exit the menu. Setting the voluntary movie rating system (MPAA) 1 Press HOME MENU. 2 Select setting. ( / then ENTER) Parental Control TV Ratings TV Ratings TV-None TV-Y TV-Y7 TV-G TV-PG Blocked TV so you don't forget it. PRO-1130HD/PRO-930HD Your password No.: If you - Pioneer PRO-930HD | Owner's Manual - Page 41
TV Parental Guidelines". ( / then ENTER) 5 Select the desired rating and change the setting. ( / then ENTER) Parental Control TV Parental Guidelines TV MENU to exit the menu. Canadian rating systems In Canada you can choose the Canadian English Canadian Radio-Television and Telecommunications - Pioneer PRO-930HD | Owner's Manual - Page 42
4-digit password using buttons 0 - 9. • Each time you press ENTER, the setting is switched. • A lock icon appears beside the blocked rating. • All the 4-digit password using buttons 0 - 9. • Each time you press ENTER, the setting is switched. • A lock icon appears beside the blocked rating. • All the - Pioneer PRO-930HD | Owner's Manual - Page 43
under the same color button, repeat step 5. To register another TV channel under a different color button, repeat steps 4 and 5. 6 Press HOME MENU to exit the menu. Setting up closed captions Your Plasma Display System is equipped with an internal closed caption decoder. Closed caption allows - Pioneer PRO-930HD | Owner's Manual - Page 44
guide, weather) that is independent of the TV program in progress. 1 Press HOME MENU. 2 Select "Tuner Setup". ( / then ENTER) 3 Select "Closed Captions". ( / then ENTER) 4 Select "Analog Settings". ( / then ENTER) 5 Select the desired closed caption. ( / then ENTER) Closed Captions Analog Settings - Pioneer PRO-930HD | Owner's Manual - Page 45
Set Auto/Manual Set •Manual Set Date and Time 3 4 3 /17/04 11:58pm 5 6 Current Time: 11:58 pm PDT Monday 05/17/04 xxxxxxxxxxxxxxxxxxxxx xxxxxxxxxxxxxxxxxxxxx xxxxxxxxxxxxxxxxxxxxx Home Menu Exit 11 Press HOME MENU to exit the menu. NOTE • If you setup the TV Guide On Screen™ system, the Plasma - Pioneer PRO-930HD | Owner's Manual - Page 46
program guide provides listings for cable-ready, cable box, and digital cable services as well as over-the-air broadcast. It does not provide listings for satellite services. • Once you set up the TV Guide On Screen™ system it may take up to 24 hours to begin to receive TV program listings - Pioneer PRO-930HD | Owner's Manual - Page 47
, and LEFT/ RIGHT buttons on the Media Receiver. The UP/DOWN and LEFT/RIGHT buttons operate the same as the / and / buttons on the remote control unit. The Listings screen You can consider the Listings screen as the "home" screen of the TV Guide On Screen™ system. This is the screen you see when - Pioneer PRO-930HD | Owner's Manual - Page 48
10 TV Guide On Screen™ System Operation • No record icon - Don't set a recording. 1 The program will still be recorded if it starts any time up to the midway point of the originally scheduled program. For example, up to 9:15 for a 9:00 to 9:30 program. Note that setting a program to record in this - Pioneer PRO-930HD | Owner's Manual - Page 49
Channel Now D Don't Change Channel REC Recording In Progress PLASMA DISPLAY Changing channels will interrupt a recording in progress. and to continue recording. When the recording is about to start The TV Guide On Screen™ system alerts you when a scheduled recording is about to start and gives - Pioneer PRO-930HD | Owner's Manual - Page 50
TV Guide On Screen™ System Operation Setting program reminders By setting a program reminder you can have the TV alert you when a program is about to start on another channel. You can set . If more than one reminder is set for the same time, select the 50 program you want by pressing / . En - Pioneer PRO-930HD | Owner's Manual - Page 51
TV Guide On Screen™ System the Service bar at the top of the screen. When scheduled reminder is about to progress (auto-tune is ON) If the "auto-tune" setting was set search category bar, then press / to select a search category. Timer Alert PLASMA DISPLAY Wed. 1/5 4 : 06am- 9 : 08am Ant. A 1000. - Pioneer PRO-930HD | Owner's Manual - Page 52
10 TV Guide On Screen™ System Operation 3 Press to move to the search sub-categories and select the sub-category you want. Searching by keyword Here you search for shows based - Pioneer PRO-930HD | Owner's Manual - Page 53
TV Guide On Screen™ System Operation 10 4 Select "new search". 5 If you want to change the category, move up and select the category you want. Alphabetical search This search is designed to display all programs that start with a particular letter. 1 Select "SEARCH" from the Service bar at the top - Pioneer PRO-930HD | Owner's Manual - Page 54
™ System Operation The search Episode Options menu From the Episode Options menu you can select: • go to Service bar - closes the panel menu and returns to the Service bar at the top of the screen. • tune to channel / watch now - exits the TV Guide On Screen™ guide and tunes to the channel. • set - Pioneer PRO-930HD | Owner's Manual - Page 55
TV Guide On Screen™ settings from the Setup menu. Setup options are divided into three categories: System Settings, Channel Display, and Default Options. 1 Select "SETUP" from the Service you can see the settings you can adjust in that area: • System Settings - ZIP/postal code, cable setup, etc. • - Pioneer PRO-930HD | Owner's Manual - Page 56
10 TV Guide On Screen™ System Operation 2 Press ENTER to display the current settings and the options to change them. 3 Press / to highlight a channel then press ENTER to go to the Grid Options menu. 3 Select one of the options, then follow the on-screen instructions. • Yes, everything is correct - Pioneer PRO-930HD | Owner's Manual - Page 57
TV Guide On Screen™ System Operation 10 Changing the Default Options This is the place to change the default settings for recordings, reminders and other general settings. 1 Select the "Change Default Options" item. 2 Select one of the three default option categories. A different panel menu - Pioneer PRO-930HD | Owner's Manual - Page 58
manual image quality adjustment. This selection is shared by the external input and TV input sources. For movies This selection is shared by the external input and TV shared by the external input and TV input sources. Allows you to customize settings as desired. You can set the mode for each input - Pioneer PRO-930HD | Owner's Manual - Page 59
Adjustments and Settings 11 Basic picture adjustments Adjust the picture to your preference for the chosen an item to be adjusted. ( / then ENTER) Picture AV Selection Contrast Brightness Color Tint Sharpness Pro Adjust Reset STANDARD 40 0 0 0 0 4 Select the desired level. ( / ) Contrast 40 - Pioneer PRO-930HD | Owner's Manual - Page 60
Settings Advanced picture adjustments The Plasma Display System provides various advanced functions for optimizing the picture quality. For details on these functions, see the tables. Using PureCinema 1 Press HOME MENU. 2 Select "Picture". ( / then ENTER) 3 Select "Pro tone Manual Color - Pioneer PRO-930HD | Owner's Manual - Page 61
Adjustments and Settings 11 6 Select the desired parameter. ( / then ENTER) CTI Using the Dynamic Range Expander (DRE) functions 1 Press HOME MENU. 2 Select "Picture". ( / then ENTER) 3 Select "Pro Adjust". ( / then ENTER) 4 Select "DRE". ( / then ENTER) 5 Select an item to be adjusted. ( / - Pioneer PRO-930HD | Owner's Manual - Page 62
Press HOME MENU. 2 Select "Picture". ( / then ENTER) 3 Select "Pro Adjust". ( / then ENTER) 4 Select "Others". ( / then ENTER) Optimum for video images 2 Standard setting 3 Optimum for still images 7 bass For stronger bass Decreases audio from the Decreases audio from the right speaker. left - Pioneer PRO-930HD | Owner's Manual - Page 63
other than VOL +/- and MUTING. This setting is not memorized by the system. 5 Press HOME MENU to exit the system is placed into the standby mode, a message appears every minute. • The system may not be placed into the standby mode when noise signals are present at the Media Receiver after a TV - Pioneer PRO-930HD | Owner's Manual - Page 64
signal is received again, the system is switched on. • The system is switched on again by pressing STANDBY/ON on the Media Receiver or TV on the / then ENTER) 3 Select "Auto Setup". ( / then ENTER) Option Auto Setup Manual Setup • Auto Setup starts. 4 Press HOME MENU to exit the menu. NOTE • When - Pioneer PRO-930HD | Owner's Manual - Page 65
Settings 11 Manual image position and clock adjustments (PC mode only) Usually you can easily adjust the positions and clock of images using Auto Setup. Use Manual received. PRO-1130HD) TV broadcasting, pressing SCREEN SIZE switches among FULL, ZOOM, WIDE, and 4:3. • If you watch High Definition TV - Pioneer PRO-930HD | Owner's Manual - Page 66
Settings AV mode 4:3 WIDE FULL CINEMA ZOOM PC mode except for XGA signals 4:3 Dot by Dot FULL PC mode for XGA signals 4:3 FULL2 FULL1 66 En Selecting a screen size automatically The Plasma Display automatically selects an appropriate screen size when video signals are received Manually - Pioneer PRO-930HD | Owner's Manual - Page 67
) masks. Auto Adjusts the brightness of the gray side masks according to the brightness of images. 5 Press HOME MENU to exit the menu. Language setting You can select a language to be used for on-screen display such as menus from among three languages: English, French, and Spanish. 1 Press HOME - Pioneer PRO-930HD | Owner's Manual - Page 68
when connecting a DVD player and other audiovisual equipment. MONITOR OUT ANT/ CABLE A IN INPUT 2 G-LINK INPUT 3 S400 (TS) R-AUDIO-L OPTICAL DIGITAL OUT SUB WOOFER Media Receiver (rear view) SERVICE ONLY R-AUDIO-L VIDEO S-VIDEO INPUT 1 Y CB / PB COMPONENT VIDEO CR / PR INPUT 1 HD - Pioneer PRO-930HD | Owner's Manual - Page 69
audio, the system supports the following: • Linear PCM (STEREO 2ch) • Sampling frequency: 32 kHz, 44.1 kHz, 48 kHz NOTE • PC signals are not supported. Connecting HDMI equipment Media Receiver (rear view) MONITOR OUT ANT/ CABLE A IN INPUT 2 G-LINK INPUT 3 S400 (TS) R-AUDIO-L OPTICAL setting - Pioneer PRO-930HD | Owner's Manual - Page 70
another audio signal type. • For the audio signal types to be specified, check the operation manual that came TV programs more easily by using the TV Guide On Screen™ system. Connect the supplied GLINK cable to the G-LINK terminal on the rear of the Media Receiver and then position the G-LINK cable - Pioneer PRO-930HD | Owner's Manual - Page 71
the digital audio output terminal (optical), you need to make settings depending on your AV receiver. For more information, see the instruction manual that came with the AV receiver. G-LINK cable (for presetting digital TV programs for recording) Connecting an AV receiver Media Receiver (rear view - Pioneer PRO-930HD | Owner's Manual - Page 72
recorder Media Receiver (rear view) MONITOR OUT ANT/ CABLE A IN INPUT 2 G-LINK INPUT 3 S400 (TS) R-AUDIO-L OPTICAL DIGITAL OUT SUB WOOFER Cable CARD NT B N SERVICE ONLY R-AUDIO-L VIDEO S-VIDEO INPUT 1 Y CB / PB COMPONENT VIDEO CR / PR INPUT 1 INPUT 3 HDMI BLACK SYSTEM CABL (Attach - Pioneer PRO-930HD | Owner's Manual - Page 73
on the remote control unit or press INPUT on the Media Receiver to select i.LINK. Useful and important notification Useful information • D-VHS recorders connected through i.LINK can play back digital TV programs recorded using this system. • D-VHS recorders connected through i.LINK can record only - Pioneer PRO-930HD | Owner's Manual - Page 74
the connected D-VHS recorder from the Plasma Display that shows the control panel screen. After making the connections, use the menu to specify the model of the D-VHS recorder to be operated. If you have 2 or more D-VHS recorders connected to the Media Receiver, you can operate a single device at - Pioneer PRO-930HD | Owner's Manual - Page 75
Media Receiver to select "PC". NOTE • The PC terminals cannot be used for audio-visual equipment. • The INPUT 4 AUDIO terminals are shared between the INPUT 4 and PC input sources. When audio has been supported for control, you cannot execute control. • If you have set up to use the TV Guide On - Pioneer PRO-930HD | Owner's Manual - Page 76
12 Enjoying through External Equipment Signal names for 15-pin mini D-sub connector Pin No. 1 2 3 4 5 6 7 8 9 10 11 12 13 14 15 543 21 10 9 8 7 6 15 14 13 12 11 (front view) Signal name R G B Not connected Not connected GND (ground) GND (ground) GND (ground) +5V GND (ground) Not connected SDA HD - Pioneer PRO-930HD | Owner's Manual - Page 77
connect the Media Receiver directly to other TV sets. Do not connect through a VCR. • Use only one wand on the G-LINK cable to control one device. G-LINK cable (supplied) Media Receiver (rear view) MONITOR OUT ANT/ CABLE A IN INPUT 2 G-LINK INPUT 3 S400 (TS) R-AUDIO-L OPTICAL DIGITAL OUT - Pioneer PRO-930HD | Owner's Manual - Page 78
IN SERVICE ONLY R-AUDIO-L VIDEO S-VIDEO INPUT 1 Y CB / PB COMPONENT VIDEO CR / PR INPUT 1 INPUT 3 HDMI BLACK WH SYSTEM CABLE I N OUT CONTROL CONTROL IN OUT About SR+ The CONTROL OUT terminal on the rear of the Media Receiver supports SR+, which allows linked operations with a PIONEER - Pioneer PRO-930HD | Owner's Manual - Page 79
as it goes. Front of the Media Receiver (with the front door opened) STANDBY/ON REC ON STANDBY TIMER TV GUIDE ENTER DOWN UP LEFT RIGHT INPUT DOWN UP VOLUME DOWN UP CHANNEL HOME GALLERY PC CARD SLOT Y COM EJECT Readable memory cards This system can read memory cards that conform - Pioneer PRO-930HD | Owner's Manual - Page 80
12 Enjoying through External Equipment Starting the initial Home Gallery screen After inserting a memory card into the PC CARD slot, use the Home Menu to start the initial Home Gallery screen. Home Gallery Folder selection MEMORY_CARD 1/2 IMAGE IMG_22~1.JPG Select RETURN Return HOMEMENU Exit 1 - Pioneer PRO-930HD | Owner's Manual - Page 81
original sizes. Number Of Times Of Playback Single time Loop Playback Mode Auto Manual Interval(sec) 3 5 10 20 30 60 90 9 If you have Home Gallery function, press HOME MENU. Starting the Slide Show screen After setting up the Slide Show, you can start it to sequentially change the images - Pioneer PRO-930HD | Owner's Manual - Page 82
You can operate the connected AV products (AV Receiver, Cable Box, SAT tuner, VCR, DVD, DVD recorder, signal by the Learn mode. • The initial mode is "000" (PIONEER). NOTE • To exit the Learn mode before it is complete, press and hold TV , and then press FAVORITE A (blue) and FAVORITE D (yellow) at - Pioneer PRO-930HD | Owner's Manual - Page 83
) 005 JERROLD4(CABLE) 006 JERROLD5(CABLE) 007 JERROLD6(CABLE) 008 JERROLD7(CABLE) 009 JERROLD8(CABLE) 010 JERROLD9(CABLE) 011 JERROLD10(CABLE) 012 S.A.1(CABLE) 013 S.A.2(CABLE) 014 S.A.3(CABLE) 015 S.A.4(CABLE) 016 ZENITH1(CABLE) 017 ZENITH2(CABLE) 018 ZENITH3(CABLE) 019 020 PIONEER(SAT) 021 RCA1 - Pioneer PRO-930HD | Owner's Manual - Page 84
the remote control unit to control other devices Mode switch (with "TV" selected) Receiver control buttons When a Pioneer receiver is connected to the display, the receiver can be operated using buttons 1 to 3. When a non-Pioneer receiver is connected to the display, the signals for 1 to 3 must - Pioneer PRO-930HD | Owner's Manual - Page 85
and the channel you were watching immediately before. * Some manufacturers do not preset CH ENTER and CH RETURN. Set up these buttons with the learning function if necessary. 3 NOTE • CABLE and SAT cannot be selected at the same time. • The color-highlighted buttons on the remote control can learn - Pioneer PRO-930HD | Owner's Manual - Page 86
selected channel with the direct channel selection buttons. • Set up this button with the learning function if necessary. 7 SAT MENU Displays the satellite broadcasting menu screen. 8 SAT GUIDE Displays the satellite broadcasting guide screen. NOTE • CABLE and SAT cannot be selected at the same - Pioneer PRO-930HD | Owner's Manual - Page 87
learning function of the remote control, the remote control unit buttons will function as follows when the Mode switch of the remote control unit is set to VCR. • Press the input selector button INPUT 1-4 that matches the input terminal number to which the VCR is connected, then the VCR can be - Pioneer PRO-930HD | Owner's Manual - Page 88
when the Mode switch of the remote control unit is set to DVD/DVR. • When the input selector button and then press to stop recording. This operation applies to only Pioneer DVD recorders. NOTE • A DVD player and a DVD recorder cannot supported LD players, see the DVD/DVR column on page 83. 88 En - Pioneer PRO-930HD | Owner's Manual - Page 89
this case, operate the system after first turning the power of the Plasma Display and the Media Receiver, or unplugging the power cord and re-plugging it in after 1 or 2 minutes. • Remote control unit does not operate. • Is the Mode switch set correctly? Slide it to the TV position. (See page 16 - Pioneer PRO-930HD | Owner's Manual - Page 90
LIABLE FOR ANY DIRECT, INDIRECT, INCIDENTAL, SPECIAL, EXEMPLARY, OR CONSEQUENTIAL DAMAGES (INCLUDING, BUT NOT LIMITED TO, PROCUREMENT OF SUBSTITUTE GOODS OR SERVICES; LOSS OF USE, DATA, OR PROFITS; OR BUSINESS INTERRUPTION) HOWEVER CAUSED AND ON ANY THEORY OF LIABILITY, WHETHER IN CONTRACT, STRICT - Pioneer PRO-930HD | Owner's Manual - Page 91
Appendix 14 Linux Source Notice The Pioneer Plasma Television integrated with the Media Receiver in part is powered by utilizes the Linux operation system. The machine readable copy of the corresponding source code is available for the cost of distribution. To obtain a copy, please visit http:// - Pioneer PRO-930HD | Owner's Manual - Page 92
not permit royalty-free redistribution of the Program by all those who receive copies directly or indirectly through you, then the only way you could satisfy the wide range of software distributed through that system in reliance on consistent application of that system; it is up to the author/donor - Pioneer PRO-930HD | Owner's Manual - Page 93
but may differ in detail to address new problems or concerns. Each version is given a this. Our decision will be guided by the two goals of preserving YOU ASSUME THE COST OF ALL NECESSARY SERVICING, REPAIR OR CORRECTION. 12. IN NO for more details. You should have received a copy of the GNU General - Pioneer PRO-930HD | Owner's Manual - Page 94
price. Our General Public Licenses are designed to make sure that you have the freedom to distribute copies of free software (and charge for this service if you wish); that you receive not be affected by problems that might be introduced system, as well as its variant, the GNU/Linux operating system - Pioneer PRO-930HD | Owner's Manual - Page 95
what the program that uses the Library does. 1. You may copy and distribute verbatim copies of the Library's complete source code as you receive it, in any medium, provided that you conspicuously and appropriately publish on each copy an appropriate copyright notice and disclaimer of warranty; keep - Pioneer PRO-930HD | Owner's Manual - Page 96
time a copy of the library already present on the user's computer system, rather than copying library functions into the executable, and (2) will not permit royalty-free redistribution of the Library by all those who receive copies directly or indirectly through you, then the only way you could - Pioneer PRO-930HD | Owner's Manual - Page 97
system in reliance on consistent application of that system differ in detail to address new problems or concerns. Each version is Our decision will be guided by the two goals ASSUME THE COST OF ALL NECESSARY SERVICING, REPAIR OR CORRECTION. 16. details. You should have received a copy of the GNU - Pioneer PRO-930HD | Owner's Manual - Page 98
14 Appendix Specifications Item Number of Pixels Audio Amplifier Surround System Power Requirement Dimensions Weight 50"Plasma Display, Model: PRO-506PU 1280 × 768 pixels 13 W + 13 W (1 kHz, 10 %, 8 Ω ) SRS/FOCUS/TruBass 120 V AC, 60 Hz, 355 W (0.2 W Standby) 1224 (W) × 717 (H) × 92 (D) mm (48 3/ - Pioneer PRO-930HD | Owner's Manual - Page 99
is a trademark of Cable Television Laboratories, Inc. • The names of the companies or institutions are trademarks or registered trademarks of the respective companies or institutions. License • The TV Guide On Screen system is manufactured under license from Gemstar-TV Guide International, Inc. and - Pioneer PRO-930HD | Owner's Manual - Page 100
Published by Pioneer Corporation. Copyright © 2005 Pioneer Corporation. All rights reserved. PIONEER CORPORATION 4-1, Meguro 1-Chome, Meguro-ku, Tokyo 153-8654, Japan PIONEER ELECTRONICS (USA) INC. P.O. BOX 1540, Long Beach, California 90810-1540, U.S.A. TEL: (800) 421-1404 PIONEER ELECTRONICS OF
-
 1
1 -
 2
2 -
 3
3 -
 4
4 -
 5
5 -
 6
6 -
 7
7 -
8
-
9
-
10
-
11
-
12
-
13
-
14
-
15
-
16
-
17
-
18
-
19
-
20
-
21
-
22
-
23
-
24
-
25
-
26
-
27
-
28
-
29
-
30
-
31
-
32
-
33
-
34
-
35
-
36
-
37
-
38
-
39
-
40
-
41
-
42
-
43
-
44
-
45
-
46
-
47
-
48
-
49
-
50
-
51
-
52
-
53
-
54
-
55
-
56
-
57
-
58
-
59
-
60
-
61
-
62
-
63
-
64
-
65
-
66
-
67
-
68
-
69
-
70
-
71
-
72
-
73
-
74
-
75
-
76
-
77
-
78
-
79
-
80
-
81
-
82
-
83
-
84
-
85
-
86
-
87
-
88
-
89
-
90
-
91
-
92
-
93
-
94
-
95
-
96
-
97
-
98
-
99
-
100
 |
 |

Register Your Product on
www.pioneerelectronics.com
(US)
www.pioneerelectronics.ca
(Canada)
PLASMA DISPLAY SYSTEM
PRO-1130HD
PRO-930HD
Operating Instructions