Pioneer PRO-930HD Owner's Manual - Page 61
Using Color Management, Eliminating noise from images, Using the Dynamic Range Expander DRE,
 |
View all Pioneer PRO-930HD manuals
Add to My Manuals
Save this manual to your list of manuals |
Page 61 highlights
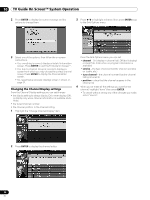
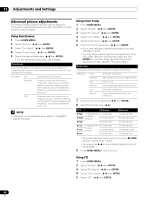
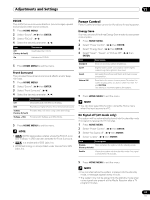
Adjustments and Settings 11 6 Select the desired parameter. ( / then ENTER) CTI Provides images with clearer color contours. The CTI stands for Color Transient Improvement. Selections Off Deactivates the CTI. On Activates the CTI. 7 Press HOME MENU to exit the menu. Using Color Management 1 Press HOME MENU. 2 Select "Picture". ( / then ENTER) 3 Select "Pro Adjust". ( / then ENTER) 4 Select "Color Detail". ( / then ENTER) 5 Select "Color Management". ( / then ENTER) 6 Select an item to be adjusted. ( / then ENTER) Color Management R 0 Y 0 G 0 C 0 B 0 M 0 Eliminating noise from images 1 Press HOME MENU. 2 Select "Picture". ( / then ENTER) 3 Select "Pro Adjust". ( / then ENTER) 4 Select "NR". ( / then ENTER) 5 Select an item to be adjusted. ( / then ENTER) • You can select "DNR" or "MPEG NR". 6 Select the desired parameter. ( / then ENTER) DNR Eliminates video noise for clean, crisp images. DNR stands for Digital Noise Reduction. Selections Off Deactivates the DNR. High Enhanced DNR Mid Standard DNR Low Moderate DNR MPEG NR Eliminates mosquito noise from video images when a DVD is played, resulting in noise-free images. Selections Off Deactivates the MPEG NR. High Enhanced MPEG NR Mid Standard MPEG NR Low Moderate MPEG NR 7 Press HOME MENU to exit the menu. 7 Select the desired level. ( / ) Item R Y G C B M button Closer to magenta Closer to red Closer to yellow Closer to green Closer to cyan Closer to blue button Closer to yellow Closer to green Closer to cyan Closer to blue Closer to magenta Closer to red • To perform adjustment for another item, press RETURN, and then repeat steps 6 and 7. • You may press / to immediately change an item to be adjusted. 8 Press HOME MENU to exit the menu. Using the Dynamic Range Expander (DRE) functions 1 Press HOME MENU. 2 Select "Picture". ( / then ENTER) 3 Select "Pro Adjust". ( / then ENTER) 4 Select "DRE". ( / then ENTER) 5 Select an item to be adjusted. ( / then ENTER) • You can select "Dynamic Contrast", "Black Level", "ACL" or "Gamma". 6 Select the desired parameter. ( / then ENTER) Dynamic Contrast Emphasizes the contrast of images so that the difference between brightness and darkness becomes more distinct. Selections Off Deactivates the Dynamic Contrast. High Enhanced Dynamic Contrast Mid Standard Dynamic Contrast Low Moderate Dynamic Contrast Black Level Emphasizes the dark portions of images so that the difference between brightness and darkness becomes more distinct. Selections Off Deactivates the Black Level. On Activates the Black Level. 61 En
-
 1
1 -
2
-
3
-
4
-
5
-
6
-
7
-
8
-
9
-
10
-
11
-
12
-
13
-
14
-
15
-
16
-
17
-
18
-
19
-
20
-
21
-
22
-
23
-
24
-
25
-
26
-
27
-
28
-
29
-
30
-
31
-
32
-
33
-
34
-
35
-
36
-
37
-
38
-
39
-
40
-
41
-
42
-
43
-
44
-
45
-
46
-
47
-
48
-
49
-
50
-
51
-
52
-
53
-
54
-
55
-
 56
56 -
 57
57 -
 58
58 -
 59
59 -
 60
60 -
 61
61 -
 62
62 -
 63
63 -
 64
64 -
 65
65 -
 66
66 -
67
-
68
-
69
-
70
-
71
-
72
-
73
-
74
-
75
-
76
-
77
-
78
-
79
-
80
-
81
-
82
-
83
-
84
-
85
-
86
-
87
-
88
-
89
-
90
-
91
-
92
-
93
-
94
-
95
-
96
-
97
-
98
-
99
-
100
 |
 |