ProForm 18.0 Re Elliptical English Manual - Page 29
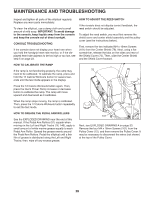
How To Adjust The Drive Belt
 |
View all ProForm 18.0 Re Elliptical manuals
Add to My Manuals
Save this manual to your list of manuals |
Page 29 highlights
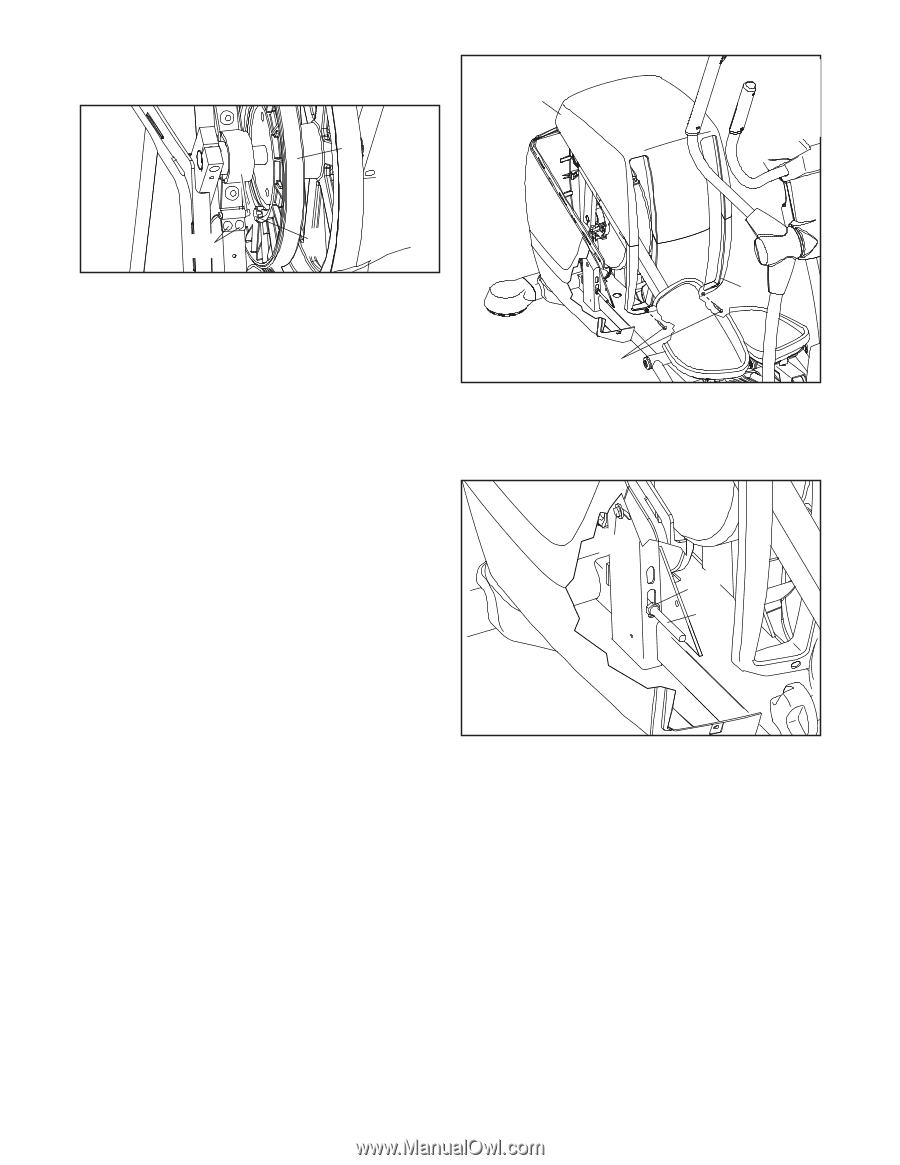
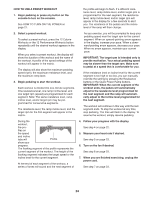
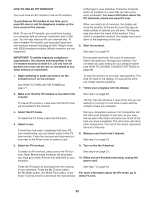
Locate the Reed Switch (38). Loosen, but do not remove, the two M4 x 12.7mm Flange Screws (161). 75 19 38 161 43 Next, rotate the Large Pulley (19) until a Magnet (43) is aligned with the Reed Switch (38). Slide the Reed Switch slightly toward or away from the Magnet. Then, retighten the M4 x 12.7mm Flange Screws (161). Rotate the Large Pulley (19) for a moment. Repeat these actions until the console displays correct feedback. When the reed switch is correctly adjusted, reattach the pulley cover, reconnect the wires if necessary, and reattach the shield cover and center shield assembly; make sure that the shield cover is aligned with the shield support on the frame. HOW TO ADJUST THE DRIVE BELT If you can feel the pedals slip while you are pedaling, even when the resistance is adjusted to the highest setting, the large drive belt may need to be adjusted. 76 101 Loosen the M6 x 35mm Screw (164) a few turns. Next, tighten the M8 Nut (122) on the J-bolt (139) one half turn. Then, retighten the M6 x 35mm Screw. 164 122 139 To adjust the large drive belt, you must first remove the Shield Cover (75) and the Center Shield (76) (see the instructions below). Remove the two indicated M4 x 16mm Screws (101) from the Center Shield (76). Next, using a flat screwdriver, release the tabs on the sides and rear of the Shield Cover (75). Then, slide the Center Shield and the Shield Cover forward. Reattach the shield cover and the center shield; make sure that the shield cover is aligned with the shield support on the frame. If the pedals still slip while you are pedaling, repeat these steps. If you have a question about drive belt adjustment, see the front cover of this manual. 29
-
 1
1 -
2
-
3
-
4
-
5
-
6
-
7
-
8
-
9
-
10
-
11
-
12
-
13
-
14
-
15
-
16
-
17
-
18
-
19
-
20
-
21
-
22
-
23
-
 24
24 -
 25
25 -
 26
26 -
 27
27 -
 28
28 -
 29
29 -
 30
30 -
 31
31 -
 32
32 -
 33
33 -
 34
34 -
35
-
36
 |
 |