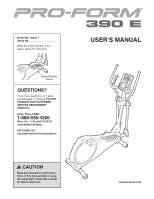
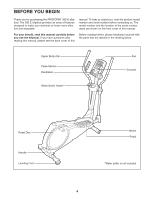
ProForm 390 E Elliptical Canadian English Manual - Page 6
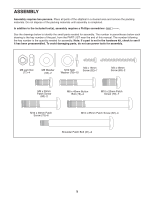
To make assembly easier, read the, information on before you begin.
 |
View all ProForm 390 E Elliptical manuals
Add to My Manuals
Save this manual to your list of manuals |
Page 6 highlights
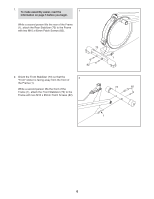
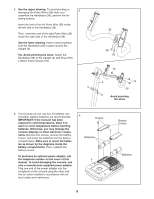
1. To make assembly easier, read the 1 information on page 5 before you begin. While a second person lifts the rear of the Frame (1), attach the Rear Stabilizer (70) to the Frame with two M10 x 85mm Patch Screws (82). 70 82 2. Orient the Front Stabilizer (73) so that the 2 "Front" sticker is facing away from the front of the Frame (1). While a second person lifts the front of the Frame (1), attach the Front Stabilizer (73) to the Frame with two M10 x 85mm Patch Screws (82). 1 73 82 1 6
-
 1
1 -
 2
2 -
 3
3 -
 4
4 -
 5
5 -
 6
6 -
 7
7 -
 8
8 -
 9
9 -
 10
10 -
 11
11 -
 12
12 -
13
-
14
-
15
-
16
-
17
-
18
-
19
-
20
-
21
-
22
-
23
-
24
-
25
-
26
-
27
-
28
 |
 |
6
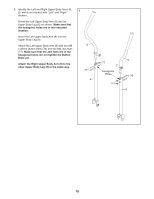
1.
While a second person lifts the rear of the Frame
(1), attach the Rear Stabilizer (70) to the Frame
with two M10 x 85mm Patch Screws (82).
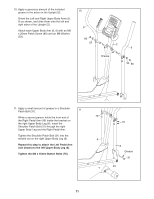
2.
Orient the Front Stabilizer (73) so that the
“Front” sticker is facing away from the front of
the Frame (1).
While a second person lifts the front of the
Frame (1), attach the Front Stabilizer (73) to the
Frame with two M10 x 85mm Patch Screws (82).
70
82
1
1
2
1
82
73
To make assembly easier, read the
information on page 5 before you begin.