ProForm 465 S Uk Manual
ProForm 465 S Manual
 |
View all ProForm 465 S manuals
Add to My Manuals
Save this manual to your list of manuals |
ProForm 465 S manual content summary:
- ProForm 465 S | Uk Manual - Page 1
, Ltd. Customer Service Department Unit 4 Revie Road Industrial Estate Revie Road Beeston Leeds, LS118JG UK email: [email protected] CAUTION Read all precautions and instructions in this manual before using this equipment. Keep this manual for future reference. USER'S MANUAL Class HC Fitness - ProForm 465 S | Uk Manual - Page 2
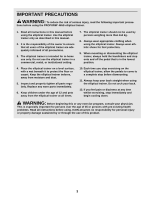
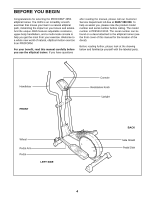
PRECAUTIONS 3 BEFORE YOU BEGIN 4 ASSEMBLY 5 HOW TO USE THE ELLIPTICAL TRAINER 9 MAINTENANCE AND TROUBLE-SHOOTING 11 CONDITIONING GUIDELINES 12 PART LIST 14 EXPLODED DRAWING 15 HOW TO ORDER REPLACEMENT PARTS Back Cover PROFORM is a registered trademark of ICON Health & Fitness, Inc. 2 - ProForm 465 S | Uk Manual - Page 3
PROFORM® 465S elliptical trainer. 1. Read all instructions in this manual before using the elliptical trainer. Use the elliptical trainer only as described in this manual of 35 or persons with pre-existing health problems. Read all instructions before using. ICON assumes no responsibility for - ProForm 465 S | Uk Manual - Page 4
exercise. Welcome to a whole new world of natural, elliptical-motion exercise from PROFORM. For your benefit, read this manual carefully before you use the elliptical trainer. If you have questions after reading the manual, please call our Customer Service Department toll-free at 08457 089 009. To - ProForm 465 S | Uk Manual - Page 5
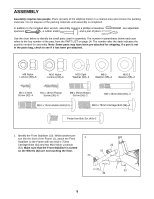
ASSEMBLY Assembly requires two people. Place all parts of the elliptical trainer in a cleared area and remove the packing materials. Do not dispose of the packing materials until assembly is completed. In addition to the included allen - ProForm 465 S | Uk Manual - Page 6
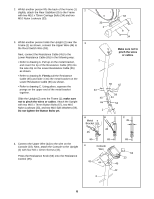
2. Whilst another person lifts the back of the Frame (1) slightly, attach the Rear Stabiliser (9) to the Frame with two M10 x 75mm Carriage Bolts (34) and two M10 Nylon Locknuts (33). 3. Whilst another person holds the Upright (2) near the Frame (1) as shown, connect the Upper Wire (44) to the Reed - ProForm 465 S | Uk Manual - Page 7
5. Identify the Left Handlebar (6), which is marked with a sticker. Insert the Left Handlebar into one of the 5 Handlebar Arms (5); make sure that the Handlebar Arm is turned so the hexagonal holes are on the indicated side. Attach the Left Handlebar to one of the Handlebar Arms with two M8 x - ProForm 465 S | Uk Manual - Page 8
touching the springs in the battery clip. Reattach the Battery Cover. 9 Batteries 36 29 Battery Clip 23 10. Make sure that all parts of the elliptical trainer are properly tightened. Place a mat under the elliptical trainer to protect the floor or carpet from damage. 8 - ProForm 465 S | Uk Manual - Page 9
Disk Pedal To dismount the elliptical trainer, allow the pedals to come to a complete stop. CAUTION: The elliptical trainer does not have a free wheel innovative console offers a manual mode and three motivational pacer programs. Each pacer program is designed to guide you through an effective - ProForm 465 S | Uk Manual - Page 10
were just installed, the power will already be on. 2 Select one of the three pacer programs or the manual mode. To select one of the pacer Program Indicator programs, repeatedly press the pro- gram button. The program indicator will show which program you have select- ed. To select the - ProForm 465 S | Uk Manual - Page 11
elliptical trainer, remove the batteries from the console. Keep the elliptical trainer in a clean, dry location, away from moisture and dust. CONSOLE TROUBLESHOOTING Drive Belt, you must remove both side shields. Refer to the instructions at the left and remove the side shields. Next, loosen the - ProForm 465 S | Uk Manual - Page 12
level can be found by using your heart rate as a guide. The chart below shows recommended heart rates for fat burning, maximum increase the flexibility of your muscles and will help to prevent post-exercise problems. EXERCISE FREQUENCY To maintain or improve your condition, plan three workouts each - ProForm 465 S | Uk Manual - Page 13
SUGGESTED STRETCHES The correct form for several basic stretches is shown at the right. Move slowly as you stretch-never bounce. 1. Toe Touch Stretch Stand with your knees bent slightly - ProForm 465 S | Uk Manual - Page 14
2 M10 x 74mm Button Bolt 68 1 M8 x 22mm Flat Head Screw # 1 Allen Wrench # 1 Grease # 1 User's Manual Note: "#" indicates a non-illustrated part. Specifications are subject to change without notice. See the back cover of this manual for information about ordering replacement parts. 14 - ProForm 465 S | Uk Manual - Page 15
EXPLODED DRAWING-Model No. PFEVEL19010 R1201A 24 8 64 52 52 29 23 52 63 4 42 24 42 42 55 45 47 49 56 46 49 50 3 52 42 38 52 52 64 6 44 48 55 46 49 50 56 2 48 38 47 49 59 5 40 33 67 60 65 59 60 17 5 22 60 41 21 22 66 34 41 21 10 52 33 53 54 61 58 57 39 33 33 39 - ProForm 465 S | Uk Manual - Page 16
Fitness, Ltd. office, or write: ICON Health & Fitness, Ltd. Customer Service Department Unit 4 Revie Road Industrial Estate Revie Road Beeston Leeds, LS118JG UK of the product (PROFORM® 465S elliptical trainer) • the SERIAL NUMBER of the product (see the front cover of this manual) • the KEY NUMBER
-
 1
1 -
 2
2 -
 3
3 -
 4
4 -
 5
5 -
 6
6 -
 7
7 -
8
-
9
-
10
-
11
-
12
-
13
-
14
-
15
-
16
 |
 |
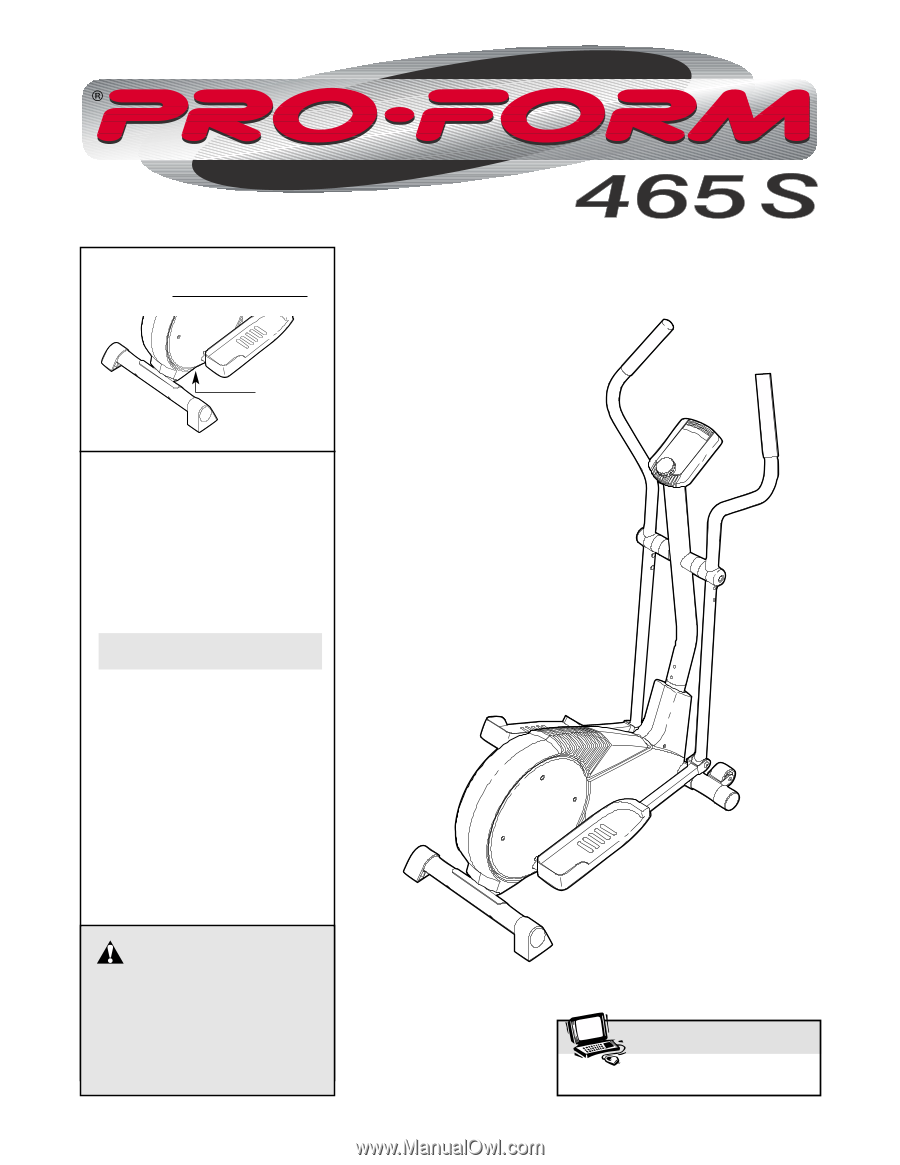
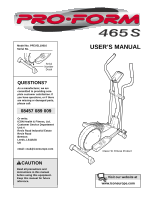
USER’S MANUAL
CAUTION
Read all precautions and
instructions in this manual
before using this equipment.
Keep this manual for future
reference.
Model No. PFEVEL19010
Serial No.
Serial
Number
Decal
www.iconeurope.com
Visit our website at
QUESTIONS?
As a manufacturer, we are
committed to providing com-
plete customer satisfaction. If
you have questions, or if there
are missing or damaged parts,
please call:
Or write:
ICON Health & Fitness, Ltd.
Customer Service Department
Unit 4
Revie Road Industrial Estate
Revie Road
Beeston
Leeds, LS118JG
UK
email: [email protected]
08457 089 009
Class HC Fitness Product