ProForm 665 E Treadmill English Manual - Page 11
Tighten a 1/2 Screw 1 into the Left Handrail
 |
View all ProForm 665 E Treadmill manuals
Add to My Manuals
Save this manual to your list of manuals |
Page 11 highlights
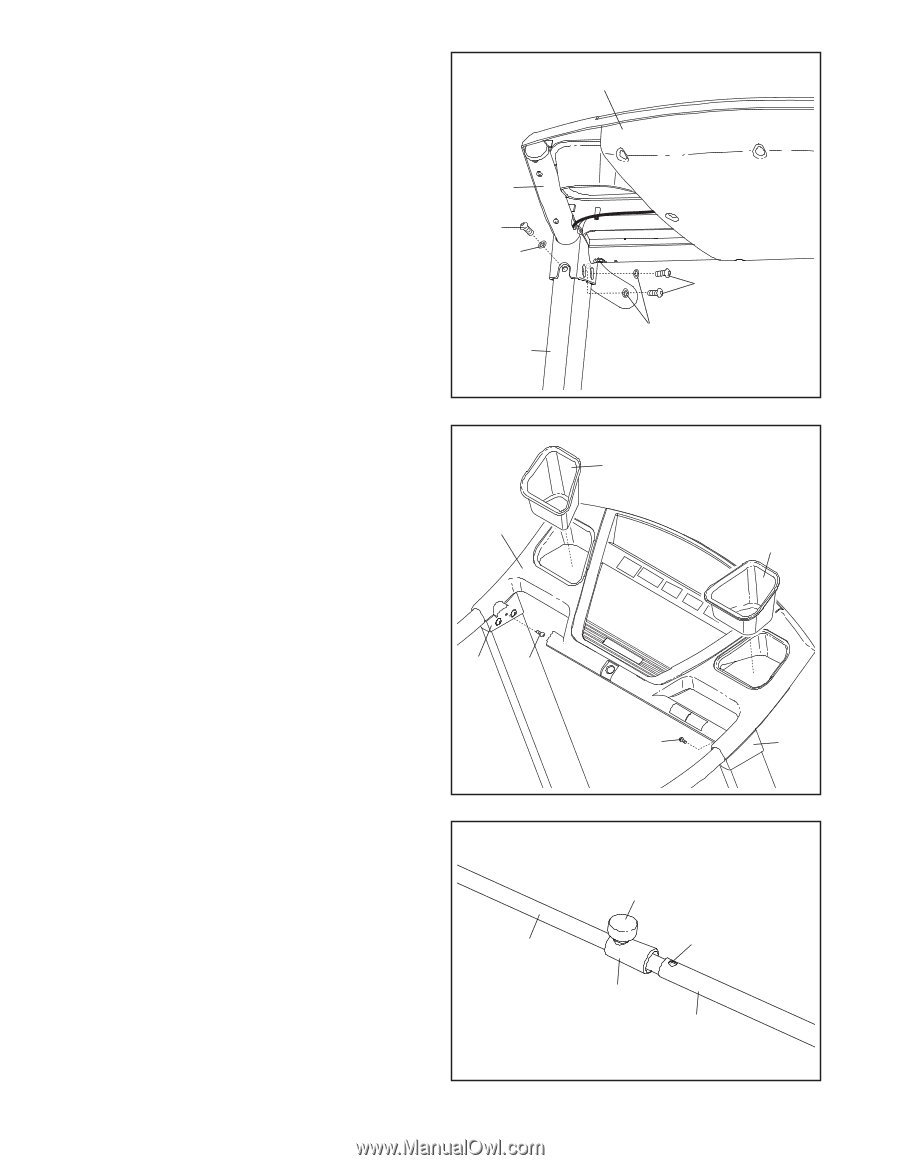
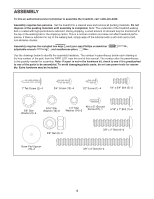
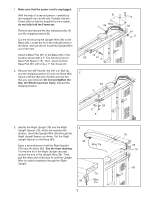
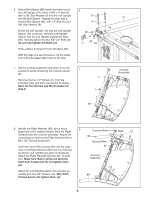
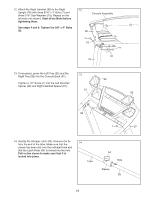
12. Attach the Right Handrail (90) to the Right Upright (78) with three 5/16" x 1" Bolts (7) and three 5/16" Star Washers (10). Repeat on the left side (not shown). Start all six Bolts before tightening them. See steps 4 and 6. Tighten the 3/8" x 4" Bolts (6). 12 Console Assembly 90 7 10 7 10 78 13. If necessary, press the Left Tray (92) and the Right Tray (93) into the Console Back (91). 13 92 Tighten a 1/2" Screw (1) into the Left Handrail Spacer (96) and Right Handrail Spacer (97). 91 93 96 1 1 97 14. Identify the Storage Latch (53). Remove the tie from the end of the tube. Make sure that the sleeve has been slid over the indicated hole and that the Latch Knob (54) is locked into the hole. Pull on the sleeve to make sure that it is locked into place. 14 Tube 54 Hole Sleeve 53 11
-
 1
1 -
2
-
3
-
4
-
5
-
 6
6 -
 7
7 -
 8
8 -
 9
9 -
 10
10 -
 11
11 -
 12
12 -
 13
13 -
 14
14 -
 15
15 -
 16
16 -
17
-
18
-
19
-
20
-
21
-
22
-
23
-
24
-
25
-
26
-
27
-
28
-
29
-
30
-
31
-
32
 |
 |