Ricoh C210SF Network Users Guide
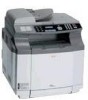
Ricoh C210SF - Aficio SP Color Laser Manual
 |
UPC - 026649025310
View all Ricoh C210SF manuals
Add to My Manuals
Save this manual to your list of manuals |
Ricoh C210SF manual content summary:
- Ricoh C210SF | Network Users Guide - Page 1
Network User's Guide Read this manual carefully before you use this machine and keep it handy for future reference. For safe and correct use, be sure to read the Important Information in "User's Guide" before using the machine. - Ricoh C210SF | Network Users Guide - Page 2
of Hewlett-Packard Company. Microsoft, Windows and Windows NT are registered trademarks of Microsoft Corporation. BRAdmin Professional is a trademark of Brother Industries, Ltd. All other terms, brand and product names mentioned in this User's Guide are registered trademarks or trademarks of - Ricoh C210SF | Network Users Guide - Page 3
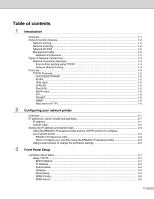
FAX ...1-2 Management utility ...1-2 BRAdmin Professional...1-2 Types of Network Connections...1-3 Network Connection Example ...1-3 BRAdmin Professional utility and the TCP/IP protocol to configure your network printer...2-3 BRAdmin Professional utility 2-3 How to configure your machine using the - Ricoh C210SF | Network Users Guide - Page 4
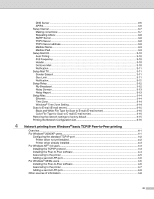
mail (E-mail server 3-15 Black and White File Type for Scan to E-mail (E-mail server 3-15 Color File Type for Scan to E-mail (E-mail server 3-15 Restoring the network settings to factory default 3-15 Printing the Network Configuration List 3-16 4 Network printing from Windows® basic TCP/IP Peer - Ricoh C210SF | Network Users Guide - Page 5
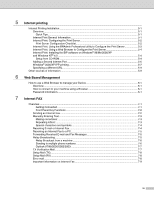
the BIP software on Windows® 98/Me/2000/XP and Windows NT® 4.0 ...5-4 Setup from CD-ROM ...5-4 Adding a Second Internet Port ...5-6 Windows® 2000/ Password Information...6-1 7 Internet FAX Overview...7-1 Getting Connected ...7-1 Front Panel Key Functions ...7-2 Sending an Internet Fax ...7-2 Manually - Ricoh C210SF | Network Users Guide - Page 6
default 8-1 Network print software installation problems 8-1 The print server is not found during setup of the network print software installation or from the printer driver of the machine in Windows 8-1 Printing problems...8-3 Print job is not printed...8-3 Protocol-specific troubleshooting - Ricoh C210SF | Network Users Guide - Page 7
shows what network features and connections are supported by each operating system. Operating Systems Windows® 98/98SE/Me/ 2000/XP Windows NT® 4.0 10/100 BASE-TX : Chapter 2: Configuring your network printer Chapter 3: Front Panel Setup Chapter 4: Network printing from Windows® basic TCP/IP Peer-to - Ricoh C210SF | Network Users Guide - Page 8
SP C210SF has the following basic network function. 1 Network printing The print server provides printing services for Windows® 98/98SE/Me/NT®/2000/XP supporting the TCP/IP protocols. Network scanning You can scan documents over the network to your computer (See Chapter 4 of the Software User - Ricoh C210SF | Network Users Guide - Page 9
TCP/IP In a Peer-to-Peer environment, each computer directly sends and receives data to each device. There is no central server controlling File access or Printer sharing. Windows® Windows® Windows® Switch or Router TCP/IP TCP/IP Network printer (your machine) ■ In a smaller network of 2 or - Ricoh C210SF | Network Users Guide - Page 10
a centrally controlled computer. This type of computer is often called a "Server" or a "Print Server". Its job is to control the printing of all print jobs. 1 Windows® Windows® Windows® Windows® TCP/IP Also known as "Server" or "Print Server" Network printer (your machine) Network Shared ■ In - Ricoh C210SF | Network Users Guide - Page 11
Installation or BRAdmin software) or automatically (using a DHCP/BOOTP/RARP server), the Automatic Private IP Addressing (APIPA) protocol will automatically assign an IP address from the range 169.254.1.0 to 169.254.254.255. DNS client The print server supports the Domain Name Service (DNS) client - Ricoh C210SF | Network Users Guide - Page 12
e-mails. IPP 1 The Internet Printing Protocol (IPP Version 1.0) allows you to print documents via the internet. TELNET The print server supports TELNET server for command line configuration. SNMP Simple Network Management Protocol (SNMP) is used to manage network devices including computers - Ricoh C210SF | Network Users Guide - Page 13
printer Overview Before you can use your machine on your network, you need to install the software and also configure the 2 appropriate TCP/IP network settings on the machine itself. To do this, we recommend that you use the automatic installer on the CD-ROM as this will guide or Windows® 2000 - Ricoh C210SF | Network Users Guide - Page 14
Configuring your network printer Subnet mask Subnet masks restrict network communication. Example: PC1 Using APIPA to configure the IP address on page A-3. If the APIPA protocol is disabled, the default IP address of a print server is 192.0.0.192. However, you can easily change this IP address - Ricoh C210SF | Network Users Guide - Page 15
your network printer 2 BRAdmin supplied on the CD-ROM of your product. • If you are using Personal Firewall software (e.g. the Internet Connection Firewall available in Windows® XP), disable it. Once you are sure that you can print, re-start your Personal Firewall software. • The default password - Ricoh C210SF | Network Users Guide - Page 16
print server. 1 Type http://printer_ip_address/ into the print server supports TCP/IP default it will appear as BRN_xxxxxx where xxxxxx is the last six digits of the Ethernet address. 2 Click Network Configuration. 3 Enter a user name and a password. The User Name is "admin" and the default Password - Ricoh C210SF | Network Users Guide - Page 17
the machine is supplied with the BRAdmin Professional Windows® software, which also In this mode the machine's IP address must be manually assigned. Once entered the IP address is locked one, and if the DHCP server is configured to allocate an IP address to the machine, then the IP address supplied - Ricoh C210SF | Network Users Guide - Page 18
the name of the print server (the name must be the same as the one you put in the /etc/hosts file). If the RARP daemon is not on your host computer (it should appear in the /etc/services file on your host as a real service; type man bootpd or refer to your system documentation for information). - Ricoh C210SF | Network Users Guide - Page 19
server when the printer is powered on. 3 DHCP mode Dynamic Host Configuration Protocol (DHCP) is one of several automated Windows® 2000/XP network) the print server automatically obtains its IP address from DHCP server and register its name with any RFC 1001 and 1002-compliant dynamic name services - Ricoh C210SF | Network Users Guide - Page 20
Front Panel Setup Subnet Mask This field displays the current subnet mask used by the machine. If you are not using DHCP or BOOTP to obtain the subnet mask, enter the desired subnet mask. Check with your network manager for the subnet mask to use. 1 Press Menu/Set, 6, 1, 3. 3 2 Select 1 to - Ricoh C210SF | Network Users Guide - Page 21
address. 5 Press Menu/Set. 6 Press Stop/Exit. Primary WINS Server IP Address This field specifies the IP address of the primary WINS (Windows® Internet Naming Service) server. Secondary WINS Server IP Address This field specifies the IP address of the secondary WINS server. It is used as a backup to - Ricoh C210SF | Network Users Guide - Page 22
Server address. 5 Press Menu/Set. 6 Press Stop/Exit. Primary DNS Server IP Address This field specifies the IP address of the primary DNS (Domain Name Service) server. Secondary DNS Server IP Address This field specifies the IP address of the secondary DNS server. It is used as a backup to the - Ricoh C210SF | Network Users Guide - Page 23
: ▲ ▲ If you entered a letter incorrectly and want to change it, use or to position the cursor under the character you want to change, and then type over it. If you want to erase the whole number or whole name, press Stop/Exit when the cursor is under the first digit or - Ricoh C210SF | Network Users Guide - Page 24
Front Panel Setup Repeating letters: ▲ If you need to repeat a character, press move the cursor to the right. As you enter the E-mail address, it will appear character by character on the LCD panel. 3 If you specify more than 16 characters, the LCD panel will scroll the name to the left, - Ricoh C210SF | Network Users Guide - Page 25
login to the POP3 Server. 3 3 Press Menu/Set. 4 Press Stop/Exit. Mailbox Pwd 1 Press Menu/Set, 6, 2, 5. 2 Enter the user password assigned to the machine that will login to the POP3 Server. Please note that this password is case sensitive. 3 Press Menu/Set. 4 Press Menu/Set again to verify the - Ricoh C210SF | Network Users Guide - Page 26
On or Off. 3 Press Menu/Set. 4 Press Stop/Exit. Poll Frequency Sets the interval for checking for new messages on the POP3 server (default is 10Min). 1 Press Menu/Set, 6, 3, 2. 2 Enter the polling frequency. 3 Press Menu/Set. 4 Press Stop/Exit. Header This selection allows the contents of the - Ricoh C210SF | Network Users Guide - Page 27
station When the I-Fax has been received. This feature only works on I-Fax machines that support the "MDN" specification. 1 Press Menu/Set, 6, 3, 5. 2 Press ▲ or attached to the Internet Fax data being sent from the machine to a PC (default is "Internet Fax Job"). 1 Press Menu/Set, 6, 4, 1. 2 - Ricoh C210SF | Network Users Guide - Page 28
station When the I-Fax has been received. This feature only works on I-Fax machines that support the "MDN" specification. 1 Press Menu/Set, 6, 4, 3. 2 Press ▲ or ▼ Relay Broadcast, see Relay Broadcasting on page 7-5 of this User's Guide. Rly Broadcast This function allows the machine to receive a - Ricoh C210SF | Network Users Guide - Page 29
be printed at the machine that will act as a Relay Station for all Relay Broadcasts. When the machine is used with the Network PC Fax software the machine is also acting as a Relay Station for fax transmissions from the network. This means that a Relay Report can also be printed for confirmation - Ricoh C210SF | Network Users Guide - Page 30
print server link mode. This change is valid after the print server has been reset (default is Auto). Note If you incorrectly set this value, you may not be able to time difference for your country by using the Time Zone setting in Windows®. 1 Click on Start. 2 Select Settings / Control Panel. 3 - Ricoh C210SF | Network Users Guide - Page 31
to E-mail (E-mail server) You can select the default Black and White file type for the Scan to E-mail (E-mail server) function. 3 1 Press Menu/Set, 6, 7, 1. 2 Press ▲ or ▼ to select PDF or TIFF. 3 Press Menu/Set. 4 Press Stop/Exit. Color File Type for Scan to E-mail (E-mail server) You can - Ricoh C210SF | Network Users Guide - Page 32
Front Panel Setup Printing the Network Configuration List Note Node Name: Node Name appears in the Network Configuration List. The default Node Name is 3 "BRN_xxxxxx" ("xxxxxx" is the last six digits of Ethernet address.). The Network Configuration List prints a report listing all the current - Ricoh C210SF | Network Users Guide - Page 33
• The default password for print servers is "access". • If you are connecting to a Nework Print Queue or Share (printing only), see Installation when using a Network Print Queue or Share (printer driver only) on page A-6 for installation details. For Windows® 2000/XP users By default, Windows® 2000 - Ricoh C210SF | Network Users Guide - Page 34
Next. 11 Windows® 2000/XP will now contact the printer that you printer driver you wish to use. Select the appropriate driver from the list of supported printers. If you are using a driver supplied driver to be default printer, and then click Next. 16 Now specify if you wish to share the printer - Ricoh C210SF | Network Users Guide - Page 35
Printer driver not yet installed on page 4-2. 6 Close Add Port and Properties dialog box. For Windows NT® 4.0 users Windows NT® 4.0 users can send print job using Peer-to-Peer Print software provided on the CD-ROM supplied Click Close. The Windows NT® 4.0 system will review protocol bindings and - Ricoh C210SF | Network Users Guide - Page 36
Guide. 2 Select the model name and your language (if necessary), and then click Install Optional Applications. 4 3 Click Network Print Software. 4 Click Next in response to the Welcome message. Follow the on-screen instructions the print server supports TCP/IP and name and by default it will appear - Ricoh C210SF | Network Users Guide - Page 37
the CD-ROM supplied with your machine. 6 If the driver already exists, select Keep Existing Driver (if it does not exist, this step will be skipped), and then click Next. 7 If desired, change the name of the printer and select Yes or No if you want this driver to be default printer, and then click - Ricoh C210SF | Network Users Guide - Page 38
setting of the printer driver. For Windows® 98/Me users Windows® 98/Me users can send print job using Peer-to-Peer Print software provided on the CD-ROM which we have supplied with the machine. Installing the Peer-to-Peer software Note If you already installed the driver from the supplied CD-ROM - Ricoh C210SF | Network Users Guide - Page 39
server. As the print server supports TCP/IP and NetBIOS names, software on page 4-6) and click Next. 8 Enter any desired name for the printer. For example, you could call the printer "Networked Printer". Select Yes or No if you want this driver to be default printer, and then click Next. 9 Windows - Ricoh C210SF | Network Users Guide - Page 40
the Start button, select Settings, and open the Printers window. Click the icon of the printer that you wish to configure, select File from the printer driver. Other sources of information See Configuring your network printer on page 2-1 to learn how to configure the IP address of the printer. 4 - 8 - Ricoh C210SF | Network Users Guide - Page 41
on a PC in New York could print a document directly from their Microsoft Excel application program to a printer in Paris. Windows® 2000/XP users can also use this BIP software, but are recommended to use the IPP protocol support that is part of the Windows® 2000/XP operating systems. Skip to the - Ricoh C210SF | Network Users Guide - Page 42
POP3 protocol (Post Office Protocol 3) to download the E-mail message from the E-mail server. It then decodes the attachment and prints it out on the printer. 5 Note If an E-mail is received that has not been configured to use the BIP virtual port driver, the printer will print the E-mail out as - Ricoh C210SF | Network Users Guide - Page 43
Windows NT® 4.0 PC running the BIP software are as follows. 1 Start the BRAdmin Professional utility. 2 Select the Node Name of the desired print server from the list and double click on it. (the default for a password; the default password is "access this will be the first part of the E-mail address - Ricoh C210SF | Network Users Guide - Page 44
you will be prompted for a User name and a 5 password. The default settings are User name "admin" and the password "access". 3 Select the : Installing the BIP software on Windows® 98/Me/2000/XP and Windows NT® 4.0 To install the BIP software on a Windows® 98/2000/XP and Windows NT® 4.0 PC - Ricoh C210SF | Network Users Guide - Page 45
Plug and Play check box. Then click Next. 14 Select the desired model of the remote printer. If necessary, click Have Disk to load the driver from the CD-ROM. Click Next when you are done. 15 If you have selected a printer driver that is already being used, you have the - Ricoh C210SF | Network Users Guide - Page 46
Windows NT® 4.0 and Windows® 2000/XP users> 14 Select the Internet port (BIP...) which you selected in step 6 and press Next. 15 Select the desired model of the remote printer. If necessary, click Have Disk to load the driver have now finished installing the BIP software. If you need to configure - Ricoh C210SF | Network Users Guide - Page 47
between the two devices. • The default password for print servers is "access". 1 For Windows® 2000: Go to the Start button, select Settings and then Printers. For Windows® XP: Go to the Start button and select Printers and Faxes. 2 For Windows® 2000: Double click the Add Printer icon to get the Add - Ricoh C210SF | Network Users Guide - Page 48
automatically. This means that you do not need to inform Windows® 2000 the type of printer driver to be used. 8 Click OK. You will then see the printer selection screen in the Add Printer Wizard. 9 If your printer is not in the list of supported printers, click Have Disk. You will then be asked to - Ricoh C210SF | Network Users Guide - Page 49
details, you can simply enter the above text and the printer will still receive and process data. please note the Get More Info option will not display any printer data. If you are using the built in service names that the print server supports, you can also use the following: (However, please note - Ricoh C210SF | Network Users Guide - Page 50
Information Web Based Management offers two levels of password access. Users are able to access to the General Setup, Fax settings and Lists and Reports. The default user name for Users is "user" (case sensitive) and the default password is "access". Administrators are able to access all settings - Ricoh C210SF | Network Users Guide - Page 51
from your machine, your mail application on the PC must be able to support the MIME format. E-mail Internet Relay Fax (G3 TX) E-mail Internet address for your machine, the mail server(s) IP address, mailbox name and password for your machine. If you are unsure of any of these items, please - Ricoh C210SF | Network Users Guide - Page 52
document into the machine, use the Fax Resolution key to set the preferred resolution and select a Speed-Dial number and pressing Black Start. If you wish to manually enter the Internet Fax Address load the document into the machine and press Shift and 1 simultaneously to change into the "alphabet - Ricoh C210SF | Network Users Guide - Page 53
Internet FAX Manually Entering Text Press Shift and 1 simultaneously to change into the "alphabet" dialling to change it, use or to position the cursor under the character you want to change, and then type over it. If you want to erase the whole number or whole name, press Stop/Exit when the - Ricoh C210SF | Network Users Guide - Page 54
For US and Canada users) 7 E 0 (For other users) As you enter the If you press the Shift + Black Start buttons to manually poll the E-mail server for will be printed automatically after paper is re-inserted into the will be printed: ATTACHED FILE FORMAT NOT SUPPORTED. FILE NAME:XXXXXX.doc If the - Ricoh C210SF | Network Users Guide - Page 55
steps for configuring Fax Forward can be found in the User's Guide supplied with your machine. Please see the User's Guide included with the machine to check that this feature is supported. This function is not available for color fax documents. Relay Broadcasting This function allows the machine - Ricoh C210SF | Network Users Guide - Page 56
be included with the phone number inside the parenthesis. Sending to multiple phone numbers: If you want to have the document relayed to more than one standard fax machine the address can be entered using the following method: 1 Enter the phone number of the first Fax machine [email protected] - Ricoh C210SF | Network Users Guide - Page 57
support sending to multiple phone numbers. If your E-mail application cannot support multiple phone numbers you will only be able to relay to one processed. Verification Mail for receiving allows you to transmit a default report back to the sending station after successfully receiving and processing - Ricoh C210SF | Network Users Guide - Page 58
if the message is opened for reading or is printed the receiving station sends back a notification to the original sending machine or user. The receiving station must support the MDN field in order to be able to send a notification report, otherwise the request will be ignored. Setup Mail (RX) There - Ricoh C210SF | Network Users Guide - Page 59
Internet FAX Important information on Internet Fax Internet Fax Communication on a LAN system is basically the same as communication via E-mail; however, it is different from Fax communication using standard phone lines. The following is important information for using Internet Fax: 7 ■ - Ricoh C210SF | Network Users Guide - Page 60
password and IP address information). See Restoring the network settings to factory default on page 3-15. Network print software installation problems The print server is not found during setup of the network print software installation or from the printer driver of the machine in Windows®. Make - Ricoh C210SF | Network Users Guide - Page 61
Troubleshooting 2 Check to see if there is any LED activity. The print Network Configuration List and check if the settings such as IP address settings are correct for your network. The problem may be the result of mismatched or duplicate IP address. Verify that the IP address is correctly loaded - Ricoh C210SF | Network Users Guide - Page 62
Protocol-specific troubleshooting Windows® 98/98SE/Me and Windows NT® 4.0 Peer-to-Peer print (LPR) troubleshooting If you are having trouble printing on a Windows® 98/98SE/Me, Windows NT® 4.0 or later Peer-to-Peer network (LPR method), check the following: 1 Make sure that the LPR Port driver is - Ricoh C210SF | Network Users Guide - Page 63
ipaddress This will then force Windows® 2000/XP to use Port 80 to communicate with the print server. Web browser troubleshooting (TCP/IP) 1 type in the IP address of the print server. This will stop your PC from trying to connect to your ISP or proxy server every time you wish to look at the printer - Ricoh C210SF | Network Users Guide - Page 64
print server remote console to see a list of available services): Enter HELP at the command prompt for a list of supported commands. Service (Example) BINARY_P1 TEXT_P1 BRN_xxxxxx_P1 Definition TCP/IP binary, NetBIOS service TCP/IP text service (adds carriage return after each line feed) TCP/IP - Ricoh C210SF | Network Users Guide - Page 65
(it should appear in the /etc/services file on your host as a real service; type man A bootpd or refer to your Certain BOOTP host software implementations will not respond to BOOTP requests if you have not included a download filename in the configuration one you put in the /etc/hosts file). A - 2 - Ricoh C210SF | Network Users Guide - Page 66
type: ps -ef | grep -v grep | grep rarpd The print server will get the IP address from the RARP daemon when the printer is powered on. Using APIPA to configure the IP address The print server supports protocol is disabled, the default IP address of a is available on Windows® systems that have - Ricoh C210SF | Network Users Guide - Page 67
your print server can receive an IP address from any one of these IP address allocation systems. In which case, password "access" (the password will not appear on the screen). You will be prompted for a user name. Enter anything in response to this prompt. You will then get the Local> prompt. Type - Ricoh C210SF | Network Users Guide - Page 68
255.0 If you do not have any subnets, use one of the following default subnet masks: 255.0.0.0 for class A networks A 255.255.0.0 for class B networks 255.255.255.0 for class C networks The leftmost group of digits in your IP address can identify the type of network you have. The value of this group - Ricoh C210SF | Network Users Guide - Page 69
software (e.g. the Internet Connection Firewall available in Windows Guide. 2 Select the model name and your language (if necessary), and then click Install Optional Applications. 3 Click Printer Driver (Only). 4 Click Next in response to the Welcome message. Follow the on-screen instructions - Ricoh C210SF | Network Users Guide - Page 70
Server, mDNS, TELNET, SNMP, HTTP Network type Network printing Computer requirements (for drivers, BRAdmin Professional, Peer-to-Peer software, etc.) 10/100BASE-TX Ethernet network Windows® 98/98SE/Me Peer-to-Peer printing Windows NT® 4.0 and Windows® 2000/XP TCP/IP printing Processor Intel - Ricoh C210SF | Network Users Guide - Page 71
Appendix A Function Table and Default Factory Settings LEVEL LEVEL ONE TWO LEVEL THREE OPTIONS OPTIONS FACTORY SETTING (up to 30 characters) 4.Mailbox Name (up to 20 characters) 5.Mailbox Pwd Password:****** Verify:****** 3.Setup 1.Auto Polling Mail RX On/ Off 4.Setup Mail TX 5.Setup - Ricoh C210SF | Network Users Guide - Page 72
Appendix A 7.Scan to 1.B/W File Type E-mail TIFF/PDF TIFF 2.ColorFile Type PDF/JPEG JPEG 0.Factory - Reset A *1: The factory setting for IP Address and Subnet Mask may be changed by the APIPA setting. A - 9 - Ricoh C210SF | Network Users Guide - Page 73
4-8 LPR/LPD 1-5 M MIME 5-1 I N Network Configuration List 3-16 Network Printing 4-1 Network Shared Printing 1-4 P Password 4-1, 5-7 Peer to Peer Software 4-6 Peer-to-Peer 1-3 Ping 8-2, 8-3 POP3 5-2 Port9100 1-5 Protocol 1-5 R RARP 1-5, 3-2, A-2 Restoring the network settings - Ricoh C210SF | Network Users Guide - Page 74
Index Windows® 2000 4-1, 5-1, 5-7, 8-4 Windows® 2000/XP Printing 4-1 Windows® 98/Me 8-3 Windows® 98/Me Printing 4-6 Windows® XP 4-1, 5-1, 5-7, 8-4 WINS Config 3-5 I WINS Server 3-5 Copylight © 2005 I - 2 - Ricoh C210SF | Network Users Guide - Page 75
Network User's Guide EN USA G157-3302
-
 1
1 -
 2
2 -
 3
3 -
 4
4 -
 5
5 -
 6
6 -
 7
7 -
8
-
9
-
10
-
11
-
12
-
13
-
14
-
15
-
16
-
17
-
18
-
19
-
20
-
21
-
22
-
23
-
24
-
25
-
26
-
27
-
28
-
29
-
30
-
31
-
32
-
33
-
34
-
35
-
36
-
37
-
38
-
39
-
40
-
41
-
42
-
43
-
44
-
45
-
46
-
47
-
48
-
49
-
50
-
51
-
52
-
53
-
54
-
55
-
56
-
57
-
58
-
59
-
60
-
61
-
62
-
63
-
64
-
65
-
66
-
67
-
68
-
69
-
70
-
71
-
72
-
73
-
74
-
75
 |
 |

Network User’s Guide
Read this manual carefully before you use this machine and keep it handy for future reference. For safe and correct
use, be sure to read the Important Information in “User’s Guide” before using the machine.