Samsung 740T User Manual (ENGLISH) - Page 24
Rear, Enter button
 |
UPC - 729507709277
View all Samsung 740T manuals
Add to My Manuals
Save this manual to your list of manuals |
Page 24 highlights
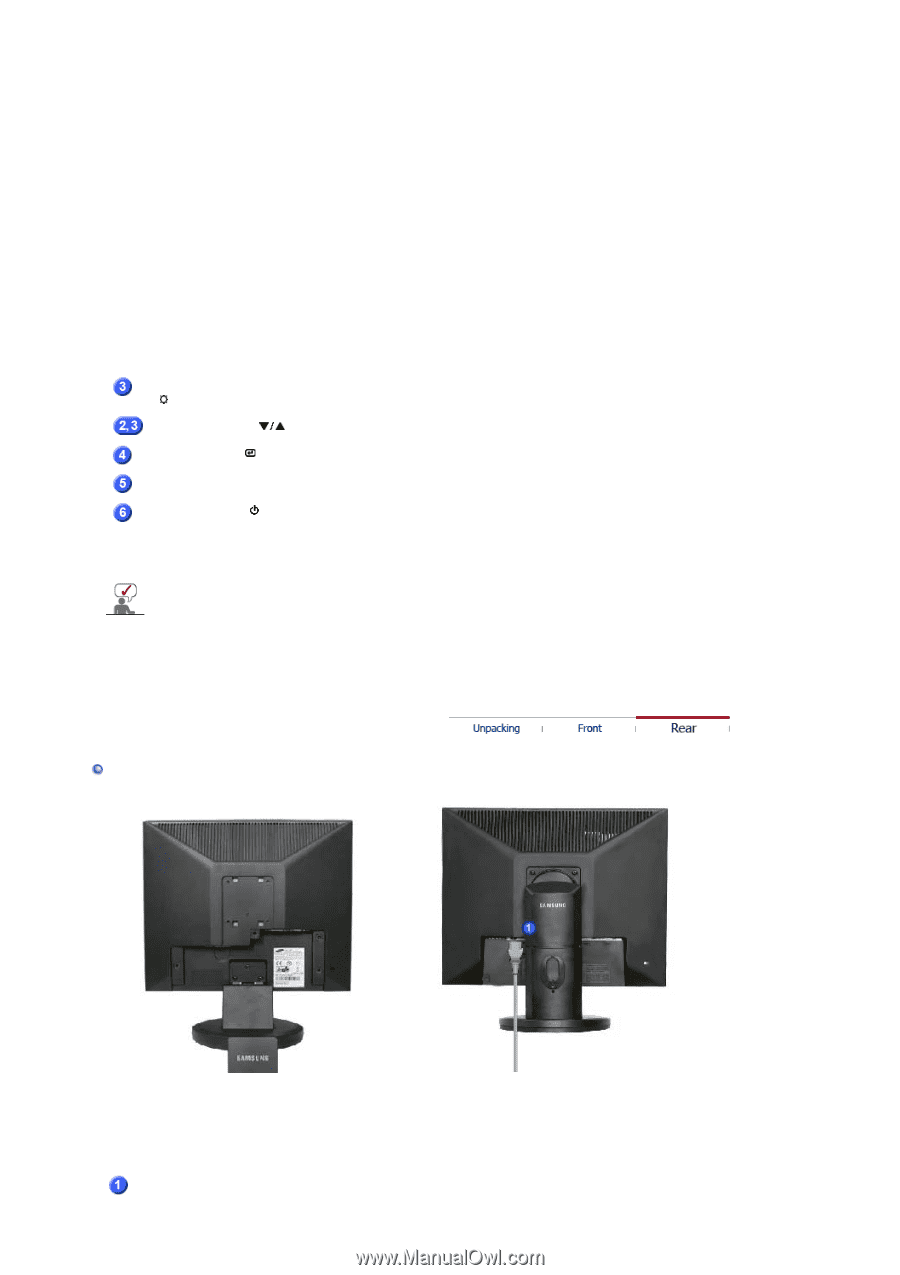
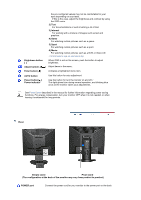
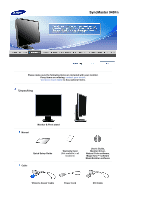
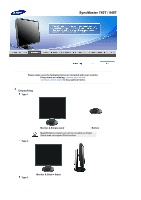
the pre-configured values may not be comfortable for your eyes depending on your taste. If this is the case, adjust the brightness and contrast by using the OSD menu. 2) Text For documentations or work involving a lot of text. 3) Internet For working with a mixture of images such as text and graphics. 4) Game For watching motion pictures such as a game. 5) Sport For watching motion pictures such as a sport. 6) Movie For watching motion pictures such as a DVD or Video CD. >>Click here to see an animation clip Brightness button [] Adjust buttons [ ] Enter button [ ] When OSD is not on the screen, push the button to adjust brightness. Adjust items in the menu. Activates a highlighted menu item. AUTO button Power button [ ]/ Power indicator Use this button for auto adjustment. Use this button for turn the monitor on and off. / This light glows blue during normal operation, and blinking blue once as the monitor saves your adjustments. See PowerSaver described in the manual for further information regarding power saving functions. For energy conservation, turn your monitor OFF when it is not needed, or when leaving it unattended for long periods. Rear Simple stand Pivot stand (The configuration at the back of the monitor may vary from product to product.) POWER port Connect the power cord for your monitor to the power port on the back
-
 1
1 -
2
-
3
-
4
-
5
-
6
-
7
-
8
-
9
-
10
-
11
-
12
-
13
-
14
-
15
-
16
-
17
-
18
-
 19
19 -
 20
20 -
 21
21 -
 22
22 -
 23
23 -
 24
24 -
 25
25 -
 26
26 -
 27
27 -
 28
28 -
 29
29 -
30
-
31
-
32
-
33
-
34
-
35
-
36
-
37
-
38
-
39
-
40
-
41
-
42
-
43
-
44
-
45
-
46
-
47
-
48
-
49
-
50
-
51
-
52
-
53
-
54
-
55
-
56
-
57
-
58
-
59
-
60
-
61
-
62
-
63
-
64
-
65
-
66
-
67
-
68
-
69
-
70
-
71
-
72
-
73
-
74
-
75
-
76
-
77
-
78
-
79
-
80
-
81
-
82
-
83
-
84
-
85
-
86
-
87
-
88
-
89
-
90
-
91
-
92
-
93
-
94
-
95
-
96
-
97
-
98
-
99
-
100
-
101
-
102
-
103
-
104
-
105
-
106
-
107
-
108
-
109
-
110
-
111
-
112
-
113
-
114
-
115
-
116
-
117
-
118
-
119
-
120
-
121
-
122
-
123
-
124
-
125
-
126
-
127
-
128
-
129
-
130
-
131
-
132
-
133
-
134
-
135
-
136
-
137
-
138
-
139
-
140
-
141
-
142
-
143
-
144
-
145
-
146
-
147
-
148
-
149
-
150
-
151
-
152
-
153
-
154
-
155
-
156
-
157
-
158
-
159
-
160
-
161
-
162
-
163
-
164
-
165
-
166
-
167
-
168
-
169
-
170
-
171
-
172
-
173
-
174
-
175
-
176
-
177
-
178
-
179
-
180
-
181
-
182
-
183
-
184
-
185
-
186
-
187
-
188
-
189
 |
 |