Samsung 910MP User Manual (ENGLISH)
Samsung 910MP - SyncMaster 19" LCD Monitor Manual
 |
UPC - 729507708232
View all Samsung 910MP manuals
Add to My Manuals
Save this manual to your list of manuals |
Samsung 910MP manual content summary:
- Samsung 910MP | User Manual (ENGLISH) - Page 1
Install Drivers Install Programs SyncMaster 910MP - Samsung 910MP | User Manual (ENGLISH) - Page 2
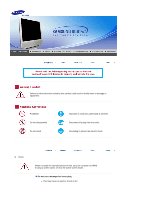
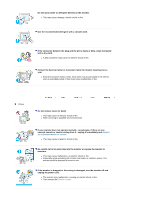
Failure to follow directions noted by this symbol could result in bodily harm or damage to equipment. Prohibited Do not disassemble Do not touch Important to read and understand at all times Disconnect the plug from the outlet Grounding to prevent an electric shock Power When not used for - Samsung 910MP | User Manual (ENGLISH) - Page 3
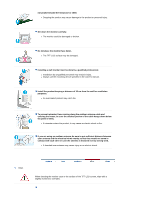
not connect too many extension cords or plugs to an outlet. z This may cause fire. Installation Be sure to contact an authorized service center, when installing your monitor in a location with the heavy dust, high or low temperatures, high humidity, chemical substance and where it operates for 24 - Samsung 910MP | User Manual (ENGLISH) - Page 4
. Do not place the monitor face down. z The TFT-LCD surface may be damaged. Installing a wall bracket must be done by a qualified professional. z Installation by unqualified personnel may result in injury. z Always use the mounting device specified in the owner's manual. Install the product keeping - Samsung 910MP | User Manual (ENGLISH) - Page 5
cause malfunction or fire. Others Do not remove cover (or back). z This may cause an electric shock or fire. z Refer servicing to qualified service personnel. If your monitor does not operate normally - in particular, if there are any unusual sounds or smells coming from it - unplug it immediately - Samsung 910MP | User Manual (ENGLISH) - Page 6
monitor by pulling only the wire or the signal cable. z This may cause a breakdown, electric shock or fire due to damage to the cable. Do not move the monitor enters the monitor, unplug the power cord and contact the Service Center . Do not use or store inflammable substances near the monitor. z This - Samsung 910MP | User Manual (ENGLISH) - Page 7
undesirable picture quality. 19 inch - 1280 X cables, including the antenna cable and cables connected to other devices, are disconnected before moving the monitor. z Failure to disconnect a cable may damage it and lead to fire or an electric shock. When you remove batteries from the remote control - Samsung 910MP | User Manual (ENGLISH) - Page 8
The customer is responsible for returning the used or rechargeable battery for recycling purposes as the consumer of the battery. z The customer can return the used or rechargeable battery to a nearby public recycling center or to a store selling the same type of the battery or rechargeable battery. - Samsung 910MP | User Manual (ENGLISH) - Page 9
sure the following items are included with your monitor. If any items are missing, contact your dealer. Contact a local dealer to buy optional items. Unpacking Manual Monitor Quick Setup Guide Warranty Card User's Guide, Monitor Driver, (Not available in all locations) Natural Color software - Samsung 910MP | User Manual (ENGLISH) - Page 10
Cable D-Sub Cable Others Power Cord Audio Cable Remote Control Batteries (AAA X 2) Connector Front 1. SOURCE 2. PIP 6. ENTER 7. Power button 3. MENU 8. Power indicator 4. CH 9. Remote Control Sensor 5. - VOL + 1. SOURCE - Samsung 910MP | User Manual (ENGLISH) - Page 11
Moves from one menu item to another vertically or adjusts selected menu values. In TV mode, selects TV channels. >>Click here to see an animation clip 5. - VOL + Moves 9. Remote Control Sensor Aim the remote control towards this spot on the Monitor. See PowerSaver described in the manual for - Samsung 910MP | User Manual (ENGLISH) - Page 12
Europe. 4. AV connection Terminal 1. Left(L) / Right(R) audio connection Terminal (Input) 2. Video connection Terminal (Input) 3. S-Video connection Terminal (Input) 5. TV Connection Terminal 1. TV Connection Terminal For more information > Connecting TV 2. Headphone connection Terminal (Output) - Samsung 910MP | User Manual (ENGLISH) - Page 13
See Connecting the Monitor for further information regarding cable connections. Remote Control The performance of the remote control may be affected by a TV or other electronic devices operated near the monitor, causing malfuction due to interference with frequency. 1. POWER 2. number 3. +100 4. - + - Samsung 910MP | User Manual (ENGLISH) - Page 14
or - + is pressed in the Mute mode. 6. TTX/MIX TV channels provide written information services via teletext. For more information > TTX / MIX TTX / MIX is allowed only in external devices that are connected to the monitor at the time. [PC] [TV] [Ext.] [AV] [S-Video] 11. INFO Current picture - Samsung 910MP | User Manual (ENGLISH) - Page 15
19. S.MODE ( Sound Mode ) When you press this button, current mode is Displays on the lower center of the screen. The Monitor be operated depending on broadcasting type by using DUAL button on the remote control while watching TV. MTS : You can select the MTS (MultiCHANNEL Television Stereo) mode - Samsung 910MP | User Manual (ENGLISH) - Page 16
into a nearby outlet. 2. Using the D-sub (Analog) connector on the video card. Connect the signal cable to the 15-pin, D-sub connector on the back of Your Monitor. 3. Connect the audio cable for Your Monitor to the audio port on the back of your computer. 4. Turn on both your computer and the - Samsung 910MP | User Manual (ENGLISH) - Page 17
older model Macintoshes, you need to adjust the resolution control DIP switch on the Macintosh adapter (optional) referring to the switch configuration table shown on its rear. 3. Turn on the monitor and Macintosh. Connecting to other devices This monitor allows the user to connect it to such input - Samsung 910MP | User Manual (ENGLISH) - Page 18
the monitor. 3. Select TV using Source button among the external signal adjustment buttons. 4. Select a desired TV channel after channel search. Is weak signal causing poor reception? Purchase and install a signal amplifier for better reception. In areas where Antenna cable is not supported, first - Samsung 910MP | User Manual (ENGLISH) - Page 19
3. Connecting Headphone You may connect your headphones to the monitor. 1. Connect your headphones to the Headphone connection terminal. Using the Stand This monitor supports various types of VESA-standard bases. You need to either fold or remove the base in use in order to install a VESA base. 1. - Samsung 910MP | User Manual (ENGLISH) - Page 20
system you have. Prepare a blank disk and download the driver program file at the Internet web site shown here. z Internet web site : http://www.samsung.com (Worldwide) http://www.samsungusa.com/monitor (USA) http://www.sec.co.kr/monitor (Korea) http://www.samsungmonitor.com.cn/ (China - Samsung 910MP | User Manual (ENGLISH) - Page 21
installation is completed. Windows XP/2000 1. Insert CD into the CD-ROM drive. 2. Click "Windows XP/2000 Driver" 3. Choose Your Monitor model in the model list, then click the "OK" button. 4. Click the "Install" button in the "Warning" window. 5. If you can see following message window, - Samsung 910MP | User Manual (ENGLISH) - Page 22
system you have. Prepare a blank disk and download the driver program file at the Internet web site shown here. z Internet web site : http://www.samsung.com (Worldwide) http://www.samsungusa.com/monitor (USA) http://www.sec.co.kr/monitor (Korea) http://www.samsungmonitor.com.cn/ (China - Samsung 910MP | User Manual (ENGLISH) - Page 23
"Next" button. 6. Select "Don't search ,I will.." then click "Next" and then click "Have disk". 7. Click the "Browse" button then choose A:(D:\Driver) and choose Your Monitor model in the model list and click the "Next" button. 8. If you can see following message window, then click the "Continue - Samsung 910MP | User Manual (ENGLISH) - Page 24
driver will be posted on Samsung Monitor Homepage. http://www.samsung.com 9. Click the "Close" button then click "OK" button continually. 10. Monitor driver 3. Choose A:(D:\Driver) then click the "Open" button and then click "OK" button. How to install 1. Click "Start" , "Setting" , "Control Panel". - Samsung 910MP | User Manual (ENGLISH) - Page 25
Control Panel". 2. Double click "Display" icon. 3. Select the "Settings" tab and click "Advanced Properties" button. 4. Select the "Monitor" tab. 5. Click the "Change" button in the "Monitor Type" area. 6. Choose "Specify the location of the driver". 7. Choose "Display a list of all the driver guide - Samsung 910MP | User Manual (ENGLISH) - Page 26
monitor. The Natural Color S/W is the very solution for this problem. It is a color administration system developed by Samsung the program manually, insert the CD included with the Samsung monitor into the the Natural Color software program Select [Setting]/[Control Panel] on the [Start] menu and - Samsung 910MP | User Manual (ENGLISH) - Page 27
PIP Description Use to select PC, TV or other external input source connected to the Monitor. Use to select the screen of your choice. - The direct button on the remote control is 'SOURCE' button. 1) PC 2) TV 3) Ext. As for EXT(RGB) port of the Monitor, it makes TV or VIDEO signal input and output - Samsung 910MP | User Manual (ENGLISH) - Page 28
On : Turn the PIP Screen on or off. - The direct button on the remote control is 'PIP' button. 2) Source PC : TV / Ext. / AV / S-Video Mode : Select the input source for the PIP. - The direct button on the remote control is 'SOURCE' button. 3) Size : Change the Size of the PIP window. - The direct - Samsung 910MP | User Manual (ENGLISH) - Page 29
pre-configured brightness value. You can easily select one of four settings by simply pressing the MagicBright™ control button. - The direct button on the remote control is 'M/B' button. 1) Entertain : High Brightness For watching motion pictures such as a DVD or VCD. 2) Internet : Medium Brightness - Samsung 910MP | User Manual (ENGLISH) - Page 30
PIP window on the screen. TV / Ext. / AV / S-Video Mode Available Mode : PC : TV : Ext. : AV : S-Video OSD Mode Description The Monitor has four automatic picture settings (" can switch the Size. - The direct button on the remote control is 'P.SIZE' button. TV / Ext. / AV / S-Video : Play - Samsung 910MP | User Manual (ENGLISH) - Page 31
1) 16:9 2) Normal 3) Zoom1 4) Zoom2 Sound Available Mode : PC : TV : Ext. : AV : S-Video OSD Description Mode The Monitor has a built-in high fidelity stereo amplifier. - The direct button on the remote control is 'S.MODE' button. 1) Standard : Choose Standard for the standard factory - Samsung 910MP | User Manual (ENGLISH) - Page 32
be functioned at the same time. Sound Select You can select either Main or Sub when PIP is On. Main Sub Channel Available Mode : PC : TV : Ext. : AV : S-Video OSD Country Description Select the country in which the product is being used before you use the Auto Store feature. If you - Samsung 910MP | User Manual (ENGLISH) - Page 33
to exchange the numbers of two channels. Name - PC Mode :PIP is On. If channel name information is broadcast when you store the channels either manually or automatically, the names are assigned to the channels directly. You can however change these names or assign new names as required. Fine Tune - Samsung 910MP | User Manual (ENGLISH) - Page 34
Available Mode : PC : TV : Ext. : AV : S-Video OSD Description Area When you turn the power on of the product for the first time since it released Configuration from a factory, menu to select location will appear. Choose the region and country where you use the monitor. This is because - Samsung 910MP | User Manual (ENGLISH) - Page 35
yourself before calling for service. Contact the service center for problems that you cannot solve by yourself. Self-Test Feature Check | Not Optimum Mode | Display Adapter Driver Maintenance and Cleaning | Symptoms & Recommended Actions 1. Self-Test Feature Check Your monitor provides a self test - Samsung 910MP | User Manual (ENGLISH) - Page 36
monitor driver. 4. Check if the scanning ratio of the video screen is set at 60Hz. (The screen refresh rate must be set within in a range of 56~75hz.) 5. If you have problems in installing the adapter (video) driver, boot the computer in Safe Mode, remove the Display Adapter at the "Control Panel - Samsung 910MP | User Manual (ENGLISH) - Page 37
Screen | Audio | Remote Control 1. Problems related to Installation Problems related to the monitor installation and their solutions are listed. Problems Solutions PC It appears the PC does not function normally. z Check if the Display Adapter Driver (VGA Driver) is properly installed. (Refer - Samsung 910MP | User Manual (ENGLISH) - Page 38
card. How can I adjust the resolution? Note that video card support can vary, depending on the version of the driver used. (Refer to the computer or the video card manual for details.) z Windows XP : Set the resolution at the Control Panel Themes Display Settings. z Windows ME/2000 : Set the - Samsung 910MP | User Manual (ENGLISH) - Page 39
case/LCD Panel? * Contact the video card manufacturer for details. z Windows XP : Set the resolution at the Control Panel Control Panel Display Screen Saver. Set the function at BIOS-SETUP of the computer. (Refer to Windows/Computer Manual). Disconnect the power cord and then clean the monitor - Samsung 910MP | User Manual (ENGLISH) - Page 40
General General Model Name SyncMaster 910MP LCD Panel Size 19.0 inch diagonal Display area 376.32(H) x 301.056(V) Pixel ±10%(terminated), Separate H/V sync, Composite, TTL level, positive or negative TV / Video Color system NTSC-3.58/4.43 ,PAL-M/N,PAL/SECAM-L/L',B/G,D/K,I Video format - Samsung 910MP | User Manual (ENGLISH) - Page 41
stand) monitor settings. In most cases, monitor installation will proceed automatically, unless the user wishes to select alternate settings. Dot Acceptable TFT LCD LCD sub monitor has a built-in power management system called PowerSaver. This system saves energy by switching your monitor monitor - Samsung 910MP | User Manual (ENGLISH) - Page 42
will be adjusted automatically. However, if the signal differs, the screen may go blank while the power LED is on. Refer to the video card manual and adjust the screen as follows. Table 1. Preset Timing Modes Display Mode Horizontal Frequency (kHz) MAC, 640 x 480 35.000 MAC, 832 x 624 49.726 - Samsung 910MP | User Manual (ENGLISH) - Page 43
Broadcasting Systems Countries Portugal Netherlands Austria Singapore Indonesia Australia Rumania Hongkong Paraguay SECAM-B Iran Iraq Saudi arabia Syria Lebanon Egypt SECAM SECAM-D SECAM-K1 Russia Hungary Bulgaria Poland SECAM-L France Horizontal Frequency The time to scan one line - Samsung 910MP | User Manual (ENGLISH) - Page 44
Service The address and phone number of the company can be changed without previous notice. AUSTRALIA : Samsung Electronics Australia Pty Ltd. Customer Response Centre 7 Parkview Drive, Homebush Bay NSW 2127 Tel : 1300 362 603 http://www.samsung.com.au/ BRAZIL : Samsung Eletronica da Amazonia Ltda. - Samsung 910MP | User Manual (ENGLISH) - Page 45
Ciencies, 55-65 (Poligono Pedrosa) 08908 Hospitalet de Llobregat (Barcelona) Tel. : (93) 261 67 00 Fax. : (93) 261 67 50 http://samsung.es/ FRANCE : SAMSUNG ELECTRONICS FRANCE Service Paris Nord 2 66 rue des Vanesses BP 50116 Villepinte 95950 Roissy CDG Cedex Tel : 08 25 08 65 65 Fax : 01 48 63 06 - Samsung 910MP | User Manual (ENGLISH) - Page 46
öksadress : Johanneslundsvägen 4 Samsung support Sverige: 020-46 46 46 Samsung support Danmark : 8088-4646 Samsung support Norge: 8001-1800 Samsung support Finland: 0800-118001 Tel +46 8 590 966 00 Fax +46 8 590 966 50 http://www.samsung.se/ THAILAND : HAI SAMSUNG Service Center MPA COMPLEX BUILDING - Samsung 910MP | User Manual (ENGLISH) - Page 47
The Non-Interlace method is used for the majority of monitors to ensure a clear image. The Interlace method is the same as that used in TVs. Plug & Play This is a function that provides the EIAJ Electronic Industries Association of Japan. RF Cable A round signal cable generally used for TV antennas. - Samsung 910MP | User Manual (ENGLISH) - Page 48
cable broadcasting is transmitted via a cable network. In order to view cable TV, one must purchase a cable receiver and hook it up to the cable network. CATV "CATV" refers to the broadcasting service TV channel to obtain the best viewing conditions. The Samsung LCD TV has both automatic and manual - Samsung 910MP | User Manual (ENGLISH) - Page 49
herein or for incidental or consequential damages in connection with the furnishing, performance, or use of this material. Samsung is the registered trademark of Samsung Electronics Co., Ltd.; Microsoft, Windows and Windows NT are registered trademarks of Microsoft Corporation; VESA, DPMS and DDC - Samsung 910MP | User Manual (ENGLISH) - Page 50
'03 Recycling Information (TCO'03 applied model only) Medical Requirement Mercury Statement (LCD Monitor, LCD TV, DLP Projection TV, Projector for USA only) FCC Information User Instructions The Federal Communications Commission Radio Frequency Interference Statement includes the following warning - Samsung 910MP | User Manual (ENGLISH) - Page 51
? In many countries, environmental labelling has become an established method for encouraging the adaptation of goods and services to the environment.The main problem as far as monitors and other electronic equipment are concerned is that environmentally harmful substances are used both in the - Samsung 910MP | User Manual (ENGLISH) - Page 52
one or more stages. The length of time to reactivate the monitor shall be reasonable for the user. Labelled products must meet strict ) Environmental Requirements Brominated flame retardants are present in printed circuit boards, cables, wires, casings and housings. In turn, they delay the spread - Samsung 910MP | User Manual (ENGLISH) - Page 53
labelled computers? In many countries, environmental labelling has become an established method for encouraging the adaptation of goods and services to the environment. The main problem, as far as computers and other electronics equipment are concerned, is that environmentally harmful substances - Samsung 910MP | User Manual (ENGLISH) - Page 54
Flame retardants Flame retardants are present in printed circuit boards, cables, wires, casings and housings. Their purpose is to permitted in the back light system of flat panel monitors as today there is no commercially available alternative. strain problems. Important parameters are luminance, - Samsung 910MP | User Manual (ENGLISH) - Page 55
TCO'03 applied model only) For recycling information for TCO'03 certified monitors, for the residents in the following countries, please contact the company those who reside in other countries, please contact a nearest local Samsung dealer for recycling information for the products to be treated in - Samsung 910MP | User Manual (ENGLISH) - Page 56
used in accordance with the instructions, may cause harmful interference z Consult the manufacturer or field service technician for help. Video In / in doubt, consult the technical services department or your local representative Mercury Statement (LCD Monitor, LCD TV, DLP Projection TV, Projector for - Samsung 910MP | User Manual (ENGLISH) - Page 57
LCD Monitors and TVs may have image retention when switching from one image to another especially after displaying a stationary image for a long time. This guide is to demonstrate correct usage of LCD Transit Stations, Stock Markets, Banks, and Controlling Systems We recommend that you follow set up - Samsung 910MP | User Manual (ENGLISH) - Page 58
The best way to protect your monitor from Image retention is to set your PC or System to operate a Screen Saver program when you are not using it. Image retention may not occur when a LCD panel is operated under normal conditions. Normal conditions are defined as continuously changing video patterns
-
 1
1 -
 2
2 -
 3
3 -
 4
4 -
 5
5 -
 6
6 -
 7
7 -
8
-
9
-
10
-
11
-
12
-
13
-
14
-
15
-
16
-
17
-
18
-
19
-
20
-
21
-
22
-
23
-
24
-
25
-
26
-
27
-
28
-
29
-
30
-
31
-
32
-
33
-
34
-
35
-
36
-
37
-
38
-
39
-
40
-
41
-
42
-
43
-
44
-
45
-
46
-
47
-
48
-
49
-
50
-
51
-
52
-
53
-
54
-
55
-
56
-
57
-
58
 |
 |
Install Drivers
Install Programs
SyncMaster 910MP