Samsung CLX-6260 Fleet Admin Pro Overview Admin Guide - Page 9
Opening System Browser, Logging in to System, System Interface Overview, Getting Started_9
 |
View all Samsung CLX-6260 manuals
Add to My Manuals
Save this manual to your list of manuals |
Page 9 highlights
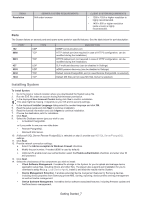
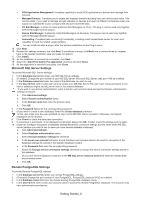
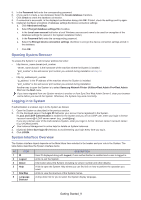
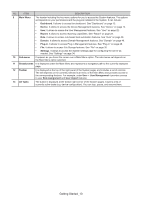
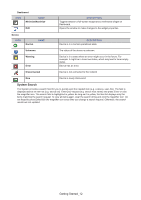
5. In the Password field enter the corresponding password. 6. (If you want to create a new database) Select the Create database checkbox. 7. Click Check to check the database connection. 8. If connection is successful, in the displayed confirmation dialog click OK. If failed, check the settings and try again. 9. (Optional) Configure encryption of database settings file/device connection settings: a. Click Advanced settings. b. Select Encrypt database settings file checkbox. c. In the Local user account field enter a local Windows user account name to be used for encryption of the database settings file (stored in the System installation folder). d. In the Password field enter the corresponding password. e. Select the Encrypt device connection settings checkbox to encrypt the device connection settings stored in the database. f. Click OK. Opening System Browser To access the System in a web browser address bar enter: • http://server_name.domain:port_number "server_name.domain" is the hostname of the machine where the System is installed. "port_number" is the web server port number you entered during installation on step 12. Or • http://ip_address:port_number "ip_address" is the IP address of the machine where the System is installed. "port_number" is the web server port number you entered during installation. Another way to open the System is to select Samsung Network Printer Utilities>Fleet Admin Pro>Fleet Admin Pro from the Start menu. If you have migrated from one System version to another or from SyncThru Web Admin Server 6, clear your browser cache before you launch the System. Otherwise, the System may work incorrectly. Logging in to System If authentication is enabled, log in to the System as follows: 1. Open the System as described in the previous section. 2. On the displayed page in the Login ID field enter your account name registered in the System. If Local and LDAP authentication is enabled in the System and you are an LDAP user, enter your login in format @ (e.g. j.smith@sng). If you are a domain user of the multi-instance System, enter your login in format \ (e.g. UKOffice\j.smith). See Instance Management in online help for details on System instances. 3. (Optional) Select Save login ID checkbox to avoid entering your login every time you log in. 4. Click LOGIN. System Interface Overview The System interface layout depends on the Main Menu item selected in the header and your role in the System. The table below describes the System interface items: NO. ITEM 1 ID 2 Logout 3 About 5 Help 7 Site Map 8 Language Selector DESCRIPTION User ID displayed along with Logout, if user authentication is enabled and a user is logged in. A link to exit the System. Information about the System (including its version number and other details). A link to open the System Help where you can find info on how to perform the operation you need. A link to view the structure of the System menus. A drop-down list for you to select the System display language. Getting Started_9
-
 1
1 -
2
-
3
-
 4
4 -
 5
5 -
 6
6 -
 7
7 -
 8
8 -
 9
9 -
 10
10 -
 11
11 -
 12
12 -
 13
13 -
 14
14 -
15
-
16
-
17
-
18
-
19
-
20
-
21
-
22
-
23
-
24
-
25
-
26
-
27
-
28
-
29
-
30
-
31
-
32
-
33
-
34
-
35
-
36
-
37
-
38
-
39
-
40
-
41
-
42
-
43
-
44
-
45
-
46
-
47
-
48
-
49
-
50
-
51
-
52
-
53
-
54
-
55
-
56
-
57
-
58
-
59
-
60
-
61
-
62
-
63
-
64
-
65
 |
 |