Samsung LH40MGQLBF/ZA Quick Guide (ENGLISH) - Page 22
Wall Bracket Assembly, Hinge Left
 |
View all Samsung LH40MGQLBF/ZA manuals
Add to My Manuals
Save this manual to your list of manuals |
Page 22 highlights
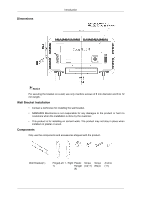
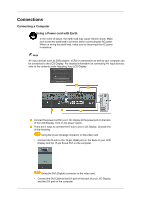
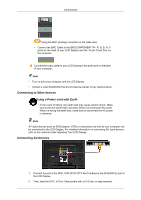
Introduction Wall Bracket Assembly Note There are two hinges(left and right). Use the correct one. 1. Insert and tighten the Captive Screw in the direction of the arrow. When done, mount the wall bracket on the wall. There are two hinges(left and right). Use the correct one. A - Captive Screw B - Wall Bracket C - Hinge (Left) D - Hinge (Right) 2. Before drilling into the wall, check if the length between the two locking holes at the back of the product is correct. If the length is too short or long, loosen all or some of the 4screws on the wall bracket to adjust the length. A - Length between the two locking holes
-
 1
1 -
2
-
3
-
4
-
5
-
6
-
7
-
8
-
9
-
10
-
11
-
12
-
13
-
14
-
15
-
16
-
 17
17 -
 18
18 -
 19
19 -
 20
20 -
 21
21 -
 22
22 -
 23
23 -
 24
24 -
 25
25 -
 26
26 -
 27
27 -
28
-
29
-
30
-
31
-
32
-
33
-
34
-
35
-
36
-
37
-
38
 |
 |
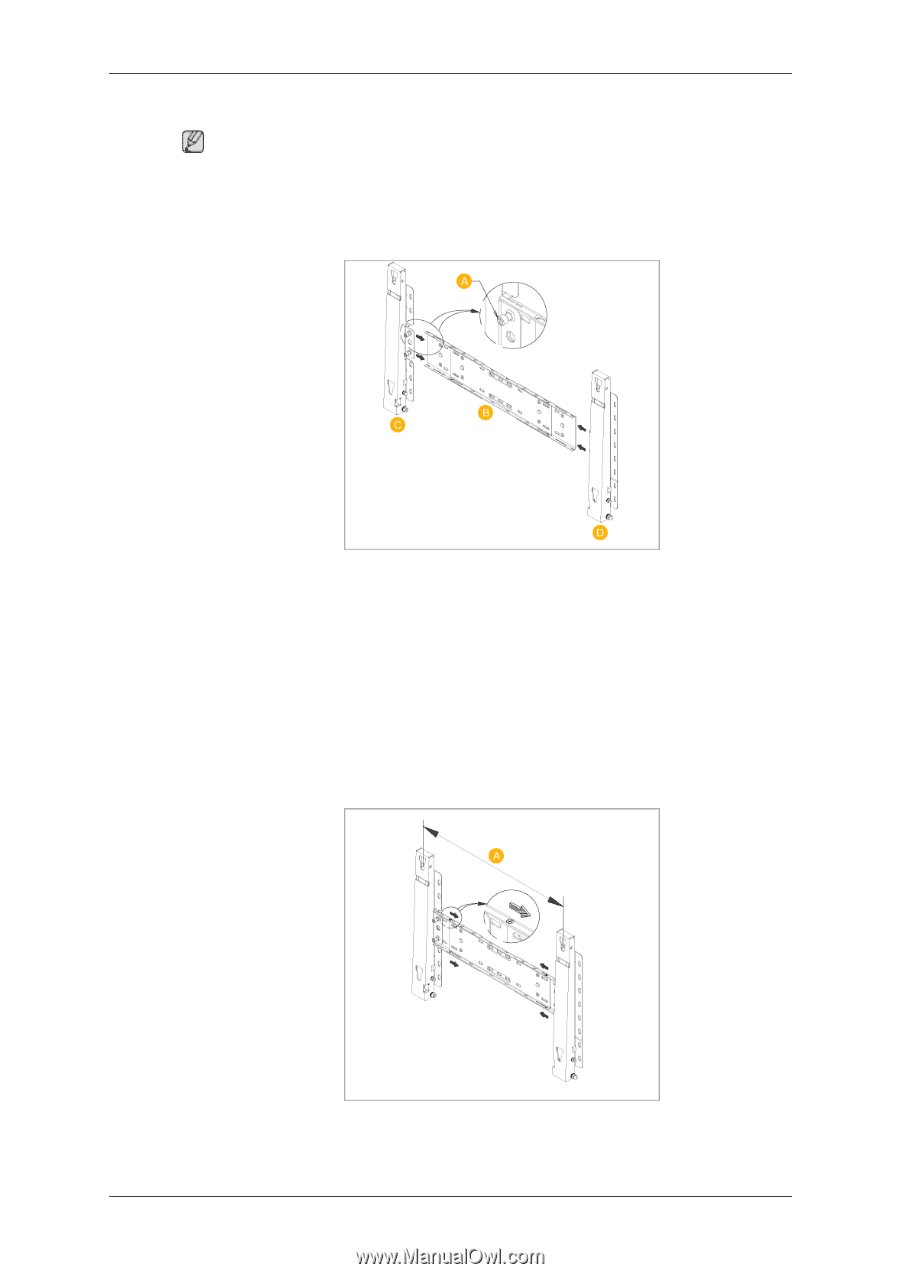
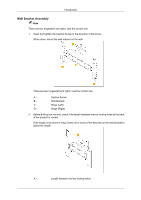
Wall Bracket Assembly
Note
There are two hinges(left and right). Use the correct one.
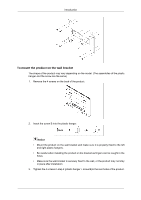
1.
Insert and tighten the Captive Screw in the direction of the arrow.
When done, mount the wall bracket on the wall.
There are two hinges(left and right). Use the correct one.
A -
Captive Screw
B -
Wall Bracket
C -
Hinge (Left)
D -
Hinge (Right)
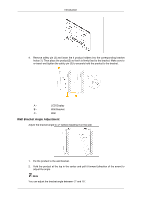
2.
Before drilling into the wall, check if the length between the two locking holes at the back
of the product is correct.
If the length is too short or long, loosen all or some of the 4screws on the wall bracket to
adjust the length.
A -
Length between the two locking holes
Introduction