Samsung LH40MGQLBF/ZA Quick Guide (ENGLISH) - Page 24
Wall Bracket Angle Adjustment, You can adjust the bracket angle between -2° and 15°.
 |
View all Samsung LH40MGQLBF/ZA manuals
Add to My Manuals
Save this manual to your list of manuals |
Page 24 highlights
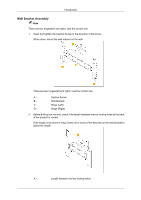
Introduction 3. Tighten the 4 screws in step 2 (plastic hanger + screw B)to the rear holes of the product. 4. Remove safety pin (3) and insert the 4 product holders into the corresponding bracket holes (1). Then place the product(2) so that it is firmly fixed to the bracket. Make sure to re-insert and tighten the safety pin (3) to securely hold the product to the bracket. A - LCD Display B - Wall Bracket C - Wall Wall Bracket Angle Adjustment Adjust the bracket angle to -2° before installing it on the wall. 1. Fix the product to the wall bracket. 2. Hold the product at the top in the center and pull it forward (direction of the arrow) to adjust the angle. Note You can adjust the bracket angle between -2° and 15°.
-
 1
1 -
2
-
3
-
4
-
5
-
6
-
7
-
8
-
9
-
10
-
11
-
12
-
13
-
14
-
15
-
16
-
17
-
18
-
 19
19 -
 20
20 -
 21
21 -
 22
22 -
 23
23 -
 24
24 -
 25
25 -
 26
26 -
 27
27 -
 28
28 -
 29
29 -
30
-
31
-
32
-
33
-
34
-
35
-
36
-
37
-
38
 |
 |
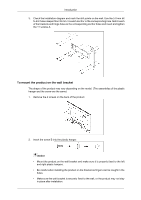
3.
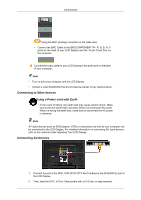
Tighten the 4 screws in step 2 (plastic hanger + screw B)to the rear holes of the product.
4.
Remove safety pin (3) and insert the 4 product holders into the corresponding bracket
holes (1). Then place the product(2) so that it is firmly fixed to the bracket. Make sure to
re-insert and tighten the safety pin (3) to securely hold the product to the bracket.
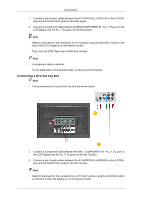
A -
LCD Display
B -
Wall Bracket
C -
Wall
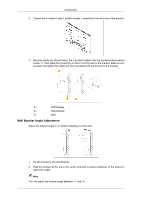
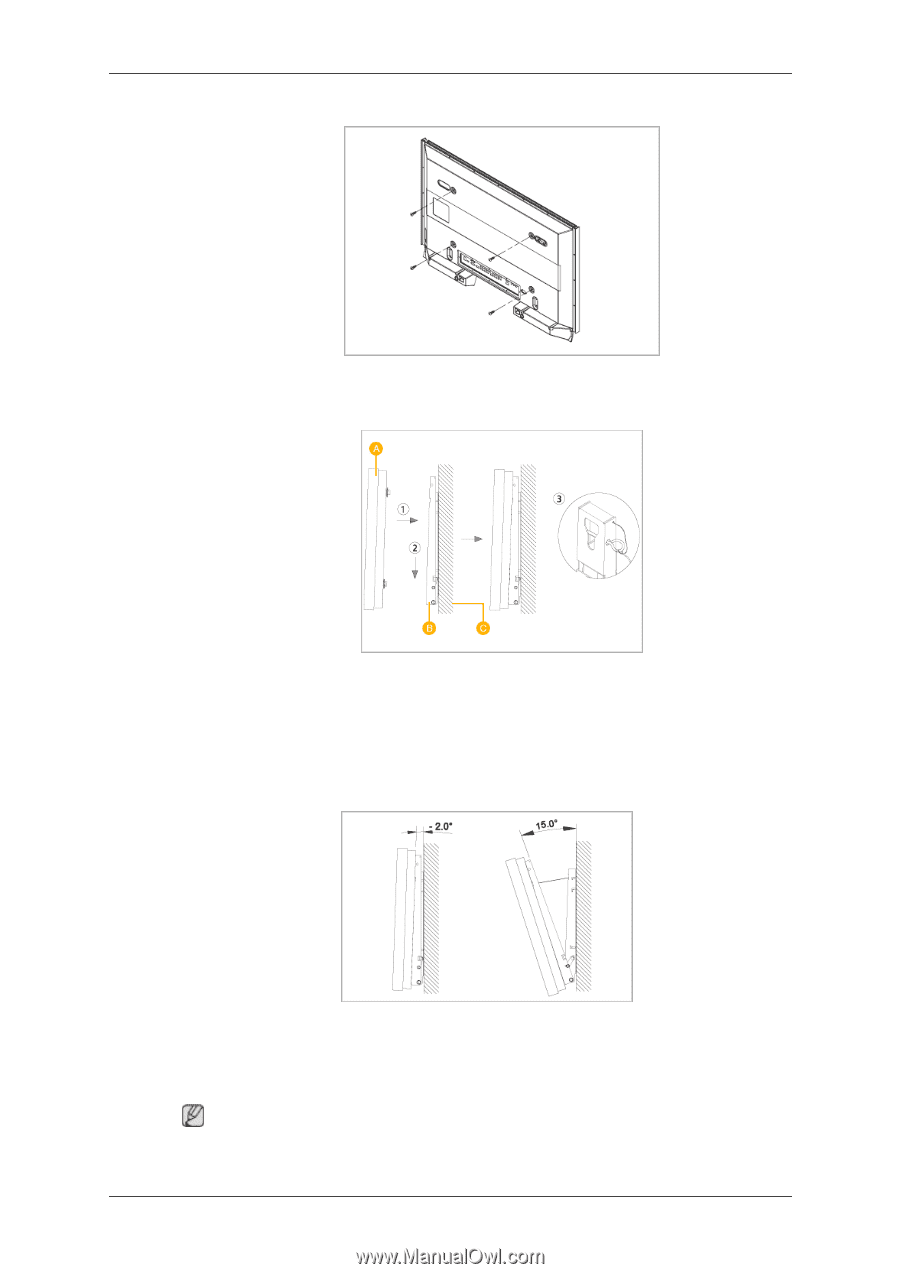
Wall Bracket Angle Adjustment
Adjust the bracket angle to -2° before installing it on the wall.
1.
Fix the product to the wall bracket.
2.
Hold the product at the top in the center and pull it forward (direction of the arrow) to
adjust the angle.
Note
You can adjust the bracket angle between -2° and 15°.
Introduction