Samsung RS2630WW Quick Guide (easy Manual) (ver.1.0) (English) - Page 24
Installation Of The Water Dispenser Line - water freezes
 |
View all Samsung RS2630WW manuals
Add to My Manuals
Save this manual to your list of manuals |
Page 24 highlights
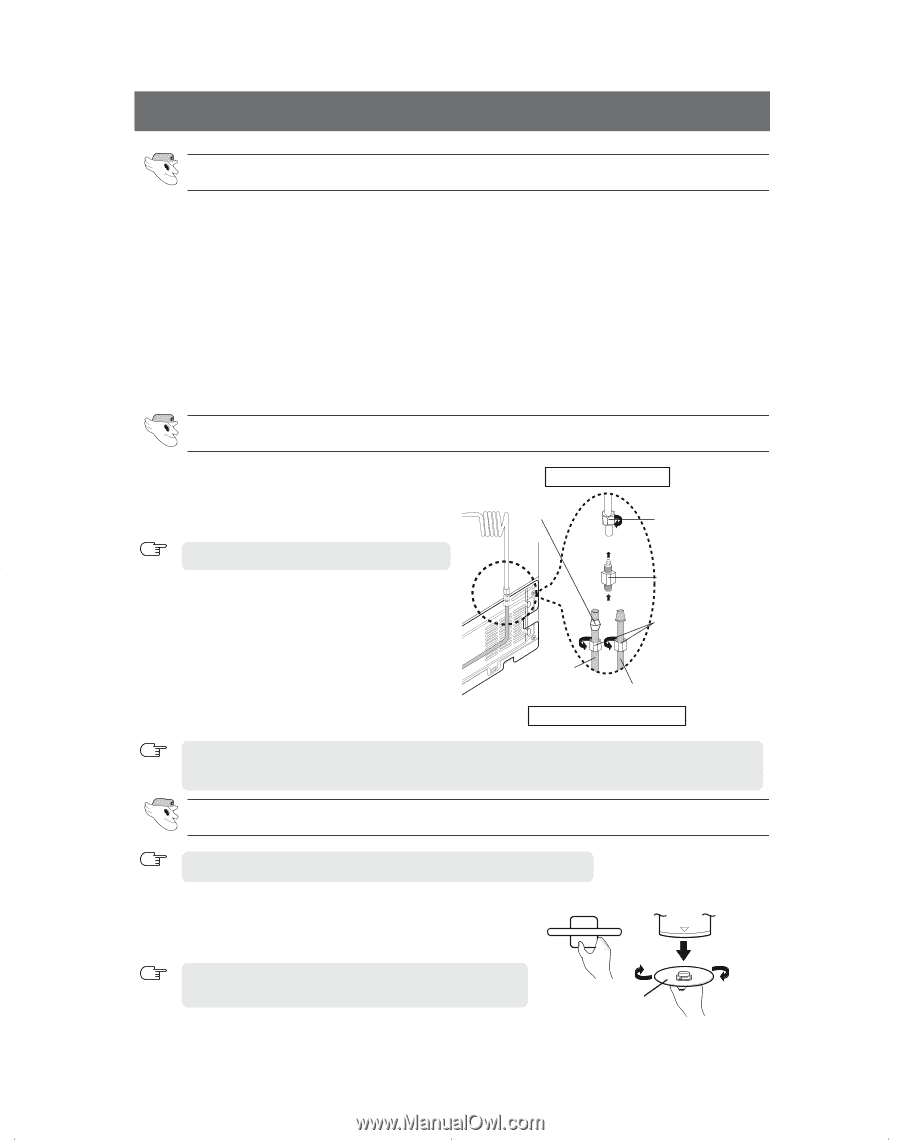
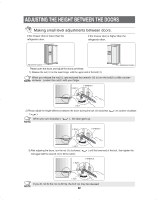
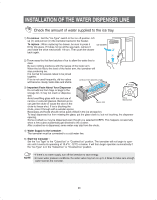
INSTALLATION OF THE WATER DISPENSER LINE Before You Install the water line • This water line installation is not warranted by the refrigerator or icemaker manufacturer. Follow these instructions carefully to minimize the risk of expensive water damage. • Banging pipes (water banging in the pipes) in house plumbing can cause damage to refrigerator parts and lead to water leakage or flooding. Call a qualified plumber to correct the problem before installing the water supply line to the refrigerator. • To prevent burns and product damage, do not hook up the water line to the hot water line. • If you use your refrigerator before connecting the water line, make sure the"Ice Type" is set to the ICE OFF position. • Do not install the icemaker tubing in areas where temperatures fall below freezing. • When using any electrical device (such as a power drill) during installation, be sure the device is insu- lated or wired in a manner to prevent electric shock. • All installations must be in a accordance with local plumbing code requirements. Connect the water tube to the refrigerator. 1) Slip the compression nut through the provided plastic tubing. 2) Tighten the compression nut onto 1/4" comprression fitting. Refrigerator Ferrule (Purchased) Compression Nut (1/4") (Provided) NOTE Do not overtighten the compression nut. ● Using Copper Tubing - Slip the compression nut and ferrule on copper tubing as shown. ● Using Plastic Tubing - Insert the molded end of the plastic tubing into the compression fitting. 3) Tighten the compression nut onto the compression fitting. 4) Turn water on and check for any leakage. Compression Fitting (Provided) Compression Nut (1/4") (Purchased) Copper Tubing (Purchased) Plastic Tubing (Purchased) Household Water Line Water line must be connected to drinkable water only. NOTE Cut off 1/4 inch of the provided plastic tubing squarely to prevent leaks when reconnect. Install the water filter. The water filter in the extra space behind the vegetable Bin. NOTE 1) As shown, the fixed cap separates from the refrigerator by rotating it counterclockwise. Remove the water filter from the box and put a month indicator sticker on the filter as shown on the next page. Keep the cap(A) in a safe place for recapping, NOTE when you will not use the filter. (A) 2) The water filter should be replaced every six months, so if the filter was installed in March (for example), put on the "SEP" sticker to remind you to change the filter. 24
-
 1
1 -
2
-
3
-
4
-
5
-
6
-
7
-
8
-
9
-
10
-
11
-
12
-
13
-
14
-
15
-
16
-
17
-
18
-
 19
19 -
 20
20 -
 21
21 -
 22
22 -
 23
23 -
 24
24 -
 25
25 -
 26
26 -
 27
27 -
 28
28 -
 29
29 -
30
 |
 |