Samsung SGH-I317 User Manual Ver.lj2_f3 (English(north America)) - Page 156
Motion, Remove account, Remove, account
 |
View all Samsung SGH-I317 manuals
Add to My Manuals
Save this manual to your list of manuals |
Page 156 highlights
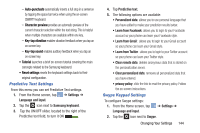
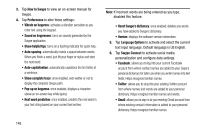
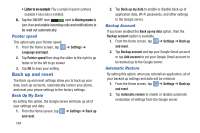
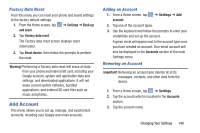
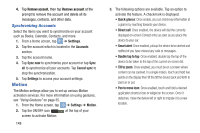
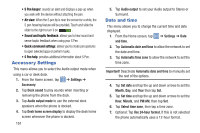
4. Tap Remove account, then tap Remove account at the prompt to remove the account and delete all its messages, contacts, and other data. Synchronizing Accounts Select the items you want to synchronize on your account such as Books, Calendar, Contacts, and more. 1. From a Home screen, tap ➔ Settings. 2. Tap the account which is located in the Accounts section. 3. Tap the account name. 4. Tap Sync now to synchronize your account or tap Sync all to synchronize all your accounts. Tap Cancel sync to stop the synchronization. 5. Tap Settings to access your account settings. Motion The Motion settings allow you to set up various Motion activation services. For more information on using gestures, see "Using Gestures" on page 35. 1. From the Home screen, tap ➔ Settings ➔ Motion. 2. Tap the ON/OFF icon ON at the top of your screen to activate Motion. 149 3. The following options are available. Tap an option to activate the feature. A checkmark is displayed. • Quick glance: Once enable, you can check key information at a glance by reaching towards your device. • Direct call: Once enabled, the device will dial the currently displayed on-screen Contact entry as soon as you place the device to your ear. • Smart alert: Once enabled, pickup the device to be alerted and notified of you have missed any calls or messages. • Double tap to top: Once enabled, double tap the top of the device to be taken to the top of the current on-screen list. • Tilt to zoom: Once enabled, you must be on a screen where content can be zoomed. In a single motion, touch and hold two points on the display then tilt the tilt the device back and forth to zoom in or out. • Pan to move icon: Once enabled, touch and hold a desired application shortcut icon or widget on the screen. Once it detaches, move the device left or right to migrate it to a new location.
-
 1
1 -
2
-
3
-
4
-
5
-
6
-
7
-
8
-
9
-
10
-
11
-
12
-
13
-
14
-
15
-
16
-
17
-
18
-
19
-
20
-
21
-
22
-
23
-
24
-
25
-
26
-
27
-
28
-
29
-
30
-
31
-
32
-
33
-
34
-
35
-
36
-
37
-
38
-
39
-
40
-
41
-
42
-
43
-
44
-
45
-
46
-
47
-
48
-
49
-
50
-
51
-
52
-
53
-
54
-
55
-
56
-
57
-
58
-
59
-
60
-
61
-
62
-
63
-
64
-
65
-
66
-
67
-
68
-
69
-
70
-
71
-
72
-
73
-
74
-
75
-
76
-
77
-
78
-
79
-
80
-
81
-
82
-
83
-
84
-
85
-
86
-
87
-
88
-
89
-
90
-
91
-
92
-
93
-
94
-
95
-
96
-
97
-
98
-
99
-
100
-
101
-
102
-
103
-
104
-
105
-
106
-
107
-
108
-
109
-
110
-
111
-
112
-
113
-
114
-
115
-
116
-
117
-
118
-
119
-
120
-
121
-
122
-
123
-
124
-
125
-
126
-
127
-
128
-
129
-
130
-
131
-
132
-
133
-
134
-
135
-
136
-
137
-
138
-
139
-
140
-
141
-
142
-
143
-
144
-
145
-
146
-
147
-
148
-
149
-
150
-
 151
151 -
 152
152 -
 153
153 -
 154
154 -
 155
155 -
 156
156 -
 157
157 -
 158
158 -
 159
159 -
 160
160 -
 161
161 -
162
-
163
-
164
-
165
-
166
-
167
-
168
-
169
-
170
-
171
-
172
-
173
-
174
-
175
-
176
-
177
-
178
-
179
-
180
-
181
-
182
-
183
-
184
-
185
-
186
-
187
-
188
-
189
-
190
-
191
-
192
-
193
-
194
-
195
-
196
-
197
-
198
-
199
-
200
-
201
-
202
-
203
-
204
-
205
-
206
-
207
-
208
-
209
-
210
-
211
-
212
-
213
-
214
-
215
-
216
-
217
-
218
-
219
-
220
-
221
-
222
-
223
-
224
-
225
-
226
-
227
-
228
-
229
-
230
-
231
-
232
-
233
-
234
-
235
-
236
-
237
-
238
-
239
-
240
-
241
-
242
-
243
-
244
-
245
-
246
-
247
-
248
-
249
-
250
-
251
-
252
-
253
-
254
 |
 |