Samsung UN46EH5000F User Manual Ver.1.0 (English) - Page 2
The On Screen Menus, Picture Menu - tv
 |
View all Samsung UN46EH5000F manuals
Add to My Manuals
Save this manual to your list of manuals |
Page 2 highlights
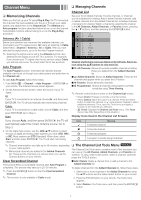
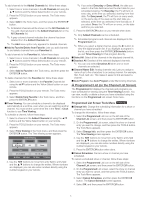
The On Screen Menus Advanced Settings Available in Standard and Movie mode only. Your TV has two kinds of menus, the Main menu and the various Compared to previous models, new Samsung TVs offer a more Tools menus. The Main menu gives you access to most or all of precise picture with more precise controls. the menu options available on your TV. The Tools menus display a selected number of frequently used menu options that change depending on the screen you are viewing. A Tools menu symbol ✎✎ When your TV is connected to a PC, you can only make changes to Gamma and White Balance. (T) in the lower right side of the screen indicates that a Tools menu ■■Color Space (Auto / Native): Auto automatically matches the is available. range of colors available to create pictures to the color range of The Main menu has seven primary categories: the video source. Native provides a color range wider than the color range of the video source. yy Picture yy Sound yy Channel yy Setup yy Input yy Application yy Support ■■White Balance: Adjusts the color temperature of the picture so that white objects look white (instead of, for example, slightly pink or slightly yellow) and the overall color of the picture looks natural. R-Offset / G-Offset / B-Offset: Adjusts each color's (red, green, blue) darkness. To view the Main menu, press the MENU button on your remote. To view a Tools menu, press the TOOLS button on your remote. R-Gain / G-Gain / B-Gain: Adjusts each color's (red, green, blue) brightness. ✎✎ The menu options that appear in the Main menu depend Reset: Resets the White Balance to it's default settings. on the Source you have selected. For example, if you have ■■Gamma: Adjusts the primary color intensity. selected the HDMI source, the Channel category will not ■■Dynamic Contrast (Off / Low / Medium / High): Adjusts the appear. To see the Channel category, you must first select TV screen contrast. in the Source List. ■■Black Tone (Off / Dark / Darker / Darkest): Selects the black The Menu options are presented below, arranged by Main menu categories. A Tools button symbol (t) next to an option name indicates the option is also available in one of the Tools menus. level to adjust the screen depth. Darker settings make blacks look darker. ■■Flesh Tone: Adjusts the amount of red in skin tones. ■■Motion Lighting (Off / On): When on, the TV automatically adjusts the brightness of the screen in response to the Picture Menu brightness of the room. In bright light, the screen brightens. In dim light, the screen dims. Mode t ✎✎ Available in Standard mode only. Picture Options Select your preferred picture mode. ✎✎ When your TV is connected to a PC, you can only select Entertain and Standard. ■■Dynamic: Brightens the screen. Suitable for a bright room. ✎✎ When the TV is connected to a PC, you can only make changes to the Color Tone, Size and HDMI Black Level. ■■Color Tone (Cool / Standard / Warm1 / Warm2): Cool makes the picture bluer (cooler). Warm 1 and Warm 2 make the picture ■■Standard: Suitable for a normal. redder (warmer). ■■Movie: Darkens the screen, making it less glary. Suitable for ✎✎ Warm1 and Warm2 are deactivated when the picture watching movies in a darkened room. mode is set to Dynamic. ■■Entertain: Sharpens the picture. Suitable for games. ✎✎ Only available when the TV is connected to a PC. Backlight / Contrast / Brightness / Sharpness / Color / Tint (G/R) ■■Size: Set the size and aspect ratio of the picture on the screen. Your cable box or satellite receiver may have its own set of screen sizes as well. However, we highly recommend you use the TVs 16:9 mode most of the time. 16:9: Sets the picture to the 16:9 wide screen format. ■■Backlight: Adjusts the brightness of the screen by adjusting the brightness of the individual pixels. Zoom1: Provides moderate magnification of the picture. Sides, top, and bottom are cut off. ■■Contrast: Increases or decreases the contrast between dark and Zoom2: Provides larger magnification of the picture. Sides, top, light areas of the picture. and bottom are cut off. ■■Brightness: Adjusts the brightness of the screen. Not as effective as Backlight. Wide Fit: Enlarges the aspect ratio of the picture so the picture fits the entire screen. ■■Sharpness: Sharpens or dulls the edges of objects. ■■Color: Adjusts the color saturation. The higher the Color setting, the more intense the color. Low settings remove color and the 4:3: Sets the picture to the old, 4:3 format and puts black or gray borders on the right and left of the picture. ✎✎ Do not watch your TV in the 4:3 format for a long time. picture becomes black, white and gray. ■■Tint: Adjusts the amount of green and red in the picture. As you increase the amount of green, the amount of red decreases and vice versa. ✎✎ When the TV is connected to a PC, you can only make changes to Backlight, Contrast, Brightness, and Sharpness. Traces of borders displayed on the left, right and center of the screen may cause image retention (screen burn) which is not covered by the warranty. Screen Fit: Displays the full image without any cut-off when your TV is inputting HDMI (720p / 1080i / 1080p) or Component (1080i / 1080p) HD signals. ✎✎ HD (High Definition) has a 16:9 aspect ratio and 1080i/1080p (1920x1080) or 720p (1280x720) resolution. ✎✎ You can adjust and store settings for each external device you have connected to an input on the TV. Picture Sizes available by Input Source are listed below: - 2 -
-
 1
1 -
 2
2 -
 3
3 -
 4
4 -
 5
5 -
 6
6 -
 7
7 -
 8
8 -
9
-
10
-
11
-
12
-
13
-
14
-
15
-
16
 |
 |