Samsung UN46EH5000F User Manual Ver.1.0 (English) - Page 5
Programmed List on the Channel List Screen - remote
 |
View all Samsung UN46EH5000F manuals
Add to My Manuals
Save this manual to your list of manuals |
Page 5 highlights
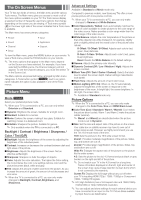
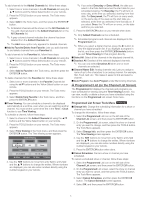
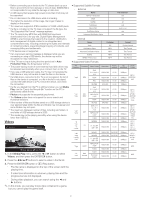
To add channels to the Added Channels list, follow these steps: 1. Select one or more channels in the All Channels list using the ▲/▼ buttons and the Yellow Select button on your remote. 2. Press the TOOLS button on your remote. The Tools menu appears. 3. Select Add in the Tools menu, and then press the ENTERE button. ✎✎ All deleted channels will be shown on the All Channels list. You add channels back to the Added Channels list on the All Channels list. ✎✎ A gray-colored channel indicates the channel has been deleted from the Added Channels list. ✎✎ The Add menu option only appears for deleted channels. ■■Add to Favorite/Delete from Favorite: Lets you add channels to and delete channels from your Favorites list. To add channels to the Favorites list, follow these steps: 1. Select one or more channels in the All Channels list using the ▲/▼ buttons and the Yellow Select button on your remote. 2. Press the TOOLS button on your remote. The Tools menu appears. 3. Select Add to Favorite in the Tools menu, and then press the ENTERE button. To delete channels from the Favorites list, follow these steps: 1. Select one or more channels in the Favorite Channels list using the ▲/▼ buttons and the Yellow Select button on your remote. 2. Press the TOOLS button on your remote. The Tools menu appears. 3. Select Delete from Favorite in the Tools menu, and then press the ENTERE button. ■■Timer Viewing: You can schedule a channel to be displayed automatically at a set time, even when you are watching another channel. You must set the current time first in the Time > Clock function to use Time Viewing. To schedule a channel, follow these steps: 1. Select a channel in the Added Channels list using the ▲/▼ buttons and the Yellow Select button on your remote. 2. Press the TOOLS button on your remote. The Tools menu appears. 3. Select Time Viewing in the Tools menu, and then press the ENTERE button. The Time Viewing screen appears. Timer Viewing Antenna ▲ DTV Air ▼ Date Channel 6-1 Repeat Once Start Time 01-01-2012 12 : 01 am L Move U Adjust E Enter R Return 4. Use the ◄/► buttons to move from entry field to entry field and the ▲/▼ buttons to change the entries. Where numbers are displayed, you can also enter numbers directly using the number keypad on your remote. ✎✎ If you select Everyday or Every Week, the date you select in the Date field becomes the start date for your scheduled viewing. For Everyday, the TV will turn on every day, at the time you selected, starting from that date. For Everyweek, the TV will turn on every week, on the same day of the week as the start date you selected, at the time you selected, from that day on. If you select Once, the TV will turn on once, on the date and time you selected. 5. Press the ENTERE button on your remote when done. ✎✎ Only Added Channels can be scheduled. ✎✎ Scheduled programs and channels are displayed in the Programmed List. ✎✎ When you select a digital channel, press the ► button to view the digital program list. If you highlight a program in the list, and then press the ENTERE(Schedule) button, you set Timer Viewing for that program directly. ■■Select All: Select all the channels in the displayed channel list. ■■Deselect All: Deselect all the selected displayed channels. ✎✎ You can only select Deselect All when one or more channels are selected. ■■Channel Name Edit: Analog channels only. Lets you assign a name of up to five characters to an analog channel. For example, Hist, Food, Golf, etc. This makes it easier to find and select a channel . ■■Auto Program: See Auto Program under Memorizing Channels. Programmed List (on the Channel List Screen) The Programmed list displays the channels and programs you have scheduled for viewing using the Time Viewing function. You can view, modify, or delete a show you have scheduled using the functions on the Programmed List screen Tools menu. Programmed List Screen Tools Menu t ■■Change Info: Change the scheduling information for a show or channel you have scheduled. To change the information, follow these steps: 1. Select the Programmed List icon on the left side of the Channel List screen, and then press the ENTERE button. 2. On the Programmed List screen, select the show or channel entry you want to change, and then press the TOOLS button. The Tools Menu appears. 3. Select Change Info, and then press the ENTERE button. The Time Viewing screen appears. 4. Use the ◄/► buttons to move from entry field to entry field and the ▲/▼ buttons to change the entries. Where numbers are displayed, you can also enter numbers directly using the number keypad on your remote. 5. Press the ENTERE button when done. ■■Cancel Schedules: Cancel a show or channel you have scheduled. To cancel a scheduled show or channel, follow these steps: 1. Select the Programmed List icon on the left side of the Channel List screen, and then press the ENTERE button. 2. On the Programmed List screen, select the show or channel entry you want to cancel, and then press the TOOLS button. The Tools Menu appears. 3. Select Cancel Schedules, and then press the ENTERE button. The Cancel Schedule screen appears. 4. Select OK, and then press the ENTERE button. - 5 -
-
 1
1 -
 2
2 -
 3
3 -
 4
4 -
 5
5 -
 6
6 -
 7
7 -
 8
8 -
 9
9 -
 10
10 -
 11
11 -
12
-
13
-
14
-
15
-
16
 |
 |