Sennheiser ew 300 iem Instructions for Use - Page 45
Selecting the frequency, channel number, Adjusting the sensitvity SR 300 IEM only
 |
View all Sennheiser ew 300 iem manuals
Add to My Manuals
Save this manual to your list of manuals |
Page 45 highlights
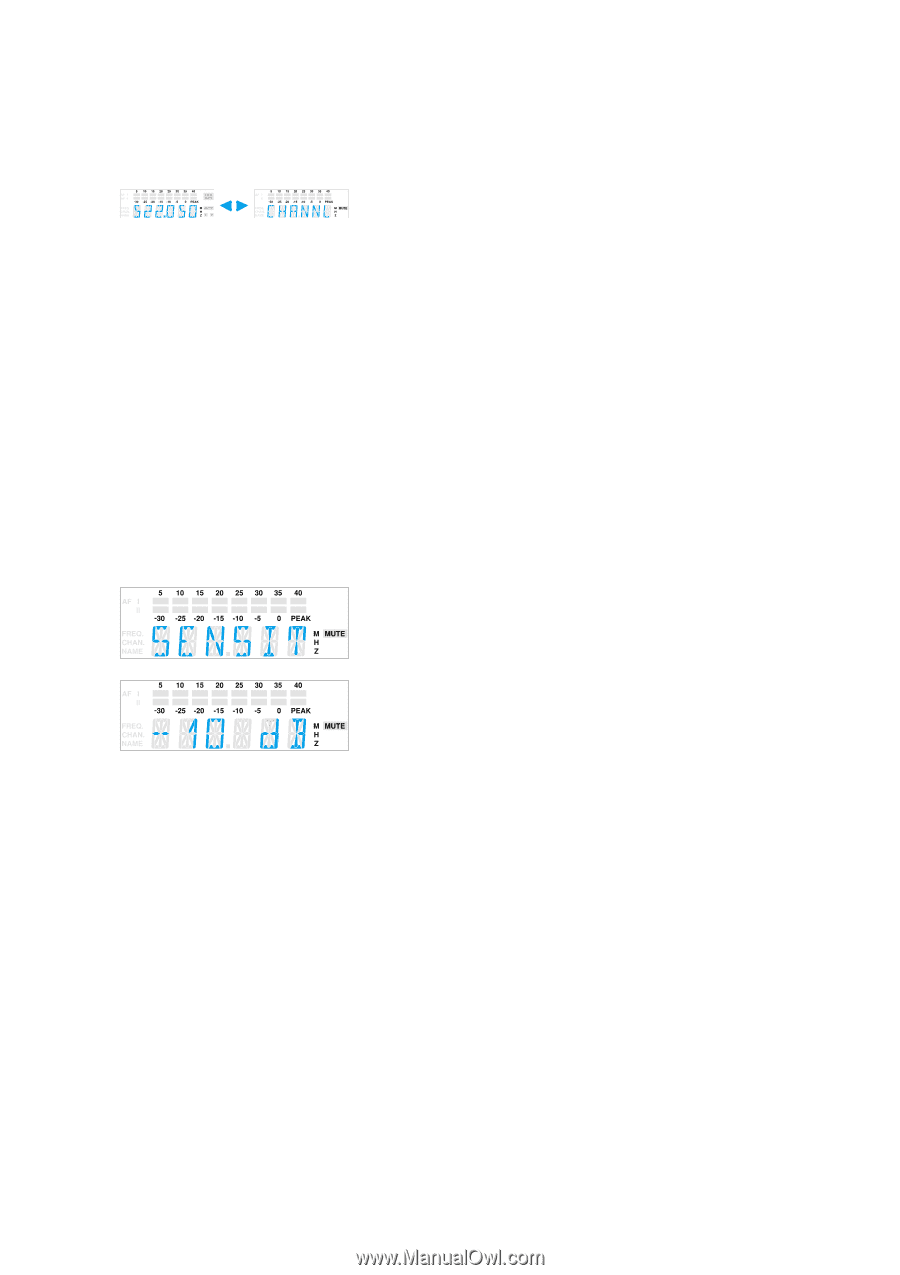
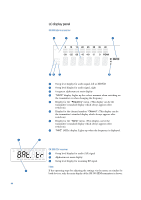
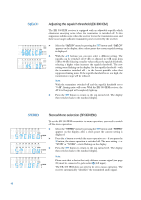
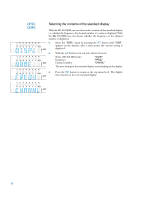
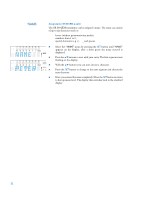
Selecting the frequency, channel number Ǡ With the ̆/̄ buttons you can directly switch between the factorypreset frequencies (channel presets). The display starts flashing. Your selection becomes effective immediately. Ǡ Press the SET button to acknowledge your selection. The display stops flashing. Note: You can choose the content of the standard display i.e. whether the frequency, the channel number or - with the SR 300 IEM - a name is displayed (u "Selecting the content of the standard display"). The devices are factory-preset to show the frequency setting as standard. SENSIT Adjusting the sensitvity (SR 300 IEM only) To match the transmitter to the output level of the connected device (e.g. mixing console), you can adjust the input sensitivity in 4 steps of 5 dB from 0 to -15 dB. Ǡ Select the "SENSIT" menu by pressing the SET button until "SENSIT" appears on the display; after a short pause the current input sensitivity setting is displayed. Ǡ With the ̆/̄ buttons you can now select a different setting. The input sensitivity can be adjusted in 5-dB steps from 0 to -15 dB. The new setting starts flashing on the display and becomes effective immediately. Ǡ Press the SET button to return to the top menu level. The display then switches back to the standard display. 47
-
 1
1 -
2
-
3
-
4
-
5
-
6
-
7
-
8
-
9
-
10
-
11
-
12
-
13
-
14
-
15
-
16
-
17
-
18
-
19
-
20
-
21
-
22
-
23
-
24
-
25
-
26
-
27
-
28
-
29
-
30
-
31
-
32
-
33
-
34
-
35
-
36
-
37
-
38
-
39
-
 40
40 -
 41
41 -
 42
42 -
 43
43 -
 44
44 -
 45
45 -
 46
46 -
 47
47 -
 48
48 -
 49
49 -
 50
50 -
51
-
52
-
53
-
54
-
55
-
56
-
57
-
58
-
59
-
60
-
61
-
62
-
63
-
64
-
65
-
66
-
67
-
68
-
69
-
70
-
71
-
72
-
73
-
74
-
75
-
76
-
77
-
78
-
79
-
80
-
81
-
82
-
83
-
84
-
85
-
86
-
87
-
88
-
89
-
90
-
91
-
92
-
93
-
94
-
95
-
96
-
97
-
98
-
99
-
100
-
101
-
102
-
103
-
104
-
105
-
106
-
107
-
108
-
109
-
110
-
111
-
112
-
113
-
114
-
115
-
116
-
117
-
118
-
119
-
120
-
121
-
122
-
123
-
124
-
125
-
126
-
127
-
128
-
129
-
130
-
131
-
132
-
133
-
134
-
135
-
136
-
137
-
138
-
139
-
140
-
141
-
142
-
143
-
144
-
145
-
146
-
147
-
148
-
149
-
150
-
151
-
152
-
153
-
154
-
155
-
156
-
157
-
158
-
159
-
160
-
161
-
162
-
163
-
164
-
165
-
166
-
167
-
168
-
169
-
170
 |
 |