Sharp 32C530 32C530 Operation Manual - Page 7
Quick Reference Control Operation
 |
View all Sharp 32C530 manuals
Add to My Manuals
Save this manual to your list of manuals |
Page 7 highlights
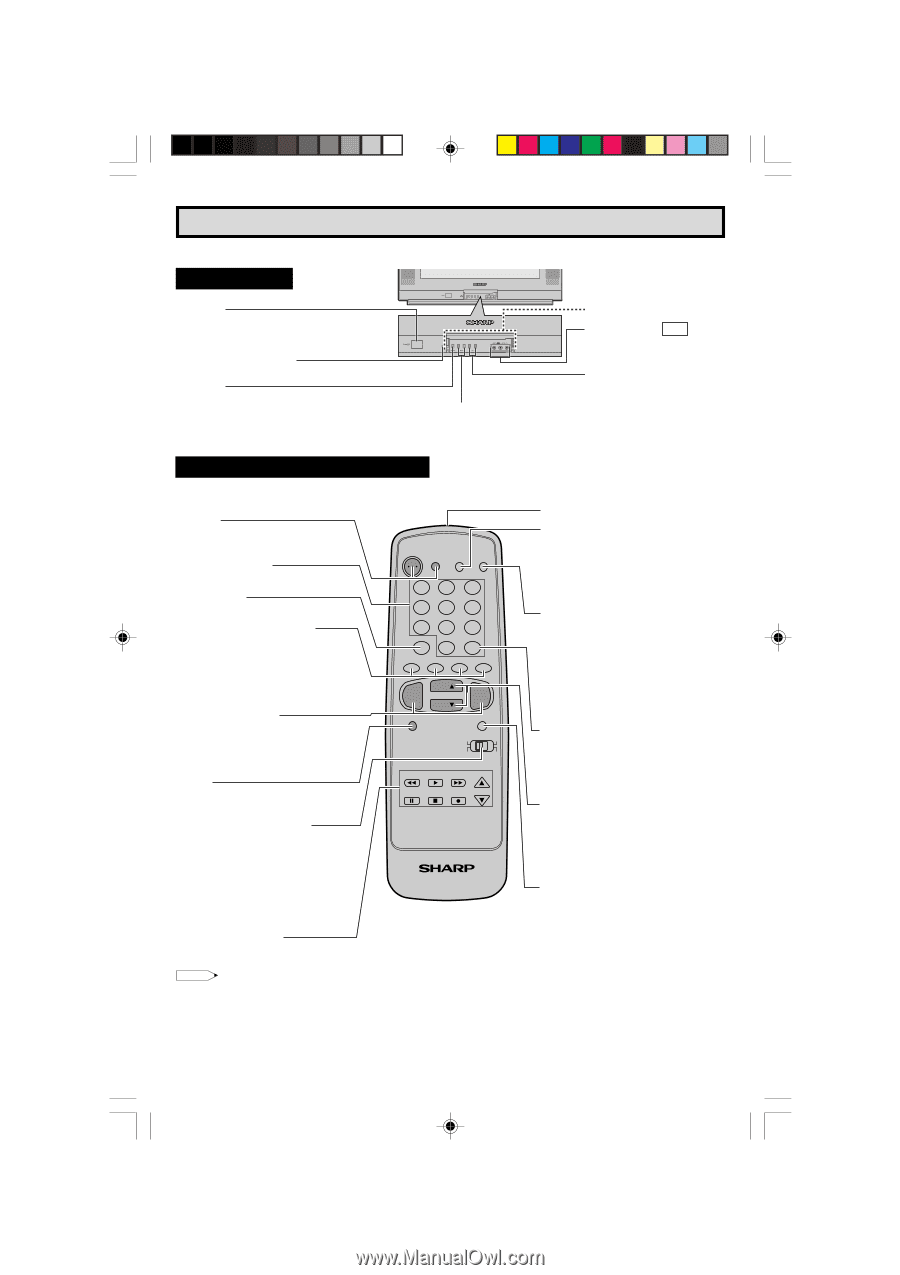
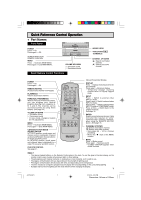
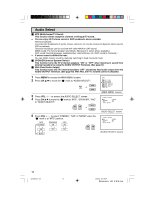
Quick Reference Control Operation • Part Names Front Panel POWER Press → On. Press again → Off. SENSOR AREA FOR REMOTE CONTROL MENU Press → Accesses MAIN MENU. Press again → Exits MAIN MENU. VOLUME UP/DOWN (+) Increases sound. (-) Decreases sound. Basic Remote Control Functions INSIDE DOOR VIDEO/AUDIO IN 2 TERMINALS CHANNEL UP/DOWN (8) Selects next higher channel. (9) Selects next lower channel. POWER Press → On. Press again → Off. REMOTE KEYPAD Accesses any channel from keypad. FLASHBACK Returns to previous channel. PERSONAL PREFERENCE With the Personal Preference buttons, you can program your favorite programs by using the 4 categories A, B, C and D. The channels can be accessed quickly by using these buttons. (See page 32.) VOLUME UP/DOWN (+) Increases sound. (-) Decreases sound. • In menu mode, changes or selects the TV adjustments. MENU Press → Accesses MAIN MENU. Press again → Exits MAIN MENU. CATV/DVD-TV/VCR MODE SELECT SWITCH In TV/VCR position, sends power and channel select commands (Channel up/down and Random Access buttons) to the TV and VCR control. In CATV/DVD position, sends power and channel select commands to a cable TV converter and DVD control. DVD/VCR CONTROL See page 41. POWER TV DVD VCR DISPLAY INPUT 123 456 78 FLASHBACK 0 9 ENTER 100 PERSONAL PREFERENCE A B C D CH VOL VOL - + CH MENU MUTE CATV TV DVD VCR REW PLAY FF PAUSE STOP REC CH/SKIP TV • CATV • VCR • DVD Infrared Transmitter Window DISPLAY Press → Displays receiving channel for four seconds. Press again → Removes display. • Temporarily displays receiving channel when in Closed Caption mode. INPUT Press → Switch to external video INPUT 1 mode. Press 2 times → Switch to external video INPUT 2 mode. Press 3 times → Switch to external video INPUT 3 mode or COMPONENT mode. Press 4 times → Switch back to the original TV mode. See page 39. ENTER Used in some instances where a Cable Converter Box requires an "enter" command after selecting channels, when using the REMOTE KEYPAD button. (See page 41) CHANNEL UP/DOWN (8) Selects next higher channel. (9) Selects next lower channel. • See pages 28 ~ 30 for channel presetting. • Moves the " [ " mark of the MENU screens. MUTE Press → Mutes sound. Press again → Restores sound. • CLOSED CAPTION appears when sound is muted. Note: • The above shaded buttons on the Remote Control glow in the dark. To use the glow-in-the-dark display on the remote control, place it under a fluorescent light or other lighting. • The phosphorescent material contains no radioactive or toxic material, so it is safe to use. • The degree of illumination will vary depending on the strength of lighting used. • The degree of illumination will decrease with time and depending on the temperature. • The time needed to charge the phosphorescent display will vary depending on the surrounding lighting. • Sunlight and fluorescent lighting are the most effective when charging the display. 7 32C530(07) 7 2/18/03, 4:39 PM Dimension: 140mm x 215mm
-
 1
1 -
 2
2 -
 3
3 -
 4
4 -
 5
5 -
 6
6 -
 7
7 -
 8
8 -
 9
9 -
 10
10 -
 11
11 -
 12
12 -
13
-
14
-
15
-
16
-
17
-
18
-
19
-
20
-
21
-
22
-
23
-
24
-
25
-
26
-
27
-
28
-
29
-
30
-
31
-
32
-
33
-
34
-
35
-
36
-
37
-
38
-
39
-
40
-
41
-
42
-
43
-
44
-
45
-
46
-
47
-
48
-
49
-
50
-
51
-
52
-
53
-
54
-
55
-
56
-
57
-
58
-
59
-
60
 |
 |