Sharp CD-DH950P CD-DH950P Operation Manual - Page 12
Listening to a cassette tape, Timer and sleep operation Remote, control only, Setting the clock - cd will not open
 |
View all Sharp CD-DH950P manuals
Add to My Manuals
Save this manual to your list of manuals |
Page 12 highlights
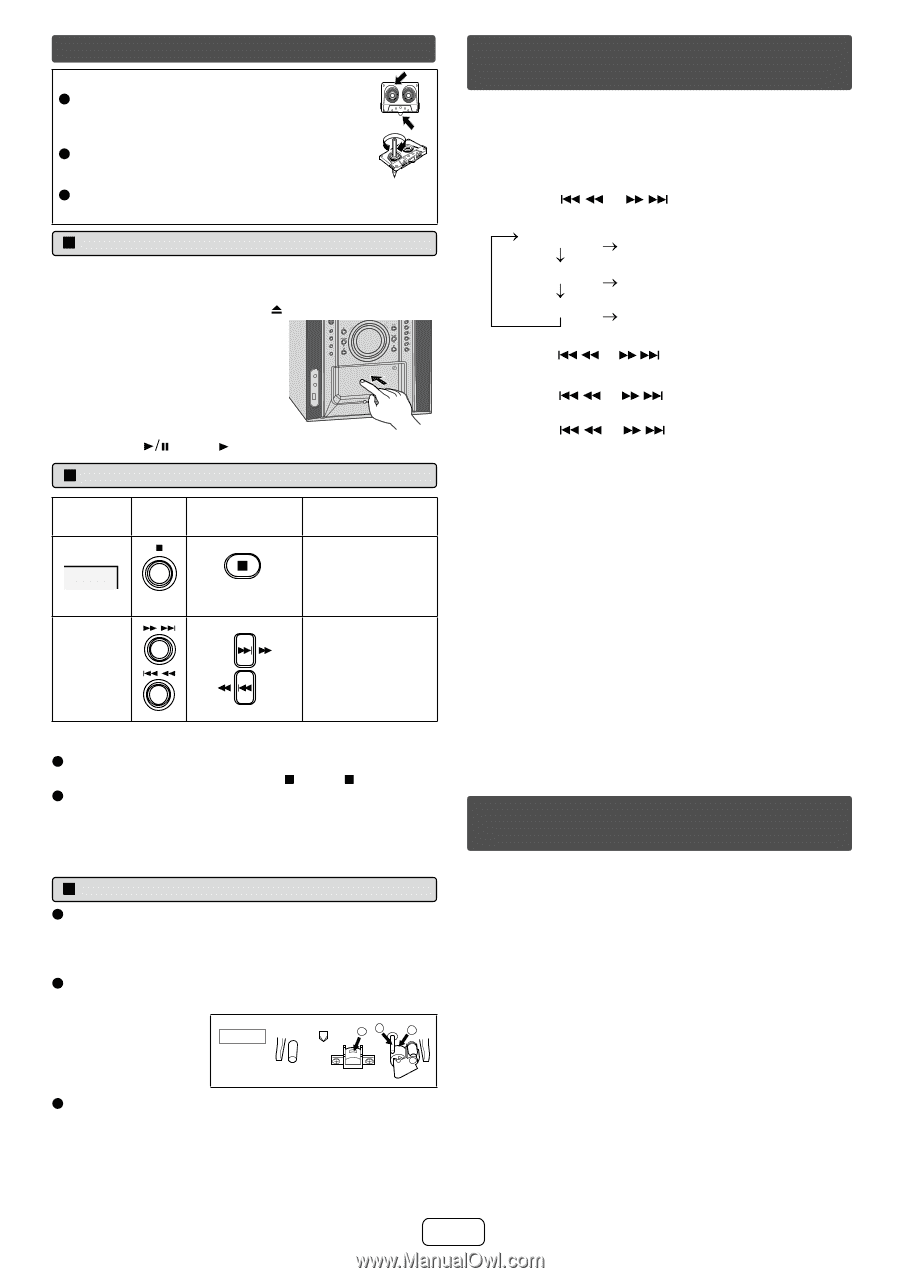
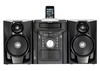
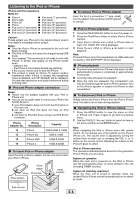
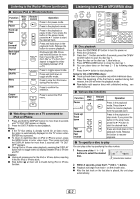
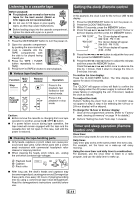
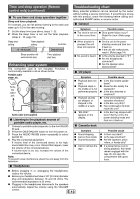
Listening to a cassette tape Before playback: O For playback, use normal or low-noise tapes for the best sound. (Metal or CrO2 tapes are not recommended.) O Do not use C-120 tapes or poor-quality tapes, as they may cause malfunctions. O Before loading a tape into the cassette compartment, tighten the slack with a pen or a pencil. Q Tape playback 1 Press the ON/STAND-BY button to turn the power on. 2 Open the cassette compartment by pushing the area marked " ". 3 Load a cassette into the TAPE compartment with the side to be played facing iPod/iPhone VOL. CD TUNER (BAND) TAPE AUDIO IN USB TUNING VOL. O 5 4 3 PRESET 2 1 toward you. 4 Press the TAPE / TUNER button repeatedly to select TAPE. 5 Press the (TAPE ) button to start playback. Q Various tape functions Function Main unit Stop Fast forward/ rewind Remote control TAPE Operation Press in the playback, fast forward or fast rewind mode. Press in the playback or stop mode. Caution: O Before remove the cassette or changing from one tape operation to another, press the (TAPE ) button. O If a power failure occurs during tape operation, the tape head will remain engaged with the tape and the cassette door will not open. In this case, wait until the power is restored. Q Cleaning the tape-handling parts O Dirty heads, capstans or pinch rollers can cause poor sound and tape jams. Clean these parts with a cotton swab moistened with commercial head/pinch roller cleaner or isopropyl alcohol. O When cleaning the heads, pinch rollers, etc., unplug the unit which contains high voltages. A Playback head B Capstan C Pinch roller TAPE 1 AB C O After long use, the deck's heads and capstans may become magnetized, causing poor sound.Demagnetize these parts once every 30 hours of playing/recording time by using a commercial tape head demagnetizer. Read the demagnetizer's instructions carefully before use. Setting the clock (Remote control only) In this example, the clock is set for the 12-hour (AM 12:00) display. 1 Press the ON/STAND-BY button to turn the power on. 2 Press the CLOCK/TIMER button. 3 Within 10 seconds, press the MEMORY button. 4 Press the or button to select 12-hour or 24-hour display and then press the MEMORY button. "AM 12:00" "AM 0:00" "0:00" The 12-hour display will appear. (AM 12:00 - PM 11:59) The 12-hour display will appear. (AM 0:00 - PM 11:59) The 24-hour display will appear. (0:00 - 23:59) 5 Press the or button to adjust the hour and then press the MEMORY button. 6 Press the or button to adjust the minutes and then press the MEMORY button. Press the or button once to advance the time by 1 minute. Hold it down to change the time in 5-minutes intervals. To confirm the time display: Press the CLOCK/TIMER button. The time display will appear for about 10 seconds. Note: The "CLOCK" will appear or time will flash to confirm the time display when the AC power supply is restored after a power failure or unplugging the unit. If incorrect, readjust the clock as follows. To readjust the clock: Perform "Setting the clock" from step 1. If "CLOCK" does not appear in step 3, step 4 (for selecting the 12-hour or 24-hour display) will be skipped. To change the 12-hour or 24-hour display: 1 Clear all the programmed contents. [Refer to "Factory reset, clearing all memory" on page 14 for details.] 2 Perform "Setting the clock" from step 1 onwards. Timer and sleep operation (Remote control only) Once timer: Once timer play works for one time only at a preset time. Daily timer: Daily timer play works at the same preset time every day. For example, set the timer as a wake-up call every morning. Using the once timer and daily timer in combination: For example, use the once timer to listen to a radio program, and use the daily timer to wake up. E-11
-
 1
1 -
2
-
3
-
4
-
5
-
6
-
 7
7 -
 8
8 -
 9
9 -
 10
10 -
 11
11 -
 12
12 -
 13
13 -
 14
14 -
 15
15 -
 16
16
 |
 |