Sharp DK-CL3P DK-CL3P Operation Manual - Page 11
Basic Operation
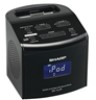 |
UPC - 074000369771
View all Sharp DK-CL3P manuals
Add to My Manuals
Save this manual to your list of manuals |
Page 11 highlights
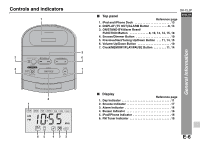
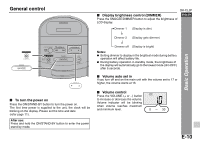
General control DK-CL3P ■ Display brightness control (DIMMER) Press the SNOOZE/DIMMER button to adjust the brightness of LCD display. ENGLISH Dimmer 1 (Display is dim) Dimmer 2 (Display gets dimmer) Basic Operation Dimmer off (Display is bright) Notes: ● Setting dimmer to display in the brightest mode during battery operation will affect battery life. MEMORY ● During battery operation in standby mode, the brightness of the display will automatically go to the lowest mode (dim OFF) after 5 seconds. ■ Volume auto set in If you turn off and on the main unit with the volume set to 17 or higher, the volume starts at 16. ■ Volume control MON Press the VOLUME (+ or -) button ■ To turn the power on Press the ON/STAND-BY button to turn the power on. The first time power is supplied to the unit, the clock will be blinking on the display. Please set the time and date to increase or decrease the volume. Volume indicator will be blinking when volume reaches maximum and minimum level. (refer page 11). After use: Press and hold the ON/STAND-BY button to enter the power stand-by mode. E-10
-
 1
1 -
2
-
3
-
4
-
5
-
 6
6 -
 7
7 -
 8
8 -
 9
9 -
 10
10 -
 11
11 -
 12
12 -
 13
13 -
 14
14 -
 15
15 -
 16
16 -
17
-
18
-
19
-
20
-
21
-
22
-
23
-
24
-
25
-
26
 |
 |
