Sony AITE260S Operating Instructions - Page 19
Option Switches (DIP Switch
 |
View all Sony AITE260S manuals
Add to My Manuals
Save this manual to your list of manuals |
Page 19 highlights
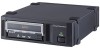
Option Switches (DIP Switch) Remove the two slotted screws by using a slotted screwdriver. Remove the access cover to change the DIP switch settings. (Refer to the following figure for details changing the DIP switch settings.) After changing the DIP switch settings, replace access cover and tighten the two slotted screws using a slotted screwdriver. CAUTION Before removing the access cover to change DIP switch settings on the drive, turn off the computer and disconnect the power cord from the unit. Once the DIP switch settings have been changed, replace the access cover using the two original slotted screws provided. DIP Switch Access Cover Slotted Screws 19 Part 2. Preparation
-
 1
1 -
2
-
3
-
4
-
5
-
6
-
7
-
8
-
9
-
10
-
11
-
12
-
13
-
 14
14 -
 15
15 -
 16
16 -
 17
17 -
 18
18 -
 19
19 -
 20
20 -
 21
21 -
 22
22 -
 23
23 -
 24
24 -
25
-
26
-
27
-
28
-
29
-
30
-
31
-
32
-
33
-
34
-
35
-
36
-
37
-
38
-
39
-
40
-
41
-
42
 |
 |

Part 2.
Preparation
19
Option Switches (DIP Switch)
Remove the two slotted screws by using a slotted screwdriver.
Remove the
access cover to change the DIP switch settings.
(Refer to the following
figure for details changing the DIP switch settings.)
After changing the DIP switch settings, replace access cover and tighten the
two slotted screws using a slotted screwdriver.
CAUTION
Before removing the access cover to change DIP switch settings on the
drive, turn off the computer and disconnect the power cord from the unit.
Once the DIP switch settings have been changed, replace the access cover
using the two original slotted screws provided.
Access Cover
DIP Switch
Slotted
Screws