Sony AITE260S Operating Instructions - Page 24
Part 3. Operation, How To Use the AIT Drive
 |
View all Sony AITE260S manuals
Add to My Manuals
Save this manual to your list of manuals |
Page 24 highlights
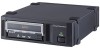
Part 3. Operation This section describes how to use the AIT drive, and how to handle data cartridges. How To Use the AIT Drive 1 Press the POWER switch on the front panel. The POWER indicator should light, and the TAPE MOTION, CLEANING REQUEST, and REPLACE TAPE indicators should blink as the self-test is performed. 2 When the three indicators stop blinking, open the dust cover and insert a data cartridge as shown below. The TAPE MOTION indicator lights. 3 Computer software controls the reading and writing of tapes. While reading or writing, the TAPE MOTION indicator blinks. 4 Close the dust cover. 24 Part 3. Operation
-
 1
1 -
2
-
3
-
4
-
5
-
6
-
7
-
8
-
9
-
10
-
11
-
12
-
13
-
14
-
15
-
16
-
17
-
18
-
 19
19 -
 20
20 -
 21
21 -
 22
22 -
 23
23 -
 24
24 -
 25
25 -
 26
26 -
 27
27 -
 28
28 -
 29
29 -
30
-
31
-
32
-
33
-
34
-
35
-
36
-
37
-
38
-
39
-
40
-
41
-
42
 |
 |

24
Part 3.
Operation
Part 3.
Operation
This section describes how to use the AIT drive, and how to handle data
cartridges.
How To Use the AIT Drive
1
Press the POWER switch on the front panel.
The POWER indicator should light, and the TAPE MOTION,
CLEANING REQUEST, and REPLACE TAPE indicators should blink
as the self-test is performed.
2
When the three indicators stop blinking, open the dust cover and insert a
data cartridge as shown below. The TAPE MOTION indicator lights.
3
Computer software controls the reading and writing of tapes. While
reading or writing, the TAPE MOTION indicator blinks.
4
Close the dust cover.