Sony CDP-M333ES Operating Instructions - Page 24
Storing Specific Tracks (Delete Bank), Grouping Discs (Group File), Assigning discs to groups
 |
View all Sony CDP-M333ES manuals
Add to My Manuals
Save this manual to your list of manuals |
Page 24 highlights
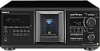
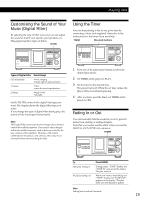
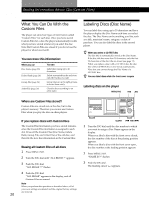
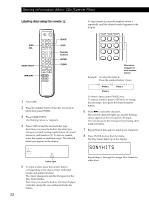
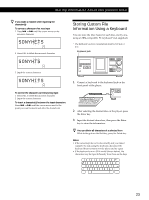
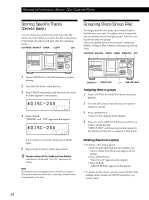
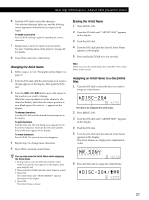
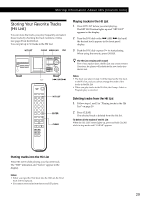
Storing Information About CDs (Custom Files) Storing Specific Tracks (Delete Bank) You can delete unwanted tracks and store only the tracks you want. When you select the disc containing a Delete Bank, the player will play only the remaining tracks. CONTINUE SHUFFLE CHECK CLEAR JOG Grouping Discs (Group File) You might find that too many discs make it hard to find the disc you want. This player has a feature that lets you classify discs into eight groups. Each disc can be put into only one group. Once you classify discs, you can enjoy Continuous, Shuffle, or Repeat Play within a certain group (Group Play). CONTINUE SHUFFLE CHECK CLEAR MENU/NO JOG I / 1 1 Press CONTINUE or SHUFFLE before you start playing. 2 Turn the JOG dial to select the disc. 3 Press CHECK repeatedly until the track you want to delete appears in the display. 2nd NEXT DISC ART. HIT TRACK GROUP ART. MIN STEP SEC *DISC-20***** ALL 1 DISCS SHUFFLE REPEAT 1 GROUP PROGRAM 1 2 3 X-FADE DELETE MULTI CD TEXT NO DELAY CD1 CD2 CD3 4 Press CLEAR. "DELETE" and "OFF" appear in the display. 2nd NEXT DISC ART. HIT TRACK GROUP ART. MIN STEP SEC *DISC-20***** ALL 1 DISCS SHUFFLE REPEAT 1 GROUP PROGRAM 1 2 3 X-FADE DELETE MULTI CD TEXT NO DELAY CD1 CD2 CD3 If you want to recover the track, press CLEAR again. 5 Repeat steps 3 and 4 to delete more tracks. z You can recover all the tracks you have deleted Hold down CLEAR until "ALL ON" appears in the display. Note The deleted tracks are skipped even in Shuffle or Program Play modes (when the whole disc containing a Delete Bank is programmed as one step). I / 1 GROUP1-8 GROUP FILE H . AMS > Assigning discs to groups 1 Press CONTINUE or SHUFFLE before you start playing. 2 Turn the JOG dial to select the disc you want to assign to a group. 3 Press GROUP FILE. "Select G1-G8" appears in the display. 4 Press one of the GROUP1-8 buttons to which you want to assign the disc. "GROUP FILE" and the group number appear in the display and the disc is assigned to that group. Deleting discs from a group • To delete a disc from a group 1 Turn the JOG dial until the disc number you want to delete from the group appears in the display. 2 Press GROUP FILE. "Select G1-G8" appears in the display. 3 Press CLEAR. "GROUP ERASE" appears in the display. • To delete all discs from a group, press CLEAR while holding down whichever GROUP1-8 button you want to clear. 24
-
 1
1 -
2
-
3
-
4
-
5
-
6
-
7
-
8
-
9
-
10
-
11
-
12
-
13
-
14
-
15
-
16
-
17
-
18
-
 19
19 -
 20
20 -
 21
21 -
 22
22 -
 23
23 -
 24
24 -
 25
25 -
 26
26 -
 27
27 -
 28
28 -
 29
29 -
30
-
31
-
32
-
33
-
34
-
35
-
36
 |
 |