Sony CDX-C5850 Installation Connections
Sony CDX-C5850 - Fm/am Compact Disc Player Manual
 |
View all Sony CDX-C5850 manuals
Add to My Manuals
Save this manual to your list of manuals |
Sony CDX-C5850 manual content summary:
- Sony CDX-C5850 | Installation Connections - Page 1
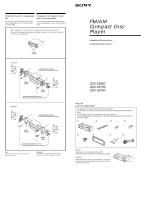
/Connections Installation/Connexions CDX-C5850 CDX-C5750 CDX-C4750 Sony Corporation © 1999 Printed in Korea Parts list Liste des composants The numbers in the list are keyed to those in the instructions. The release key 7 is used for dismounting the unit. See the Operating Instructions manual - Sony CDX-C5850 | Installation Connections - Page 2
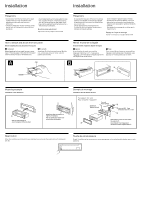
service technicians. •Choose the installation location carefully so that the unit will not interfere with normal driving operations. •Avoid installing Installation dans le tableau de bord To support the unit Pour installer Reset button When the installation and connections are complete, be sure - Sony CDX-C5850 | Installation Connections - Page 3
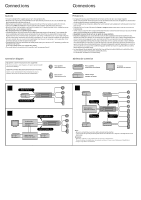
de votre voiture n'est pas doté d'une position accessoires (ACC). Le cas échéant, consultez un revendeur Sony. Connection diagram Equipment used in illustrations (not supplied) For connecting two or more changers, the source selector XA-C30 (optional) is necessary. Appareils utilisés dans les - Sony CDX-C5850 | Installation Connections - Page 4
Connection example Exemple de connexions RCA pin cord (not supplied) Cordon à broche RCA (non fourni) BUS cable (not supplied) Câble BUS (non fourni) BUS CONTROL IN BUS AUDIO IN LINE OUT REAR L R Rotary commander RM-X4S (not supplied) Satellite de commande RM-X4S (non fourni) REMOTE IN LINE
-
 1
1 -
 2
2 -
 3
3 -
 4
4
 |
 |
FM
/
AM
Compact Disc
Player
Sony Corporation
1999
Printed in Korea
Installation/Connections
Installation/Connexions
CDX-C5850
CDX-C5750
CDX-C4750
6
8
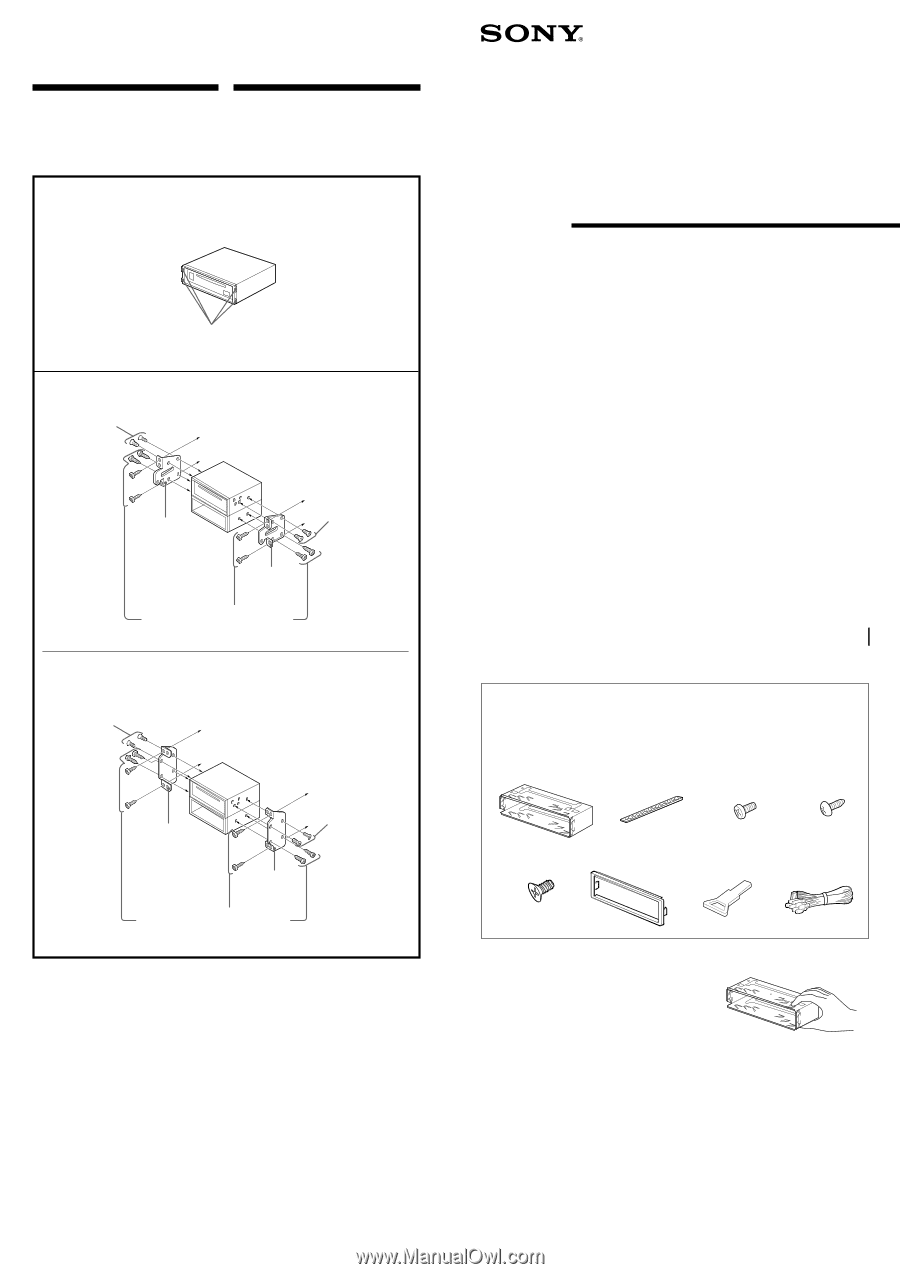
Parts list
Liste des composants
The numbers in the list are keyed to those in the instructions.
The release key
7
is used for dismounting the unit. See the Operating Instructions manual for
details.
Les numéros de l’illustration correspondent à ceux des instructions.
La clé de dégagement
7
est nécessaire pour démonter l’appareil. Consulter le mode d’emploi
pour plus de détails.
2
3
4
×
4
1
5
Caution
Cautionary notice for handling the bracket
1
.
Handle the bracket carefully to avoid injuring your fingers.
Attention
Remarque importante pour la manipulation du support
1
.
Manipulez précautionneusement le support pour éviter de
vous blesser aux doigts.
3-865-687-
11
(1)
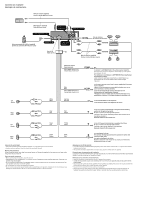
Mounting the unit in a Japanese
car
You may not be able to install this unit in some
makes of Japanese cars. In such a case, consult
your Sony dealer.
1
With nippers or similar, cut off claws on both side of the unit.
Coupez les onglets des deux côtés de l‘appareil à l‘aide de tenailes
ou d‘un outil similaire.
Claws
Onglets
2
TOYOTA
NISSAN
Note
To prevent malfunction, install only with the
supplied screws
5
.
Bracket
Support
Bracket
Support
Existing parts supplied to your car
Pièces existantes fournies avec la voiture
5
max. size
5
×
8 mm
Dimension
max.
5
×
8 mm
5
max. size
5
×
8 mm
Dimension
max.
5
×
8 mm
Bracket
Support
Existing parts supplied to your car
Pièces existantes fournies avec la voiture
Bracket
Support
5
max. size
5
×
8 mm
Dimension
max.
5
×
8 mm
to dashboard/center console
au tableau de bord/console centrale
to dashboard/center console
au tableau de bord/console centrale
5
max. size
5
×
8 mm
Dimension
max.
5
×
8 mm
TOP
TOP
7
Installation de l’appareil dans
une voiture japonaise
Si vous ne pouvez pas installer l’appareil dans
une voiture japonaise, consultez votre revendeur
Sony.
Remarque
Pour éviter tout dysfonctionnement, utilisez
uniquement les vis de montage fournies
5
.