Sony DAV-DZ175 Operating Instructions - Page 51
Erasing audio files on a USB device, Using the sleep timer
 |
View all Sony DAV-DZ175 manuals
Add to My Manuals
Save this manual to your list of manuals |
Page 51 highlights
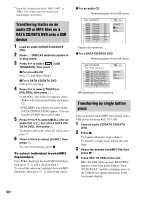
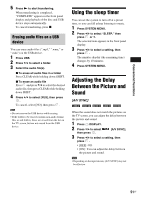
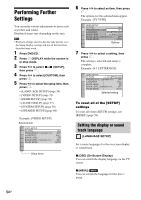
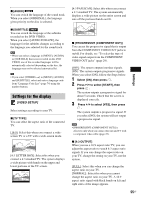
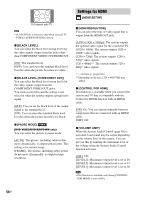
Convenient Functions 5 Press N to start transferring. When transferring is completed, "COMPLETE" appears in the front panel display and playback of the disc and USB device stops automatically. To cancel transferring, press x. Erasing audio files on a USB device You can erase audio files (".mp3," ".wma," or ".m4a") on the USB device. 1 Press USB. 2 Press X/x to select a folder. 3 Select the audio file(s). x To erase all audio files in a folder Press CLEAR while holding down SHIFT. x To erase an audio file Press and press X/x to select the desired audio file, then press CLEAR while holding down SHIFT. 4 Press C/c to select [YES], then press . To cancel, select [NO], then press . Note • Do not remove the USB device while erasing. • If the folder to be erased contains non-audio format files or sub folders, these are erased from the list on the TV screen, but are not erased from the USB device. Using the sleep timer You can set the system to turn off at a preset time, so you can fall asleep listening to music. 1 Press SYSTEM MENU. 2 Press X/x to select "SLEEP," then press or c. The selected item appears in the front panel display. 3 Press X/x to select a setting, then press . The minutes display (the remaining time) changes by 10 minutes. 4 Press SYSTEM MENU. Adjusting the Delay Between the Picture and Sound [A/V SYNC] When the sound does not match the pictures on the TV screen, you can adjust the delay between the picture and sound. 1 Press DISPLAY. 2 Press X/x to select [A/V SYNC], then press . 3 Press X/x to select a setting, then press . • [OFF]: Off. • [ON]: You can adjust the delay between the picture and sound. Note • Depending on the input stream, [A/V SYNC] may not be effective. 51US
-
 1
1 -
2
-
3
-
4
-
5
-
6
-
7
-
8
-
9
-
10
-
11
-
12
-
13
-
14
-
15
-
16
-
17
-
18
-
19
-
20
-
21
-
22
-
23
-
24
-
25
-
26
-
27
-
28
-
29
-
30
-
31
-
32
-
33
-
34
-
35
-
36
-
37
-
38
-
39
-
40
-
41
-
42
-
43
-
44
-
45
-
 46
46 -
 47
47 -
 48
48 -
 49
49 -
 50
50 -
 51
51 -
 52
52 -
 53
53 -
 54
54 -
 55
55 -
 56
56 -
57
-
58
-
59
-
60
-
61
-
62
-
63
-
64
-
65
-
66
-
67
-
68
-
69
-
70
-
71
-
72
-
73
-
74
-
75
-
76
 |
 |
