Sony DCR-PC115 Operating Instructions - Page 93
Making your own titles
 |
View all Sony DCR-PC115 manuals
Add to My Manuals
Save this manual to your list of manuals |
Page 93 highlights
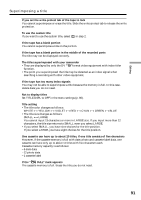
Making your own titles You can make up to two titles and store them in the memory of your camcorder. Each title can have up to 20 characters. (1) Set the POWER switch to CAMERA or VCR. (2) Press MENU, then select and decide upon TITLE in with the control button (p. 96). (3) Select and decide upon with the control button. (4) Select and decide upon CUSTOM1 SET or CUSTOM2 SET with the control button. (5) Select and decide upon the desired character with the control button. (6) Repeat steps 5 to complete making your own title. (7) To finish making your own titles, select and decide upon [SET] with the control button. 3 T I TLE SET CUS TOM1 S E T CUS TOM2 S E T T I TLE SET CUS TOM1 S E T CUS TOM2 S E T RETURN Editing [ MENU ] : END [ MENU ] : END 4 T I TLE SET CUS TOM1 S E T CUS TOM2 S E T RETURN [ MENU ] : END T I TLE SET ABCDE 12345 FGH I J 67890 K LMNO ' . , / - PQRST [ C ] UVWXY [ SET ] Z& ? ! [ MENU ] : END MENU 5 T I TLE SET ABCDE 12345 FGH I J 67890 K LMNO ' . , / - PQRST [ C ] UVWXY [ SET ] Z& ? ! [ MENU ] : END T I TLE SET S ABCDE 12345 FGH I J 67890 K LMNO ' . , / - PQRST [ C ] UVWXY [ SET ] Z& ? ! [ MENU ] : END To change a title you have stored In step 4, select the original title you want to change, and then press z on the control button. Select [C] to select the title to delete, then press z to delete the last character of your title. Enter the new title as desired. If you take five minutes or longer to enter characters in the standby mode while a cassette is in your camcorder The power automatically goes off. The characters you have entered remain stored in memory. Set the POWER switch to OFF (CHG) once and then to CAMERA again, then proceed from step 1. We recommend setting the POWER switch to VCR or removing the cassette so that your camcorder does not automatically turn off while you are entering title characters. To erase the title Select [C]. The last character is erased. To enter a space Select [ Z& ? ! ], then select the blank part. 93
-
 1
1 -
2
-
3
-
4
-
5
-
6
-
7
-
8
-
9
-
10
-
11
-
12
-
13
-
14
-
15
-
16
-
17
-
18
-
19
-
20
-
21
-
22
-
23
-
24
-
25
-
26
-
27
-
28
-
29
-
30
-
31
-
32
-
33
-
34
-
35
-
36
-
37
-
38
-
39
-
40
-
41
-
42
-
43
-
44
-
45
-
46
-
47
-
48
-
49
-
50
-
51
-
52
-
53
-
54
-
55
-
56
-
57
-
58
-
59
-
60
-
61
-
62
-
63
-
64
-
65
-
66
-
67
-
68
-
69
-
70
-
71
-
72
-
73
-
74
-
75
-
76
-
77
-
78
-
79
-
80
-
81
-
82
-
83
-
84
-
85
-
86
-
87
-
 88
88 -
 89
89 -
 90
90 -
 91
91 -
 92
92 -
 93
93 -
 94
94 -
 95
95 -
 96
96 -
 97
97 -
 98
98 -
99
-
100
-
101
-
102
-
103
-
104
-
105
-
106
-
107
-
108
-
109
-
110
-
111
-
112
-
113
-
114
-
115
-
116
-
117
-
118
-
119
-
120
-
121
-
122
-
123
-
124
-
125
-
126
-
127
-
128
-
129
-
130
-
131
-
132
-
133
-
134
-
135
-
136
-
137
-
138
-
139
-
140
-
141
-
142
-
143
-
144
-
145
-
146
-
147
-
148
-
149
-
150
-
151
-
152
-
153
-
154
-
155
-
156
-
157
-
158
-
159
-
160
-
161
-
162
-
163
-
164
-
165
-
166
-
167
-
168
-
169
-
170
-
171
-
172
-
173
-
174
-
175
-
176
-
177
-
178
-
179
-
180
-
181
-
182
-
183
-
184
-
185
-
186
-
187
-
188
 |
 |
