Sony DPP-SV88 Operating Instructions
Sony DPP-SV88 Manual
 |
View all Sony DPP-SV88 manuals
Add to My Manuals
Save this manual to your list of manuals |
Sony DPP-SV88 manual content summary:
- Sony DPP-SV88 | Operating Instructions - Page 1
205-930-11(1) Digital Photo Printer Operating Instructions GB Before operating this printer, please read this manual thoroughly and retain Manual de instrucciones ES Antes de utilizar esta impresora, lea este manual atentamente y consérvelo para consultarlo en el futuro. DPP-SV88 2001 Sony - Sony DPP-SV88 | Operating Instructions - Page 2
below. Refer to this number whenever you call upon your Sony dealer regarding this product. Model No. DPP-SV88 Serial No. 2 GB WARNING This equipment has been tested and found to comply with the limits for a Class B digital device, pursuant to Part 15 of the FCC Rules. These limits are designed to - Sony DPP-SV88 | Operating Instructions - Page 3
SONY Model No.: DPP-SV88 Responsible Party: Sony Electronics Inc. Address: 680 Kinderkamarck Road, Oradell NJ 07649 U.S.A. Telephone No.: 201-930-6972 This device complies with part holder's claim for damages. When using photo images with this printer, pay special attention not to infringe - Sony DPP-SV88 | Operating Instructions - Page 4
. Sony Corporation reserves the right to make any modification to this manual or the information contained herein at any time without notice. The software described herein may also be governed by the terms of a separate user license agreement. User Registration To receive customer services, complete - Sony DPP-SV88 | Operating Instructions - Page 5
102 Installing the printer driver 102 Printing from a software application ...... 104 Additional information Precautions 106 About the "Memory Stick" and PC card media 108 On "Memory Stick 108 To protect "Memory Stick" images ........ 108 Notes on use 109 Troubleshooting 110 If paper jams 112 - Sony DPP-SV88 | Operating Instructions - Page 6
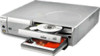
can do with the printer With the Digital Photo Printer DPP-SV88, you can print images of a "Memory Stick," PC card, CD-R/RW disc, a video recorder, or a computer. You can also save images on a "Memory Stick," or PC card or in albums in a CD-R/RW disc. Photo-realistic printing With its sublimation - Sony DPP-SV88 | Operating Instructions - Page 7
more types of prints such as a calendar, a card, split images, a sticker with framed images. Making a convenient USB connection with your computer By installing the supplied DPP-SV88 printer driver software on your computer, you can print images from your computer. With the supplied "Memory Stick/PC - Sony DPP-SV88 | Operating Instructions - Page 8
• CD-ROM (1) -Sony DPP-SV88 Printer Driver Software • Paper tray (1) for Windows® 98/Me/2000 Professional/XP Home Edition/ XP Professional Version 1.0 for MAC OS 8.5.1./8.6/9.0/9.1/ 9.2 Version 1.0 - Memory Stick/PC card Reader Software • Operating Instructions (1) for Windows® 98/Me/2000 - Sony DPP-SV88 | Operating Instructions - Page 9
Paper tray compartment lid (page 25) Insert the supplied paper tray here. 8 Remote sensor (page 21) Point the supplied remote commander to this sensor to operate the printer pages 22, 23) (Not supplied) Printer rear panel 1 USB connector (page 20) Connects to the USB connector of your computer. 2 S - Sony DPP-SV88 | Operating Instructions - Page 10
Identifying the parts 10 GB Printer indicators and operation panel 1 Input indicators (pages 20, 27, 35) The indicator for the current input signal lights ("MEMORY STICK"/PC CARD/ CD-RW/VIDEO/PC). 2 PRINT indicator (pages 30, 34) 3 Paper error indicator (pages 26, 112) 4 Cartridge error indicator ( - Sony DPP-SV88 | Operating Instructions - Page 11
SEL (SELECT) button (page 20, 27, 35) Switches the input. (The selected input indicator on the printer lights, except for "PC.") 3 SAVE ALL button (pages 37, 42) 4 Arrow (B/b/V/v) buttons 5 page 67) qf PRINT button (pages 30, 34, 36) Paper tray 1 lid (page 25) 1 2 Partition (page 25) 2 11 GB - Sony DPP-SV88 | Operating Instructions - Page 12
parts Thumbnail list 12 3 45 6 7 8 9 q; qa qs Preview image 1 q;2 3 7 89 qa qs 4 Screen 1 Print preset (DPOF) indication Indicates the image is DPOF preset for printing from a digital CD-R/RW disc being loaded in the printer. For a "Memory Stick," icon instructions for the next step. 12 GB - Sony DPP-SV88 | Operating Instructions - Page 13
) When your television has an S-video input connector Connect the S-video input connector of your television to the S VIDEO OUT (output) connector of the printer using an S-video connection cable (not supplied). You can get better picture quality. In this case, you do not need to connect the video - Sony DPP-SV88 | Operating Instructions - Page 14
connections, turn off the power of the printer, the video equipment and television. •When you do not use the video connecting cable supplied, use a commercially available video cable or S video connecting cable 3 m or shorter in length. •Also refer to the instruction manual of the video equipment. - Sony DPP-SV88 | Operating Instructions - Page 15
connect the supplied AC power cord to the AC IN connector of the printer and then to an AC outlet. The POWER indicator lights in red. you do, the "Memory Stick" or the PC card or the printer may be damaged. •When the printer is accessing the "Memory Stick" or PC card and the relevant indicator - Sony DPP-SV88 | Operating Instructions - Page 16
1 Connecting the printer Note Insert the "Memory Stick" only. Do not insert any other objects. Printing an image from a PC card Open the operation panel cover and insert - Sony DPP-SV88 | Operating Instructions - Page 17
-R/RW disk into the CDR/RW disc tray of the printer. For the types of discs you can use with the printer and precautions on use of a disc, see "On CD -R/RW discs" on page 47. 1 Press the POWER button to turn on the printer. The POWER indicator light changes orange to green. 2 Press the CD-R/RW disc - Sony DPP-SV88 | Operating Instructions - Page 18
of your CD Mavica digital camera with this printer, we recommend you use the 8cm CD adaptor supplied with your CD Mavica. 1 Insert an 8cm CD-R/RW disc into the two tabs of the adaptor in the order of 1 and 2. 1 Label side (Rear side is for recording.) 2 Side with SONY printing (Rear side - Sony DPP-SV88 | Operating Instructions - Page 19
make it flat. Otherwise, the CD-R/RW disc tray may not operate properly or noise sounds. Note The CD adaptor supplied with your CD Mavica digital camera is for an 8cm CD-R/ RW disc for the CD Mavica only. Do not use the adaptor with other types of 8cm CD-R/RW - Sony DPP-SV88 | Operating Instructions - Page 20
due to trouble with the printer. •Refer to the instruction manual of your computer for further information. •You cannot use the printer and the printer driver on a network or with a commercially available printer buffer. •You cannot use the supplied "Memory Stick/PC card Reader Software" to transfer - Sony DPP-SV88 | Operating Instructions - Page 21
the remote commander to the remote sensor on the printer and then press a button to operate the printer. You can use the buttons on the remote - properly aligned. Lithium battery CAUTION: Replace the battery with Sony CR2025 lithium battery. Use of another battery may preset a instructions. 21 GB - Sony DPP-SV88 | Operating Instructions - Page 22
of Small size photo paper/Print cartridge for printer only. •Always use the print cartridge designed for the size of the print paper you use. If you mix cartridges and paper of different types or size, printing may not be possible, or a paper jam or other trouble may occur. •Do not rewind the ink - Sony DPP-SV88 | Operating Instructions - Page 23
. 2 Pull and open the cartridge compartment lid. Setting up 3 Insert the print cartridge into the printer firmly until it clicks into place and close the cartridge compartment lid. The side with the Sony logo To replace the print cartridge When the print cartridge runs out, the cartridge error - Sony DPP-SV88 | Operating Instructions - Page 24
ribbon or place the print cartridge in a dusty location. Fingerprints or dust on the ink ribbon may result in imperfect printing. •Do not change the print cartridge while operating the printer. Notes on storing the print cartridge •Avoid placing the print cartridge in a location subject to high - Sony DPP-SV88 | Operating Instructions - Page 25
) facing up and the arrow pointing in the same direction as the arrow in the tray. When inserting paper, insert the protective sheet together with paper into the tray. After you have placed the paper into the tray, remove the protective sheet. You can set up to 25 sheets for Post Card size - Sony DPP-SV88 | Operating Instructions - Page 26
draw on the printed surface after printing, use an oil ink pen. •Do not attach stickers or anything else on the printing surface before printing. •Do not remove the backing from sticker print paper before printing is completed. Otherwise, jams or printer damage may occur. •Do not print on the used - Sony DPP-SV88 | Operating Instructions - Page 27
insertion slot (pages 15-16) or into the CD-R/RW disc tray (page 17). 2 Turn on the printer and television and set the input selector of your television to "VIDEO." The POWER indicator of the printer lights in green. 3 Press INPUT SELECT to light "MEMORY STICK," PC CARD or CD- RW indicator - Sony DPP-SV88 | Operating Instructions - Page 28
, then press ENTER/PRINT QTY. The images in the folder are displayed as thumbnails. Notes • While the printer is accessing the CDR/RW disc, do not submit the printer to shock or vibration. Otherwise, the printer may not operate properly or may not save an image. Even the images already stored in the - Sony DPP-SV88 | Operating Instructions - Page 29
display the preview of the previous image, press B. To display the image list again, press PICTURE. Note While the screen display is switching or the printer is accessing the "MEMORY STICK," PC card, or CD-R/RW disc, do not eject or insert them; they may crash. Continued 29 GB - Sony DPP-SV88 | Operating Instructions - Page 30
printing process bar and the approximate printing time are displayed on the screen. Printer Press together. When you start printing while the preview image is displayed printing ends and the print paper automatically emerges from the paper outlet, remove the printed paper from the printer. 30 GB - Sony DPP-SV88 | Operating Instructions - Page 31
or print the images of a CD-R/RW disc saved using other devices than this printer. •While printing, never move or turn off the printer; the print cartridge or paper may become stuck. If this happens, turn the printer off and on, and resume printing from the beginning. •While printing, the print - Sony DPP-SV88 | Operating Instructions - Page 32
with DPOF. For details, see the operating instructions of the digital still camera you are using. Note Some types of digital still camera does not support the DPOF function or the printer does not support part of the functions of the digital still camera. 3 1 4 2 2 3 CANCEL button 5 4 CANCEL - Sony DPP-SV88 | Operating Instructions - Page 33
. • To print all the preset images for printing, press AUTO PRINT until DPOF indicator lights. To cancel operation Press CANCEL. When you connect your printer to the television When you select All, all the images in the thumbnail list are displayed with the orange area beneath the image. When you - Sony DPP-SV88 | Operating Instructions - Page 34
printing Press CANCEL. Printing from the next print will be canceled. 6 When printing ends and the print paper automatically emerges from the paper outlet, remove the printed paper from the printer. For notes giving further information during or after printing, see page 31. To return to the usual - Sony DPP-SV88 | Operating Instructions - Page 35
image from the video equipment connected to the VIDEO IN connector of the printer and print it in full-size (standard print). Borderless standard print 2 details on playing back on your video equipment, refer to the instruction manual of your video equipment. Note It is not recommended that you - Sony DPP-SV88 | Operating Instructions - Page 36
Press CANCEL. Printing from the next print will be canceled. 6 When printing ends and the print paper automatically emerges from the paper outlet, remove the printed paper from the printer. The memory image is being displayed on the screen. To display the playback pictures, press PICTURE. Notes - Sony DPP-SV88 | Operating Instructions - Page 37
the DC-R/RW disc tray. 2 Insert a "Memory Stick" or PC card storing the image(s) that you want to save on a CD-R/RW disc into the printer. 3 Press INPUT SELECT to turn on the "MEMORY STICK" or PC CARD indicator. The thumbnails of the images saved on the "Memory Stick" or PC - Sony DPP-SV88 | Operating Instructions - Page 38
can save the selected "Memory Stick" or PC card images on the desired folder of a CD-R/RW disc. To use a CD-R/RW disc on your printer, you need to initialize the disc. For details, refer to "Preparing a CD-R/RW disc for saving images (initializing)" on page 51. 1 Insert a CD-R/RW disc - Sony DPP-SV88 | Operating Instructions - Page 39
Saving images 4 Select an image that you want to save. x When thumbnails are displayed Press the arrow (B/b/V/v) button to select the image you want to save and then press ENTER/PRINT QTY. You can select multiple images. x When a preview image is displayed Press the arrow (B/b/V/v) button to - Sony DPP-SV88 | Operating Instructions - Page 40
Saving "Memory Stick" or PC card images onto a CD-R/RW disc Tip If you select "Memory Stick" or PC card as the destination, you can copy the images from a card to another card. You cannot select the identical card type (from "Memory Stick" to "Memory Stick", or from PC card to PC card). Notes •If - Sony DPP-SV88 | Operating Instructions - Page 41
order they are created. Even if you rename folders with your printer, the folders are written in a CD-R/RW disc with their original folder names. The folder name data you change with the printer is saved in the file called "dirname.txt" in each "ALBUM###" (###: - Sony DPP-SV88 | Operating Instructions - Page 42
at one time. 1 Insert a "Memory Stick" or PC card for saving CD-R/RW disc data into the printer. 2 Insert a CD-R/RW disc storing the image(s) that you want to save onto a card into the printer. 3 Press INPUT SELECT to turn on the CD-RW indicator. The folder covers saved on the CDR - Sony DPP-SV88 | Operating Instructions - Page 43
complete appears, press ENTER/PRINT QTY. Notes •While saving the image, do not turn off the power of the printer or remove the "Memory Stick," PC card or CD-R/RW disc from the printer. The "Memory Stick," PC card or CD-R/RW disc may be damaged. •If the "Memory Stick" or PC - Sony DPP-SV88 | Operating Instructions - Page 44
the image, do not turn off the power of the printer or remove the "Memory Stick," PC card or CD-R/RW disc from the printer. The "Memory Stick," PC card or CD-R/RW disc may or contains the characters or numbers that the printer does not support, you may not be able to display or save the file. 44 GB - Sony DPP-SV88 | Operating Instructions - Page 45
video memory image onto a "Memory Stick," PC card or CD-R/RW disc The captured and printed image from the video equipment is stored in the printer's memory. If you capture another image, the previous image is overwritten and erased. You can save the memory image onto a "Memory Stick," PC card or - Sony DPP-SV88 | Operating Instructions - Page 46
are saved onto the selected folder. Notes •While saving the image, do not turn off the power of the printer or remove the "Memory Stick," PC card or CD-R/RW disc from the printer. The "Memory Stick," PC card or CD-R/RW disc may be damaged. •If the "Memory Stick" or PC - Sony DPP-SV88 | Operating Instructions - Page 47
Mavica disc on the printer You can display and print the images of an 8cm CD-R/RW disc recorded using your CD Mavica digital camera. You can list " on page 31. •We recommend you use CD-R/RW discs manufactured by Sony. •Please use a commercially available unformatted CD-R/RW disc. •You cannot use a - Sony DPP-SV88 | Operating Instructions - Page 48
On CD-R/RW discs On handling discs To prevent losing data, note the following. • Do not stick on paper or labels, or scratch the surface of the disc. • Do not touch the recording surface of the disc (the surface on which nothing is printed). • - Sony DPP-SV88 | Operating Instructions - Page 49
RW [ ] :time required in min. (minutes) or sec. (seconds) Saving all/selected images Editing folders Disc allows repeated saving. Viewable by the printer You can save images. Saving all/selected images Creating a new folder Images are stored. [approx. 21 min.] Unfinalization Recovers the space - Sony DPP-SV88 | Operating Instructions - Page 50
Level 2* basis. (*The printer does not support multi-session capability. Depending on the file name or directory structures on a disc, the printer will not be able to read the disc.) Notes •When the CD-R/RW disc is written using the Windows XP standard CD-R/RW writing software, only the data written - Sony DPP-SV88 | Operating Instructions - Page 51
for saving images (Initialization) To use a CD-R/RW disc on the printer, you need to initialize the disc. 1 Insert an unformatted CD-R/RW a CD-R disc. During initialization, do not give vibration or shock to the printer. •You can perform initialization only for a CD-R/RW disc with no data written - Sony DPP-SV88 | Operating Instructions - Page 52
, or rename a folder. Creating a new folder 1 Insert a CD-R/RW disc in which you want to create a new folder into CD-R/RW disc tray of the printer. 2 Press INPUT SELECT to turn on the CD-RW indicator. The folder covers on the CD-R/RW disc are displayed. Note While the - Sony DPP-SV88 | Operating Instructions - Page 53
rename a folder up to 16 alphanumeric characters. 1 Insert a CD-R/RW disc containing a folder that you want to rename into CD-R/RW disc tray of the printer. 2 Press INPUT SELECT to turn on the CD-RW indicator. The folder covers on the CD-R/RW disc are displayed. 3 Press MENU. The Folder menu - Sony DPP-SV88 | Operating Instructions - Page 54
CD-R/RW disc into your computer's CD-ROM drive, the folder name is displayed as "ALBUM###" (###: numbers). The folder name data you change with this printer is saved in the file called "dirname.txt" in each "ALBUM###" (###: numbers) folder. 54 GB - Sony DPP-SV88 | Operating Instructions - Page 55
Using a CD-R/RW disc Deleting a folder 1 Insert a CD-R/RW disc containing a folder that you want to delete into CD-R/RW disc tray of the printer. 2 Press INPUT SELECT to turn on the CD-RW indicator. The folder covers on the CD-R/RW disc are displayed. 3 Press MENU. The Folder menu - Sony DPP-SV88 | Operating Instructions - Page 56
save in a CD-R/RW disc on the printer. To view the images, your computer must meet the following system requirements: Recommended Windows system: OS: Microsoft Windows 98/Windows Me/ Windows 2000 Professional/Windows XP Home Edition/Windows XP Professional should be pre-installed. CD-ROM Drive - Sony DPP-SV88 | Operating Instructions - Page 57
RW disc. (The time required depends on the number of files written on a disc.) During finalization, do not give vibration or shock to the printer. •You can remove a CD-R/RW disc without finalization. You can perform finalization later. •After you finalize a CD-R/RW disc, you cannot add recording to - Sony DPP-SV88 | Operating Instructions - Page 58
CD-RW disc that you want to unfinalize into CD-R/RW disc tray of the printer. 2 Press INPUT SELECT to turn on the CD-RW indicator. The folder covers CD-RW disc. During unfinalization, do not give vibration or shock to the printer. •A CD-RW disc, after finalization, can be unfinalized so that you can - Sony DPP-SV88 | Operating Instructions - Page 59
performing formatting, make sure to check the disc contents. 1 Insert a CD-RW disc that you want to format into CD-R/RW disc tray of the printer. 2 Press INPUT SELECT to turn on the CD-RW indicator. 3 Press MENU. The Folder menu is displayed. 4 Press the arrow (B/b) button to select "FORMAT" and - Sony DPP-SV88 | Operating Instructions - Page 60
-R write speed: X8 (X4) • CD-RW write speed: X4 (X2) • Read speed: X24 (X8) 1 Insert a CD-R/RW disc into CD-R/RW disc tray of the printer. 2 Press INPUT SELECT to turn on the CD-RW indicator. 3 Press MENU. The Folder menu is displayed. 4 Press the arrow (B/b) button to select "SET" and - Sony DPP-SV88 | Operating Instructions - Page 61
Advanced printing operations Adding effects to an image What you can do with the EFFECT menu The EFFECT menu allows you to edit, adjust or add special filters to an image in the "Memory Stick," PC card or CD-R/RW disc. To display the EFFECT menu 1 Select the image to be edited in the thumbnail list - Sony DPP-SV88 | Operating Instructions - Page 62
Adding effects to an image 3 Press the arrow (B/b) button to move the cursor to the desired menu item on the menu bar and then press ENTER/PRINT QTY to display its sub menu. Sub menu +/- EDIT ADJUST FILTER RESET Functions Enlarges or reduces an image. (Page 63) Moves, rotates or flips an image. ( - Sony DPP-SV88 | Operating Instructions - Page 63
PC card. •While saving the image, do not turn off the power or remove the "Memory Stick," PC card or CD-R/RW disc from the printer. The "Memory Stick," PC card or CD-R/RW disc may be damaged. Changing an image size and position In the EFFECT menu (page 61), press - Sony DPP-SV88 | Operating Instructions - Page 64
Adding effects to an image Changing an image position The EDIT sub menu allows you to move, rotate, or flip an image. 1 In the EFFECT menu (page 61), press the arrow (B/b) button to select "EDIT." The EDIT sub menu is displayed. 2 Press the arrow (V/v) button to move the cursor to the desired item - Sony DPP-SV88 | Operating Instructions - Page 65
Adjusting the pictures The ADJUST sub menu allows you to adjust brightness, color deepness, tint, or sharpness levels of the image pictures. 1 In the EFFECT menu (page 61), press the arrow (B/b) button to select "ADJUST" on the menu bar and press ENTER/PRINT QTY. The ADJUST sub menu is displayed. 2 - Sony DPP-SV88 | Operating Instructions - Page 66
Adding effects to an image Adding a special filter to an image The FILTER sub menu allows you to add a special effect to an image to print in monochrome, paint, or sepia tone. 1 In the EFFECT menu (page 61), press the arrow (B/b) button to select "FILTER." The FILTER sub menu is displayed. 2 Press - Sony DPP-SV88 | Operating Instructions - Page 67
Making various prints (Creative Print) What you can do with the Creative Print menu The Creative Print menu allows you to make a variety of prints using an image of the "Memory Stick," PC card, or CD-R/RW disc. To display the Creative Print menu, press CREATIVE PRINT. Note You cannot enter into the - Sony DPP-SV88 | Operating Instructions - Page 68
return to the Creative Print top menu is displayed. If this occurs, start from the beginning. To change the printer settings midway You can press MENU and change the printer settings for "Finish," "Beep," "Video input" and "Clock setting." You cannot change the other items during the Creative Print - Sony DPP-SV88 | Operating Instructions - Page 69
move the cursor to the desired template, then press ENTER/PRINT QTY. The preview of the selected template is displayed. 3 Press ENTER/PRINT QTY. The window for setting the calendar is displayed. Continued 69 GB - Sony DPP-SV88 | Operating Instructions - Page 70
red" or "Sunday in red/Saturdays in blue." Then press ENTER/PRINT QTY. 5 Insert the "Memory Stick," PC card, or CD-R/RW disc into the printer and press ENTER/PRINT QTY. The thumbnail list for selecting an image is displayed. 6 Press the arrow (B/b/v/V) button to move the cursor to the desired - Sony DPP-SV88 | Operating Instructions - Page 71
you select and adjust the remaining images. When you finish, the preview of the created print is displayed. By selecting the following button in the window, you can do: COPIES Press ENTER/PRINT QTY to set the printing quantity. Each time you press ENTER/PRINT QTY, the copies increase one by - Sony DPP-SV88 | Operating Instructions - Page 72
Making various prints (Creative Print) 9 To print the Creative Print image, press PRINT. Printing starts. To stop printing Press CANCEL. When multiple copies are being printed, the printing from the next print will be canceled. 10 Press the arrow (B/b/V/v) button to move the cursor to "Exit" and - Sony DPP-SV88 | Operating Instructions - Page 73
Insert the "Memory Stick," PC card, or CD-R/RW disc into the printer and press ENTER/PRINT QTY. The thumbnail list for selecting an image is to move the cursor to the desired image, then press ENTER/PRINT QTY. The window to adjust the image position is displayed. 8 Adjust the image. For adjustment, - Sony DPP-SV88 | Operating Instructions - Page 74
Making various prints (Creative Print) 10 Press the arrow (B/b/V/v) button to move the cursor to the desired character, then press ENTER/PRINT QTY to input a character for the first line. The selected characters are input in the input box. If you do not want to input characters, skip this step. - Sony DPP-SV88 | Operating Instructions - Page 75
print is displayed. You can set the printing quantity or other operations in this window (page 71). 12 Perform steps 9 and 10 on page 72 of "Making you can use the Small Size print paper only. Before making a sticker, make sure to feed the Small Size paper into the printer. •If you want to make a - Sony DPP-SV88 | Operating Instructions - Page 76
5 Insert the "Memory Stick," PC card, or CD-R/RW disc into the printer and press ENTER/PRINT QTY. The thumbnail list for selecting an image is displayed. the cursor to the desired image, then press ENTER/PRINT QTY. The window to adjust the image position is displayed. 7 Adjust the image. For image - Sony DPP-SV88 | Operating Instructions - Page 77
Insert the "Memory Stick," PC card, or CD-R/RW disc into the printer and press ENTER/PRINT QTY. The thumbnail list for selecting an image is move the cursor to the desired image, then press ENTER/PRINT QTY. The window to adjust the image position is displayed. 5 Adjust the image. For image - Sony DPP-SV88 | Operating Instructions - Page 78
(MENU) What you can do with the MENU The MENU allows you to change the printer settings, delete images, perform slideshow, or make an index print. To display the MENU screen, press MENU: MENU button MENU button Cursor MENU bar Cursor - Sony DPP-SV88 | Operating Instructions - Page 79
button to select "EXIT" in the MENU screen or press MENU. The screen displayed before you entered the MENU screen returns. Changing the printer preferences (SET) The SET sub menu allows you to change the printing preferences including Auto Fine Print 2, date print, finish, or borderless print - Sony DPP-SV88 | Operating Instructions - Page 80
the printer ( the image. Notes • You cannot make borderless prints with Small size print paper. • When printing a 4:3 picture, the top and bottom edges of the image with the date recorded together with the image shot with your digital still camera. Notes • You can print the date only when the - Sony DPP-SV88 | Operating Instructions - Page 81
video camera. If there is blur in the memory image, the printer automatically corrects it, which will take few seconds after the image the arrow (V/v) button to select "Clock Setting" and press ENTER/PRINT QTY. The printer enters clock setting mode. The cursor appears on the month (for NTSC) or the - Sony DPP-SV88 | Operating Instructions - Page 82
can select and delete images on a "Memory Stick," PC card, or CD-R/RW disc. 1 Insert a "Memory Stick," PC card or CD-R/RW disc into the printer. 2 Press INPUT SELECT to light on "MEMORY STICK," PC CARD or CD-RW indicator. When you select CD-RW The covers of the folders contained - Sony DPP-SV88 | Operating Instructions - Page 83
Advanced printing operations 3 In the MENU screen (page 78), press the arrow (B/b) button to select "DELETE/FORMAT" and press ENTER/PRINT QTY. The DELETE/FORMAT sub menu is displayed. 4 Press the arrow (V/v) button to move the cursor to "Deleting Image" and press ENTER/PRINT QTY. The thumbnail list - Sony DPP-SV88 | Operating Instructions - Page 84
a slideshow of the images saved in a "Memory Stick," PC card or CD-R/RW disc. 1 Insert a "Memory Stick," PC card or CD-R/RW disc into the printer. 2 Press INPUT SELECT to light on "MEMORY STICK," PC CARD or CD-RW indicator. When you select CD-RW The covers of the folders contained - Sony DPP-SV88 | Operating Instructions - Page 85
Notes •Depending on the image, it may take time to be displayed. •You cannot view the slideshow during the Creative Print or EFFECT mode. •You cannot start sideshow from the CD-R/RW folders screen. Select the folder and display the image list. Or select an image to display its preview. •You cannot - Sony DPP-SV88 | Operating Instructions - Page 86
). 1 Insert a "Memory Stick," PC card or CD-R/RW disc into the printer. 2 Press INPUT SELECT to light on "MEMORY STICK," PC CARD or CD- are printed horizontally and 6 images are printed vertically in a sheet of print paper. • When you select "10 x 8," 10 images horizontally and 6 images vertically - Sony DPP-SV88 | Operating Instructions - Page 87
5 Press the arrow (B/b/V/v) button to move the cursor to "Execute," then press ENTER/PRINT QTY. The index of the images in a "Memory Stick," PC card or a CD-R/RW disc are printed in the selected pattern. Each image is printed with corresponding image number. When the "Date Print" is set to "ON," the - Sony DPP-SV88 | Operating Instructions - Page 88
Printing from your computer Using your printer with Windows computers The supplied software enables you to print an image stored on your computer's hard disk with the Digital Photo Printer DPP-SV88. You can also view, copy, or transfer images stored in a "Memory Stick" or PC card inserted in the - Sony DPP-SV88 | Operating Instructions - Page 89
your computer Installing the software Install the printer driver and Memory Stick/PC card reader software contained on the supplied CD-ROM to your computer's hard disk. When using Windows 98/98SE/Me Installing the USB driver 1 Turn on your computer and the printer. 2 Start Windows and then connect - Sony DPP-SV88 | Operating Instructions - Page 90
you may be asked to insert the Windows OS CD-ROM. 6 Click "Finish." The Sony DPP-SV88 USB driver is installed. Note After you click window is displayed. 2 Double-click "System." The "System Properties" window is displayed. 3 Click a "Device Manager" tab. When "Sony DPP-SV88 USB Digital Photo Printer - Sony DPP-SV88 | Operating Instructions - Page 91
Printing from your computer Installing the printer driver and reader software 1 Insert the supplied CD-ROM into your CD-ROM dialog box is displayed. The files are factory-set to install the "C:\Program Files\Sony\DPPSV88" folder. If you want to install them to another folder, input the destination - Sony DPP-SV88 | Operating Instructions - Page 92
name box and then click "OK." The dialog box to select the model name is displayed. 13 Select "Sony DPP-SV88" and click "Next." Copying of files starts. The dialog box used to select the port is displayed. Note During installation, you may be asked to insert the Windows OS CD-ROM. 92 GB - Sony DPP-SV88 | Operating Instructions - Page 93
your DPP-SV88 with a computer which has Windows 2000 Professional/Windows XP Home Edition/Windows XP Professional installed, you need to follow the procedures below to install the USB driver and the printer driver onto your computer. 1 Start Windows, and log on your computer as the user name having - Sony DPP-SV88 | Operating Instructions - Page 94
your printer before connection. 3 Wait for the USB driver to be installed automatically and for the following dialog box to disappear. Note If the "Add New Hardware Wizard" dialog box is displayed instead of the above window, follow the instructions on the screen to install the "USB Printing Support - Sony DPP-SV88 | Operating Instructions - Page 95
Software is installed (usually "C:\Program File\Sony\DPPSV88\Program") and follow the instructions on printer driver 1 Disconnect the USB cable from the printer and the computer. 2 Click "Start," point to "Settings" and then click "Printers." 3 Right-click on "Sony DPP-SV88" in the "Printers" window - Sony DPP-SV88 | Operating Instructions - Page 96
for the customers using Sony DPP-SV55/SV77 digital photo printer When you have already installed the Sony DPP-SV55/SV77 printer driver or reader software onto your computer with Windows 98/98SE/Me operating system, your computer cannot detect the DPP-SV88 connected via USB port as new hardware - Sony DPP-SV88 | Operating Instructions - Page 97
" in the CDROM. • When the dialog box for restart is not displayed, follow the procedures below. 1 Click "Close." 2 Check that the description is changed to "Sony DPP-SV88 USB Digital Photo Printer" and click "OK." Printing from your computer 3 Execute the "Setup.exe" in the CD-ROM. 97 GB - Sony DPP-SV88 | Operating Instructions - Page 98
Using your printer with Windows computers Using the reader software You can view the "Memory Stick" or PC card inserted in the printer as a drive on your computer's monitor. 1 In the "My Computer" or "Windows Explorer" window, double-click "Sony DPP-SV88." 2 Click "Memory Stick" or the PC card icon. - Sony DPP-SV88 | Operating Instructions - Page 99
dpi. 1 Start the application software that you use to print with, and select the image to be printed. 2 Click "Print Setup" from the "File" menu of the application. The "Print Setup" dialog box appears. 3 Set the printer. Select "Sony DPP-SV88" as the printer. Select the print paper size. Select the - Sony DPP-SV88 | Operating Instructions - Page 100
Using your printer with Windows computers 3 Set "Orientation." To print in portrait (tall) format, select "Portrait." To print in landscape (wide) format, select "Landscape." To set properties of the printer Click "Properties" to display the "Properties" dialog box. ❒ Graphics tab You can set the - Sony DPP-SV88 | Operating Instructions - Page 101
. When the data is in the printer queue 1 Click "Start" in the Windows taskbar, point to "Settings," and click "Printers." The "Printers" window is displayed. 2 Double-click the "Sony DPP-SV88" icon. The "Sony DPP-SV88" window is displayed. In the window, the documents in the queue for printing - Sony DPP-SV88 | Operating Instructions - Page 102
, you cannot operate the printer. • You cannot operate the printer from another USB device being used simultaneously. Installing the printer driver Install the Sony DPP-SV88 Printer Driver Software for Mac OS 8.5.1/8.6/9.0/ 9.1/9.2 Version 1.0 ("printer driver" in this manual) into your Macintosh - Sony DPP-SV88 | Operating Instructions - Page 103
language folder opens. 5 Double-click "Setup Program." 6 Click "Install." Installation starts. Follow the instructions on the screen to complete installation. Uninstalling the printer driver When the software becomes unnecessary, remove the software as follows: In step 6, click "Uninstall." 103 GB - Sony DPP-SV88 | Operating Instructions - Page 104
Macintosh computers Printing from a software application You can use a software application to print images stored in your computer's hard disk using the DPP-SV88 Digital Photo Printer. Notes • This sections explains the settings and operations using a typical application as an example. Depending - Sony DPP-SV88 | Operating Instructions - Page 105
, select "All." Copies Enter the number of copies to be printed. Preview Displays a print preview. 6 Set the print range and copies and click "Print." The printer starts printing. To stop printing, click "Cancel." Printing from your computer 105 GB - Sony DPP-SV88 | Operating Instructions - Page 106
roughly. • To reduce the risk of electrical shock, always unplug the printer from the electrical outlet before cleaning and servicing the printer. On installation • Avoid placing the printer in a location subject to: - vibration - high humidity - excessive dust - direct sunlight - extremely high - Sony DPP-SV88 | Operating Instructions - Page 107
When you transport the printer, remove the print cartridge, paper tray, the "Memory Stick" or PC card from the printer and put the printer and its peripherals in the original box with the protective packaging. If you no longer have the original box and packing parts, use similar packing material - Sony DPP-SV88 | Operating Instructions - Page 108
. On "Memory Stick" "Memory Stick" is a removable storage media used with a digital still camera, video camera, or PC. You can easily display, save or delete images with your printer. However, because the printer does not support the MagicGate standards, data recorded with the printer is not subject - Sony DPP-SV88 | Operating Instructions - Page 109
adaptor that is compatible with the card. Insert the card into the adaptor and then insert it into the printer. For how to install the card and adaptor, refer to the operating instructions of the PC card adaptor. • Avoid inserting or removing the compact flash card or Smart Media into or out - Sony DPP-SV88 | Operating Instructions - Page 110
Troubleshooting If you run into any problems using the printer, use the following guidelines to solve the problem. If the problem persists, consult your Sony dealer. When you are printing from your computer, also refer to the computer manual. Cannot operate the printer after the power switch is - Sony DPP-SV88 | Operating Instructions - Page 111
DPP-SV88 does not support or the image itself is damaged. m An image which is damaged or has some kind of problem will not appear in or processed using your digital still camera. This is not because of trouble with the printer, but because the image was rewritten using your digital still camera. m - Sony DPP-SV88 | Operating Instructions - Page 112
Troubleshooting If paper jams If the print paper jams, the paper error indicator lights and an error message is displayed. Printing stops. Turn the printer off and remove the jammed paper from the paper outlet or take out the paper tray to remove the jammed paper. Take out the paper tray to remove - Sony DPP-SV88 | Operating Instructions - Page 113
Windows format users) 220 - 240 V AC, 50/60 Hz, 0.62A (for 220 to 240 V users parts) (11 1/8 x 3 3/8 x 10 5/8 inches) (363 mm (14 3/8 inches) of depth when the paper tray is installed.) Mass Approx. 3.0 kg (7 lb) (excluding the 0.1 kg (4 oz) paper tray) Supplied accessories See "Unpacking the printer - Sony DPP-SV88 | Operating Instructions - Page 114
47 Writing/reading a disc 50 CD-RW disc 47 Changing Image position 64 Printer preferences 79 Cleaning 107 Clock setting 81 Connections AC power cord 15 Computer 20 17 Memory Stick 15 Paper tray 26 PC Card 16 Print cartridge 23 Print paper 25 Installing the software Macintosh 102 Windows 89 114 GB - Sony DPP-SV88 | Operating Instructions - Page 115
MENU 78 Mirror 64 O Operation panel 10 Overview 6 P Paper error indicator 26, 112 Paper jams 112 Paper tray 11, 25 PC card Inserting/removing 16 Note on use 102 Windows 88 T Thumbnail list 12, 31 Transport 107 Troubleshooting 110 U Unfinalization 58 Uninstalling the software 95, 103 USB connector - Sony DPP-SV88 | Operating Instructions - Page 116
Pour les clients en Europe Cette imprimante photo numérique est considérée comme un FR • Microsoft, MS, MS-DOS et Windows® sont des marques déposées de Microsoft Macintosh, Power Macintosh, et Mac OS sont des marques dépos sont des marques commerciales de Sony Corporation. •Cette imprimante utilise - Sony DPP-SV88 | Operating Instructions - Page 117
machine sans l'accord écrit préalable de Sony Corporation. EN AUCUN CAS, SONY CORPORATION NE POURRA ETRE TENU RESPONSABLE DE DOMMAGES ACCIDENTELS de licence utilisateur distinct. Enregistrement utilisateur Pour bénéficier du service clientèle, complétez et renvoyez la carte d'enregistrement - Sony DPP-SV88 | Operating Instructions - Page 118
Table des matières Préparatifs Fonctionnalités de l'imprimante 6 Déballage de l'imprimante 8 Identification des composants 9 Configuration 1 Raccordement de l'imprimante 13 Raccordement à un téléviseur 13 Raccordement aux appareils vidéo 14 Raccordement du cordon d'alimentation secteur 15 - Sony DPP-SV88 | Operating Instructions - Page 119
d'un "Memory Stick 83 Diaporama 84 Création d'une impression d'index 86 Impression depuis votre ordinateur Utilisation de l'imprimante sous Windows ... 88 Configuration du système 88 Installation du logiciel 89 Utilisation du logiciel de lecture 98 Impression à partir d'une application - Sony DPP-SV88 | Operating Instructions - Page 120
Préparatifs Fonctionnalités de l'imprimante A l'aide de l'imprimante photo numérique DPP-SV88, vous pouvez imprimer des images provenant d'un "Memory Stick", •Les CD-RW et CD-R fabriqués par Sony sont recommandés. •Utilisez des disques CD-R ou CD-RW non formatés disponibles dans le commerce. 6 FR - Sony DPP-SV88 | Operating Instructions - Page 121
, ou sur une carte PC ou toutes les images DPOF (Digital Print Order Format) présélectionnées peuvent être imprimées es. Raccordement USB facile avec votre ordinateur En installant le pilote d'impression DPP-SV88 fourni sur votre Reader Software" fourni pour transférer les images d'un CD-R/RW vers - Sony DPP-SV88 | Operating Instructions - Page 122
• Câble de raccordement vidéo (1) • CD-ROM (1) - Logiciel "Sony DPP-SV88 Printer Driver Software" • Magasin à papier (1) pour Windows® 98/Me/2000 Professional/XP Home Edition/ XP Professional Version 1.0 pour MAC OS 8.5.1./8.6/9.0/9.1/ 9.2 Version 1.0 - Logiciel "Memory Stick/PC card Reader - Sony DPP-SV88 | Operating Instructions - Page 123
pour éjecter la cartouche d'impression. qa Cartouche d'impression (pages 22, 23) (Non fournie) Panneau arrière de l'imprimante 1 Connecteur USB (page 20) Se raccorde au connecteur USB de votre ordinateur. 2 Connecteur S VIDEO OUT (page 13) 3 Connecteur VIDEO OUT (page 13) 4 Connecteur AC IN (page 15 - Sony DPP-SV88 | Operating Instructions - Page 124
Identification des composants 10 FR Témoins de l'imprimante et panneau de commande 1 Témoins d'entrée (pages 20, 27, 35) Le témoin du signal d'entrée en cours s'allume ("MEMORY STICK"/PC CARD/CD-RW/VIDEO/PC). 2 Témoin PRINT (pages 30, 34) 3 Témoin d'erreur papier (pages 26, 112) 4 Témoin d'erreur - Sony DPP-SV88 | Operating Instructions - Page 125
Préparatifs Télécommande 1 Touche AUTO PRINT (page 33) Chaque fois que vous appuyez sur cette touche, les modes ALL et DPOF commutent. Le témoin correspondant s'allume sur l'imprimante. 2 Touche INPUT SEL (SELECT) (pages 20, 27, 35) Commute l'entrée. (Le témoin d'entrée sélectionné s'allume sur l' - Sony DPP-SV88 | Operating Instructions - Page 126
Carte PC/CD-R/RW Indique le type de support en cours d'utilisation. 4 Témoin de protection Indique que l'image est protégée par un appareil photo numérique. 5 Curseur (cadre jaune) nombre d'images total. qs Message d'instructions Affiche les consignes simplifiées relatives à l'étape suivante. 12 FR - Sony DPP-SV88 | Operating Instructions - Page 127
Configuration Configuration 1 Raccordement de l'imprimante Raccordement à un téléviseur Raccordez le connecteur VIDEO OUT (sortie) de l'imprimante à l'entrée vidéo du téléviseur pour afficher les images à imprimer. Téléviseur Réglez le sélecteur d'entrée VIDEO/TV sur VIDEO. Câble de raccordement - Sony DPP-SV88 | Operating Instructions - Page 128
1 Raccordement de l'imprimante Raccordement aux appareils vidéo En cas d'impression d'images depuis un appareil vidéo tel qu'un caméscope ou un magnétoscope, utilisez le câble de raccordement fourni pour raccorder l'appareil vidéo et l'imprimante. Pour obtenir des détails sur l'impression à partir - Sony DPP-SV88 | Operating Instructions - Page 129
Raccordement du cordon d'alimentation secteur Après avoir réalisé les raccordements, branchez le cordon d'alimentation fourni au connecteur AC IN de l'imprimante, puis à une prise secteur. Le témoin POWER s'allume en rouge. Configuration Vers la prise murale Cordon d'alimentation secteur (fourni) - Sony DPP-SV88 | Operating Instructions - Page 130
1 Raccordement de l'imprimante Remarque Insérez uniquement le "Memory Stick". N'insérez jamais d'autres objets. Impression d'une image à partir d'une carte PC Ouvrez le couvercle du panneau de commande et insérez la carte PC dans le logement PC CARD jusqu'au déclic. Touche d'éjection PC CARD Carte - Sony DPP-SV88 | Operating Instructions - Page 131
Configuration Insertion d'un CD-R/RW Pour lire des images ou les enregistrer dans des dossiers, insérez un CD-R/RW dans le lplateau de lecture de CD-R ou CD-RW de l'imprimante. Pour obtenir des informations sur les types de disques que vous pouvez utiliser avec l'imprimante et les précautions d' - Sony DPP-SV88 | Operating Instructions - Page 132
CD-R ou CD-RW de 8 cm de votre appareil photo numérique Mavica CD Pour l'utilisation des disques CD-R/RW de 8 cm d'un appareil photo numérique Mavica CD avec cette imprimante, il est 2. 1 Côté étiquette (côté non destiné à l'enregistrement). 18 FR 2 Côté portant le logo SONY (côté non brillant). - Sony DPP-SV88 | Operating Instructions - Page 133
, le plateau de disque CD-R/RW pourrait ne pas fonctionner correctement ou produire des sons parasites. Remarque L'adaptateur CD fourni avec votre appareil photo numérique Mavica CD est conçu pour des disques CD-R/RW de 8 cm destinés au Mavica CD uniquement. N'utilisez pas l'adaptateur avec d'autres - Sony DPP-SV88 | Operating Instructions - Page 134
de lecture fonctionne uniquement avec Windows. •Utilisez un câble USB de 3 m maximum. •Si vous raccordez un ordinateur déjà sous tension au connecteur USB, vous ne pouvez pas passer le logiciel "Memory Stick/PC card Reader Software" pour transférer les images d'un CD-R/RW vers votre ordinateur. 20 FR - Sony DPP-SV88 | Operating Instructions - Page 135
Configuration 2 Préparation de la télécommande 1 Retirez le joint de frottement de la télécommande Une fois le joint de frottement retiré de la pile au lithium, la télécommande est prête à l'emploi. Joint de frottement 2 Pointez la télécommande vers le capteur de la télécommande de l'imprimante, - Sony DPP-SV88 | Operating Instructions - Page 136
impression que vous souhaitez réaliser : Kit d'impression SVM-25LS SVM-25LW SVM-30SS SVM-30SW SVM-30SW09 Contenu 25 feuilles de papier photo au format Carte postale/ Cartouche pour 25 impressions. 25 feuilles de papier autocollant au format Carte postale/Cartouche pour 25 impressions. 30 feuilles - Sony DPP-SV88 | Operating Instructions - Page 137
vous entendiez un déclic vous indiquant qu'elle est bien en place, puis fermez le capot du compartiment. Côté portant le logo Sony Pour remplacer la cartouche d'impression Lorsque la cartouche d'impression est vide, l'indicateur d'erreur cartouche s'allume et un message d'erreur apparaît à l'écran - Sony DPP-SV88 | Operating Instructions - Page 138
4 Chargement de la cartouche d'impression Remarques •N'introduisez jamais vos doigts dans le compartiment de la cartouche d'encre. La tête d'impression thermique atteint des températures élevées, en particulier après une impression prolongée. •Ne réutilisez pas une cartouche d'encre pour l' - Sony DPP-SV88 | Operating Instructions - Page 139
5 Insertion du papier d'impression 1 Ouvrez le capot du magasin à papier et réglez la séparation en fonction du format de papier que vous utilisez. Pour utiliser du papier au format carte postale, abaissez la séparation. Pour utiliser du papier petit format, relevez la séparation. Configuration Sé - Sony DPP-SV88 | Operating Instructions - Page 140
grasse. •Ne fixez pas d'autocollant ou quoi que ce soit d'autre sur la surface d'impression avant l'impression. •Ne retirez pas le papier support du papier d'impression autocollant avant que l'impression ne soit terminée. Ceci pourrait en effet provoquer un bourrage papier ou endommager l'imprimante - Sony DPP-SV88 | Operating Instructions - Page 141
Opérations d'impression de base Opérations d'impression de base Impression de cartes sélectionnées ou d'images provenant d'un disque Vous pouvez sélectionner une image enregistrée dans le "Memory Stick", sur la carte PC ou un CD-R/RW et l'imprimer en pleine page (impression standard). 3 2 3-5 - Sony DPP-SV88 | Operating Instructions - Page 142
Impression de carte sélectionnée ou d'images provenant d'un disque A propos de la touche INPUT SELECT Vous pouvez commuter la source d'entrée en appuyant sur la touche INPUT SELECT avant que l'écran ne change. Au bout de quelques instants, l'écran de la source sélectionnée s'affiche. Si vous sé - Sony DPP-SV88 | Operating Instructions - Page 143
Opérations d'impression de base Pour afficher une autre page En cas de pages multiples, vous pouvez passer d'une page à l'autre. Pour afficher la page suivante, déplacez le cadre jaune vers la ligne du bas de la liste d'images et appuyez sur v. Pour afficher la page précédente, déplacez le cadre - Sony DPP-SV88 | Operating Instructions - Page 144
Impression de carte sélectionnée ou d'images provenant d'un disque 5 Appuyez sur ENTER/PRINT QTY pour définir le nombre d'impressions. A chaque fois que vous appuyez sur ENTER/PRINT QTY, le nombre d'impressions augmente. Pour redéfinir le nombre d'impressions à zéro, appuyez sur CANCEL. Pour - Sony DPP-SV88 | Operating Instructions - Page 145
•Selon le type de fichier et la taille de l'image, l'aperçu de l'image à l'écran peut prendre de 5 à 60 secondes. •En fonction du modèle d'appareil photo numérique, le temps d'affichage de la liste des miniatures peut varier. •Lorsque la largeur ou la hauteur d'une image est inférieure à 480 points - Sony DPP-SV88 | Operating Instructions - Page 146
. Vous pouvez également imprimer en une seule fois plusieurs images présélectionnées par votre appareil photo numérique (DPOF). Qu'est-ce que le "DPOF"? Le format "DPOF" (Digital Print Order Format) est un format destiné à l'enregistrement des informations nécessaires pour l'impression automatique - Sony DPP-SV88 | Operating Instructions - Page 147
Opérations d'impression de base 3 Appuyez sur INPUT SELECT pour allumer le témoin "MEMORY STICK", PC CARD ou CD-RW. Lorsque vous raccordez votre imprimante au téléviseur, les miniatures du "Memory Stick" ou de la carte PC s'affichent à l'écran. Lorsque vous sélectionnez CD-RW Les dossiers contenus - Sony DPP-SV88 | Operating Instructions - Page 148
Impression de toutes les images ou des images présélectionnées DPOF en une seule fois 5 Appuyez sur PRINT. Appuyez simultanément sur les deux touches PRINT de la télécommande. L'impression démarre. Lorsque vous sélectionnez All, toutes les images d'un "Memory Stick", d'une carte PC ou d'un CD-R/RW - Sony DPP-SV88 | Operating Instructions - Page 149
Opérations d'impression de base Impression d'une image à partir d'un appareil vidéo Vous pouvez capturer l'image d'entrée de l'appareil vidéo raccordé au connecteur VIDEO IN de l'imprimante et l'imprimer en pleine page (impression standard). 2 1 4 Impression standard sans marge Touche PICTURE 1 - Sony DPP-SV88 | Operating Instructions - Page 150
Impression d'une image à partir d'un appareil vidéo 4 Appuyez sur ENTER/PRINT QTY lorsque l'image que vous souhaitez imprimer apparaît à l'écran. L'image sélectionnée est capturée dans la mémoire de l'imprimante et l'aperçu de l'image sélectionnée (image mémorisée) apparaît au centre de l'écran. - Sony DPP-SV88 | Operating Instructions - Page 151
Enregistrement des images Enregistrement des images Enregistrement des images d'un "Memory Stick" ou d'une carte PC sur un disque CD-R ou CD-RW Enregistrement de toutes les images d'un "Memory Stick" ou d'une carte PC en une seule fois Vous pouvez enregistrer toutes les images contenues dans un " - Sony DPP-SV88 | Operating Instructions - Page 152
Enregistrement des images d'un "Memory Stick" ou d'une carte PC sur un CD-R/RW 6 Appuyez sur les touches de direction (B/b) pour sélectionner "Yes", puis appuyez sur ENTER/PRINT QTY. Le CD-R/RW est initialisé, puis toutes les images du "Memory Stick" ou de la carte PC sont enregistrées sur le CD-R/ - Sony DPP-SV88 | Operating Instructions - Page 153
4 Sélectionnez une image que vous souhaitez enregistrer. x Lorsque les miniatures s'affichent Appuyez sur les touches de direction (B/b/V/v) pour sélectionner l'image que vous souhaitez enregistrer, puis appuyez sur ENTER/PRINT QTY. Vous pouvez sélectionner plusieurs images. x Lorsque l'aperçu d'une - Sony DPP-SV88 | Operating Instructions - Page 154
Stick" ou une carte PC comme destination, vous pouvez copier des images à partir d'un support vers un autre support. Cependant, vous ne pouvez pas effectuer cette opération lorsqu'il s'agit du même type de support (d'un "Memory Stick" à un autre "Memory Stick", ou d'une carte PC à une autre carte - Sony DPP-SV88 | Operating Instructions - Page 155
carte PC. Lorsque vous enregistrez des images dans le "Memory Stick" ou sur la carte PC, aucun dossier "ALBUM###" n'est créé. Le dossier "ALBUM" mis à part, les mêmes règles d'enregistrement s'appliquent. 41 FR - Sony DPP-SV88 | Operating Instructions - Page 156
Enregistrement des images d'un disque CD-R ou CD-RW dans un "Memory Stick" ou sur une carte PC Enregistrement de toutes les images dans un dossier CD-R ou CD-RW en une seule fois. Vous pouvez enregistrer, en une seule fois, toutes les images contenues dans un dossier d'un disque CD-R ou CD-RW dans - Sony DPP-SV88 | Operating Instructions - Page 157
Enregistrement des images 7 Lorsque le message indiquant que l'enregistrement est terminé s'affiche, appuyez sur ENTER/PRINT QTY. Remarques •Pendant l'enregistrement de l'image, n'éteignez pas l'imprimante et ne retirez pas le "Memory Stick", la carte PC ou le CD-R/RW de l'imprimante, car vous - Sony DPP-SV88 | Operating Instructions - Page 158
Enregistrement des images d'un disque CD-R ou CD-RW dans un "Memory Stick" ou sur une carte PC 5 Sélectionnez une image que vous souhaitez enregistrer. x Lorsque les miniatures s'affichent Appuyez sur les touches de direction (B/b/V/v) pour sélectionner l'image que vous souhaitez enregistrer, puis - Sony DPP-SV88 | Operating Instructions - Page 159
Enregistrement des images Sauvegarde de l'image vidéo en mémoire sur un "Memory Stick", une carte PC ou un disque CD-R/RW Lors de la capture et de l'impression d'une image à partir d'un appareil vidéo, cette image est sauvegardée dans la mémoire de l'imprimante. Lorsque vous capturez une nouvelle - Sony DPP-SV88 | Operating Instructions - Page 160
Sauvegarde de l'image vidéo en mémoire sur un "Memory Stick", une carte PC ou un disque CD-R/RW 5 Appuyez sur les touches de direction (B/b) pour sélectionner la destination ("Memory Stick", "PC Card" (carte PC) ou "CD-R/ RW"), puis appuyez sur ENTER/PRINT QTY. •Lorsque vous sélectionnez le "Memory - Sony DPP-SV88 | Operating Instructions - Page 161
CD-R (CD enregistrable) est un support de stockage de données vous permettant enregistrées à l'aide de votre appareil photo numérique CD Mavica. Vous pouvez de 8 cm Mavica CD, mis à part les fichiers images. Pour plus de dé CD-RW et CD-R fabriqués par Sony sont recommandés. •Utilisez des disques CD - Sony DPP-SV88 | Operating Instructions - Page 162
A propos des disques CD-R et CD-RW Manipulation des disques Afin d'éviter la perte de données, notez ce qui suit. • Ne collez pas de papier ou d'étiquette sur le disque et n'en grattez pas la surface. • Ne touchez pas la face de lecture du disque (la face non imprimée). • Ne rangez pas le disque - Sony DPP-SV88 | Operating Instructions - Page 163
Schéma des opérations d'utilisation d'un disque CD-R ou CD-RW Pour utiliser un CD-R/RW avec l'imprimante, effectuez les opérations suivantes : Début [environ 20 s] Vous pouvez sauvegarder des images. Disque neuf Initialisation Occupe 8 Mo [environ 15 s] [ ] Enregistrement de toutes les images ou - Sony DPP-SV88 | Operating Instructions - Page 164
que l'imprimante ne puisse pas lire le disque). Remarques •Lorsque le CD-R/RW est enregistré à l'aide du logiciel d'enregistrement de CD-R/ RW standard de Windows XP, seules les données enregistrées en premier (les données enregistrées lors de la première session) peuvent être visionnées à l'aide de - Sony DPP-SV88 | Operating Instructions - Page 165
Disques CD-R et CD-RW Préparation des disques CD-R ou CD-RW pour l'enregistrement d'images (initialisation) Avant d'utiliser un disque CD-R ou CD-RW avec l'imprimante, vous devez l'initialiser : 1 Insérez un disque CD-R/RW non formaté sur le plateau de CD-R/RW. 2 Appuyez sur INPUT SELECT pour - Sony DPP-SV88 | Operating Instructions - Page 166
Classement des dossiers sur le CD-R/RW Vous pouvez ajouter, supprimer ou renommer un dossier sur un CD-R/RW. Remarque Si l'espace mémoire du disque est limité, vous ne pouvez pas ajouter, supprimer ni renommer de dossiers. Création d'un nouveau dossier 1 Insérez un CD-R/RW dans lequel vous - Sony DPP-SV88 | Operating Instructions - Page 167
Disques CD-R et CD-RW 4 Appuyez sur les touches de direction (B/b) pour sélectionner "NEW", puis appuyez sur ENTER/PRINT QTY. Un message de confirmation de création d'un nouveau dossier s'affiche. Remarque Le nombre maximal de dossiers est de 99. Vous ne pouvez pas créer plus de 99 dossiers. 5 - Sony DPP-SV88 | Operating Instructions - Page 168
Classement des dossiers sur un CD-R/RW Pour saisir en lettres majuscules Sélectionnez "CAPS", puis appuyez sur ENTER/PRINT QTY pour afficher la table des lettres majuscules. Sélectionnez ensuite le caractère souhaité et appuyez sur ENTER/PRINT QTY. Pour saisir une lettre minuscule, sélectionnez de - Sony DPP-SV88 | Operating Instructions - Page 169
Disques CD-R et CD-RW Suppression d'un dossier 1 Insérez le CD-R/RW contenant le dossier que vous souhaitez supprimer dans le plateau de lecture de CD-R/RW de l'imprimante. 2 Appuyez sur INPUT SELECT pour allumer le témoin CD-RW. Les dossiers du disque CD-R/RW s'affichent. 3 Appuyez sur MENU. Le - Sony DPP-SV88 | Operating Instructions - Page 170
exploitation : Lecteur de CD-ROM : Microsoft Windows 98, Windows Me, Windows 2000 Professional, Windows XP Home Edition ou Windows XP Professional, préinstallés. Compatible MultiRead Système Macintosh recommandé : Système d'exploitation : Mac OS 8.5.1, 8.6, 9.0, 9.1, ou 9.2 préinstallés. Lecteur - Sony DPP-SV88 | Operating Instructions - Page 171
Disques CD-R et CD-RW 4 Appuyez sur les touches de direction (B/b) pour sélectionner "FORMAT", puis appuyez sur ENTER/PRINT QTY. Le sous-menu FORMAT s'affiche. 5 Appuyez sur les touches de direction (V/v) pour sélectionner "Finalizing CD-R/RW", puis appuyez sur ENTER/PRINT QTY. Le message de - Sony DPP-SV88 | Operating Instructions - Page 172
Visualisation d'images d'un CD-R/RW sur votre ordinateur Annulation de la finalisation (définalisation) Pour un disque CD-RW, vous pouvez annuler la finalisation que vous avez effectué. Lorsque vous effectuez une définalisation, l'espace mémoire occupé sur le disque par la finalisation est récupéré. - Sony DPP-SV88 | Operating Instructions - Page 173
Disques CD-R et CD-RW Formatage d'un CD-RW Vous pouvez formater un disque afin d'effacer toutes les images qui s'y trouvent ou bien pour utiliser sur l'imprimante un disque CD-RW formaté par un autre appareil. Lorsque vous formatez un disque, ce dernier est automatiquement initialisé. Remarque Le - Sony DPP-SV88 | Operating Instructions - Page 174
Réglage de la vitesse d'accès aux données des disques CD-R/RW Vous pouvez régler la vitesse d'enregistrement et de lecture du lecteur CD-R/RW. Utilisez normalement les réglages de vitesse par défaut indiqués ci-dessous. Ne réduisez la vitesse à la valeur indiquée entre parenthèses que lorsque le - Sony DPP-SV88 | Operating Instructions - Page 175
Opérations d'impression avancée Ajout d'effets à une image Fonctions du menu EFFECT Le menu EFFECT vous permet de modifier, d'ajuster ou d'ajouter des filtres spéciaux à une image dans le "Memory Stick", sur la carte PC ou le CD-R/RW. Pour afficher le menu EFFECT 1 Sélectionnez l'image à modifier - Sony DPP-SV88 | Operating Instructions - Page 176
Ajout d'effets à une image 3 Appuyez sur les touches de direction (B/b) pour déplacer le curseur vers l'élément de menu souhaité de la barre de menu, puis appuyez sur ENTER/PRINT QTY pour afficher son sous- menu. Sous-menu Fonctions +/- Agrandit ou réduit l'image. (Page 63) EDIT Déplace, - Sony DPP-SV88 | Operating Instructions - Page 177
Opérations d'impression avancée Pour enregistrer l'image avec les effets sélectionnés Pour une explication détaillée de la procédure d'enregistrement, reportez-vous aux pages 37 à 46. 1 Appuyez sur SAVE. Une boîte de dialogue de sélection de la cible s'affiche. Vous pouvez choisir comme cible un " - Sony DPP-SV88 | Operating Instructions - Page 178
Ajout d'effets à une image Modification de la position d'une image. Le sous-menu EDIT vous permet de déplacer, faire pivoter et retourner une image. 1 Appuyez sur les touches de direction (B/b) du menu EFFECT (page 61) pour sélectionner "EDIT". Le sous-menu EDIT s'affiche. 2 Appuyez sur les touches - Sony DPP-SV88 | Operating Instructions - Page 179
Réglage des images Le sous-menu ADJUST vous permet de régler la luminosité, la profondeur de couleur, la teinte ou les niveaux de netteté des images. 1 Appuyez sur les touches de direction (B/b) du menu EFFECT (page 61) pour sélectionner "ADJUST" dans la barre de menu, puis appuyez sur ENTER/PRINT - Sony DPP-SV88 | Operating Instructions - Page 180
Ajout d'effets à une image Ajout d'un filtre spécial à une image Le sous-menu FILTER vous permet d'ajouter un effet spécial à une image pour imprimer en monochrome, en sépia ou en mode peinture. 1 Appuyez sur les touches de direction (B/b) du menu EFFECT (page 61) pour sélectionner "FILTER". Le sous - Sony DPP-SV88 | Operating Instructions - Page 181
Création d'impressions diverses (Creative Print) Fonctions du menu Creative Print Le menu Creative Print vous permet d'effectuer différentes impressions d'une image du "Memory Stick", de la carte PC ou du CD-R/RW. Pour afficher le menu Creative Print, appuyez sur CREATIVE PRINT. Remarque Vous ne - Sony DPP-SV88 | Operating Instructions - Page 182
Création d'impressions diverses (Creative Print) Pour annuler et recommencer les opérations à mi-chemin Appuyez sur CANCEL. L'écran revient à la procédure précédente, recommencez la procédure. S'il est difficile de revenir à la procédure précédente, la boîte de dialogue pour revenir au menu - Sony DPP-SV88 | Operating Instructions - Page 183
Opérations d'impression avancée Création d'un calendrier Vous pouvez ajouter un calendrier sélectionné à une ou plusieurs images pour créer un calendrier original. 1 Appuyez sur les touches de direction (B/b/v/V) pour déplacer le curseur vers "Calendar", puis appuyez sur ENTER/PRINT QTY. Les modè - Sony DPP-SV88 | Operating Instructions - Page 184
: 1 Définissez le mois et l'année auxquels va débuter le calendrier. Appuyez sur les touches de direction (v/V) pour sélectionner "Start month" (mois de départ), puis appuyez sur les touches de direction (B/b) pour déplacer le curseur vers l'année. Pour définir le numéro, appuyez sur les touches de - Sony DPP-SV88 | Operating Instructions - Page 185
7 Appuyez sur les touches de direction (v/V) pour déplacer le curseur vers l'élément de réglage souhaité, puis appuyez sur ENTER/PRINT QTY. Pour effectuer plusieurs réglages, répétez cette étape. + A chaque fois que vous appuyez sur ENTER/PRINT QTY, l'image est agrandie. - A chaque fois que - Sony DPP-SV88 | Operating Instructions - Page 186
Création d'impressions diverses (Creative Print) 9 Pour imprimer l'image créée avec Creative Print, appuyez sur PRINT. L'impression démarre. Pour arrêter l'impression Appuyez sur CANCEL. Lorsque plusieurs copies sont en cours d'impression, l'impression suivante est annulée. 10 Appuyez sur les - Sony DPP-SV88 | Operating Instructions - Page 187
Opérations d'impression avancée 3 Appuyez sur ENTER/PRINT QTY. La fenêtre de sélection d'un message s'affiche. 4 Appuyez sur les touches de direction (B/b/v/V) pour déplacer le curseur vers le message souhaité, puis appuyez sur ENTER/ PRINT QTY. La fenêtre de sélection de la couleur du message s' - Sony DPP-SV88 | Operating Instructions - Page 188
Création d'impressions diverses (Creative Print) 10 Appuyez sur les touches de direction (B/b/V/v) pour déplacer le curseur sur le caractère souhaité, puis appuyez sur ENTER/ PRINT QTY pour saisir un caractère sur la première ligne. Les caractères sélectionnés sont validés et apparaissent dans la - Sony DPP-SV88 | Operating Instructions - Page 189
Opérations d'impression avancée 11 Appuyez sur les touches de direction (B/b/V/v) pour déplacer le curseur sur "NEXT", puis appuyez sur ENTER/PRINT QTY. Répétez les étapes 10 et 11 pour saisir les autres lignes. Lorsque vous avez terminé, un aperçu de l'impression créée s'affiche. Dans cette fenê - Sony DPP-SV88 | Operating Instructions - Page 190
Création d'impressions diverses (Creative Print) 3 Appuyez sur ENTER/PRINT QTY. La fenêtre de sélection d'un cadre s'affiche. 4 Appuyez sur les touches de direction (B/b/V/v) pour déplacer le curseur vers le cadre souhaité. 5 Insérez le "Memory Stick", la carte PC ou le CD-R/RW dans l'imprimante, - Sony DPP-SV88 | Operating Instructions - Page 191
Opérations d'impression avancée Création d'une image en plusieurs portions Vous pouvez imprimer une image divisée en 4, 9, 13 ou 16 portions. 1 Appuyez sur les touches de direction (B/b/v/V) pour déplacer le curseur vers "Split Images", puis appuyez sur ENTER/PRINT QTY. Les modèles d'images en - Sony DPP-SV88 | Operating Instructions - Page 192
Configuration de l'imprimante (MENU) Fonctions du MENU Le MENU vous permet de modifier les paramètres de l'imprimante, de supprimer des images, de réaliser des diaporamas ou d'imprimer un index. Pour afficher l'écran du MENU, appuyez sur MENU: Touche MENU Touche MENU Curseur Barre de MENU Curseur - Sony DPP-SV88 | Operating Instructions - Page 193
Opérations d'impression avancée Pour afficher un autre sous-menu Appuyez sur V jusqu'à la disparition du sous-menu courant. Pour quitter (EXIT) le MENU Appuyez sur les touches de direction (V/v/B/b) pour sélectionner "EXIT" dans l'écran de MENU ou appuyez sur MENU. L'écran affiché avant l'écran de - Sony DPP-SV88 | Operating Instructions - Page 194
ne seront pas coupées.) Date Print ON Permet d'imprimer une image avec la date enregistrée en même temps que l'image par votre appareil photo numérique. Beep OFF* ON* RemarqueS • Vous pouvez imprimer la date uniquement lorsque celle-ci est enregistrée au format DCF (Design rule for Camera - Sony DPP-SV88 | Operating Instructions - Page 195
Opérations d'impression avancée Eléments Video input Clock Setting Réglages Fonctions Motion* Sélectionnez cette option lorsque vous capturez une image à partir des images lues sur un caméscope. Si l'image mémorisée est un peu floue, l'imprimante la corrige automatiquement, ce qui prend quelques - Sony DPP-SV88 | Operating Instructions - Page 196
Suppression d'images Vous pouvez supprimer des images dans le "Memory Stick", sur la carte PC ou le CD-R/RW. Vous pouvez également formater le "Memory Stick" et le CD-RW (page 59). Remarques •Au cours de la suppression ou du formatage ne mettez pas l'appareil hors tension, ne retirez pas le "Memory - Sony DPP-SV88 | Operating Instructions - Page 197
Opérations d'impression avancée 3 Appuyez sur les touches de direction (B/b) de l'écran de MENU (page 78) pour sélectionner "DELETE/ FORMAT", puis appuyez sur ENTER/PRINT QTY. Le sous-menu DELETE/FORMAT s'affiche. 4 Appuyez sur les touches de direction (V/v) pour déplacer le curseur vers "Deleting - Sony DPP-SV88 | Operating Instructions - Page 198
Diaporama Vous pouvez réaliser un diaporama des images enregistrées dans un "Memory Stick", sur une carte PC ou un CD-R/RW. 1 Insérez le "Memory Stick", la carte PC ou le CD-R/RW dans l'imprimante. 2 Appuyez sur INPUT SELECT pour allumer le témoin "MEMORY STICK", PC CARD ou CD-RW. Si vous sé - Sony DPP-SV88 | Operating Instructions - Page 199
Opérations d'impression avancée Pour arrêter le diaporama Appuyez sur CANCEL. Remarques •Selon l'image, l'affichage peut prendre un certain temps. •Vous ne pouvez pas visionner le diaporama en mode Creative Print ou EFFECT. •Vous ne pouvez pas lancer le diaporama à partir de l'écran des dossiers du - Sony DPP-SV88 | Operating Instructions - Page 200
Création d'une impression d'index Vous pouvez imprimer une liste des images contenues dans un "Memory Stick", sur une carte PC ou dans un dossier d'un disque CD-R ou CD-RW (impression d'un index). 1 Insérez le "Memory Stick", la carte PC ou le CD-R/RW dans l'imprimante. 2 Appuyez sur INPUT SELECT - Sony DPP-SV88 | Operating Instructions - Page 201
Opérations d'impression avancée 5 Appuyez sur les touches de direction (B/b/V/v) pour déplacer le curseur sur "Execute", puis appuyez sur ENTER/PRINT QTY. L'index des images contenues sur le "Memory Stick", dans la carte PC ou dans disque CD-R/RW s'imprime selon la disposition sélectionnée. Chaque - Sony DPP-SV88 | Operating Instructions - Page 202
Windows Le logiciel fourni vous permet d'imprimer sur l'imprimante photo numérique DPP-SV88 Windows 98/Windows 98SE/ Windows Me/ Windows 2000 Professional/ Windows XP Home Edition/Windows XP périphériques USB sont connectés à l'ordinateur. •Lorsque plusieurs imprimantes DPP-SV88/SV77/SV55 - Sony DPP-SV88 | Operating Instructions - Page 203
du "Memory Stick"/carte PC contenus sur le CD-ROM fourni. Utilisation sous Windows 98/98SE/Me Installation du pilote USB 1 Mettez votre ordinateur et l'imprimante sous tension. 2 Démarrez Windows, puis connectez votre ordinateur et l'imprimante. Lorsque l'ordinateur détecte l'imprimante, la boîte - Sony DPP-SV88 | Operating Instructions - Page 204
rer le CD-ROM du système d'exploitation Windows. 6 Cliquez sur "Terminer". Le pilote USB Sony DPP-SV88 est installé. Remarque Après avoir cliqué riques". Si "Sony DPP-SV88 USB Digital Photo Printer" (Imprimante photo numérique USB Sony DPP-SV88) s'affiche sous "Contrôleur de bus USB", cela signifie - Sony DPP-SV88 | Operating Instructions - Page 205
". La boîte de dialogue "Sélection de l'emplacement de destination" s'affiche. Les fichiers sont installés par défaut dans le dossier "C:\Program Files\Sony\ DPPSV88". Si vous souhaitez les installer dans un autre dossier, entrez le nom du dossier de destination ou spécifiez-le en cliquant sur - Sony DPP-SV88 | Operating Instructions - Page 206
Utilisation de l'imprimante sous Windows 7 Cochez la case "Imprimante locale" et cliquez sur "Suivant". "OK". La boîte de dialogue de sélection du nom du modèle s'affiche. 13 Sélectionnez "Sony DPP-SV88" et cliquez sur "Suivant". La copie des fichiers démarre. La boîte de dialogue de sélection du - Sony DPP-SV88 | Operating Instructions - Page 207
Impression depuis votre ordinateur 14 Sélectionnez "Sony DPPUSB1: Sony Digital Photo Printer" dans la liste et cliquez sur "Suivant". La boîte de dialogue de sélection du nom de l'imprimante s'affiche. Son nom défini par défaut est "Sony DPP-SV88". Pour lui attribuer un nom différent, saisissez-le - Sony DPP-SV88 | Operating Instructions - Page 208
du logiciel sous Windows XP Home Edition/Professional, un message d'erreur indiquant que le logiciel n'a pas réussi le test de logo Windows peut s'afficher. Cliquez alors sur "Continuer" pour passer à l'étape suivante. 9 Cliquez sur "Terminer". Le fichier Readme s'affiche. "Sony DPP-SV88" est ajout - Sony DPP-SV88 | Operating Instructions - Page 209
"A propos du pilote d'imprimante pour Windows 2000 Professional" du fichier Readme se installé (généralement "C:\Program File\Sony\DPPSV88\Program"), puis suivez les instructions affichées à l'écran pour suivantes: Désinstallation de "Sony DPP-SV88" 1 Déconnectez le câble USB de l'imprimante et de - Sony DPP-SV88 | Operating Instructions - Page 210
Windows, pointez sur "Paramètres", puis cliquez sur "Panneau de configuration". 3 Cliquez deux fois sur "Système" pour ouvrir la fenêtre "Propriétés Système". 4 Cliquez sur l'onglet "Gestionnaire de périphériques", sélectionnez "Sony DPP-SV55 USB Digital Photo Printer"/"Sony DPP-SV77 Digital Photo - Sony DPP-SV88 | Operating Instructions - Page 211
redémarrer ne s'affiche pas, suivez la procédure ci-dessous. 1 Cliquez sur "Fermer". 2 Vérifiez que la désignation a été modifiée en "Sony DPP-SV88 USB Digital Photo Printer" (Imprimante photo numérique USB Sony DPP-SV88) et cliquez sur "OK". 3 Exécutez "Setup.exe" sur le CDROM fourni. Suite 97 FR - Sony DPP-SV88 | Operating Instructions - Page 212
fenêtre "Poste de travail" ou "Explorateur Windows", cliquez deux fois sur "Sony DPP-SV88". 2 Cliquez sur l'icône du "Memory fichiers Windows. Remarque Le logiciel de lecture n'exploite pas le DPP-SV88 comme un support entiè Software" fourni pour transférer les images d'un CD-R/RW vers votre - Sony DPP-SV88 | Operating Instructions - Page 213
le disque dur de votre ordinateur à l'aide de l'imprimante photo numérique DPP-SV88. Remarques • Cette section donne un exemple de réglages Mise en page" s'affiche. 3 Configurez l'imprimante. Sélectionnez "Sony DPP-SV88" comme imprimante. Impression depuis votre ordinateur Sélectionnez le format - Sony DPP-SV88 | Operating Instructions - Page 214
Utilisation de l'imprimante sous Windows 3 Définissez l'orientation. Pour imprimer en mode Portrait (haut), sélectionnez "Portrait". Pour imprimer en mode Paysage (large), sélectionnez "Paysage". Pour définir les propriétés de l'imprimante Cliquez - Sony DPP-SV88 | Operating Instructions - Page 215
d'impression 1 Cliquez sur "Démarrer" dans la barre des tâches Windows, pointez sur "Paramètres", puis cliquez sur "Imprimantes". La fenêtre "Imprimantes" s'affiche. 2 Double-cliquez sur l'icône "Sony DPP-SV88". La fenêtre "Sony DPP-SV88" s'affiche. Dans cette fenêtre, les documents dans la queue - Sony DPP-SV88 | Operating Instructions - Page 216
Le logiciel fourni vous permet d'imprimer sur l'imprimante photo numérique DPP-SV88 une image stockée sur votre Macintosh. Pour imprimer riphérique USB utilisé simultanément. Installation du pilote d'imprimante Installez le gestionnaire d'impression Sony DPP-SV88 Version 1.0 pour Mac OS - Sony DPP-SV88 | Operating Instructions - Page 217
sélectionnée s'ouvre. 5 Cliquez deux fois sur l'icône d'installation (Setup Program). 6 Cliquez sur "Installation". L'installation démarre. Suivez les instructions affichées à l'écran pour terminer l'installation. Désinstallation du pilote d'imprimante Si vous n'utilisez plus le logiciel, vous devez - Sony DPP-SV88 | Operating Instructions - Page 218
disque dur de votre ordinateur à l'aide de l'imprimante photo numérique DPP-SV88. Remarques • Cette section donne un exemple de réglages et à imprimer 2 Sélectionnez "Sélecteur" dans le menu Pomme, cliquez sur "Sony DPP-SV88", puis fermez le "Sélecteur". 3 Choisissez "Format d'impression" dans le - Sony DPP-SV88 | Operating Instructions - Page 219
Papier/Marge Orientation Graçage Agrandir/Réduire Pour réaliser des impressions au format Carte postale sans marge, cliquez sur "Carte postale" et sur l'icône sans marge . Pour réaliser des impressions au format Carte postale avec marge, cliquez sur "Carte postale" et sur l'icône avec marge . Pour - Sony DPP-SV88 | Operating Instructions - Page 220
ou du liquide pénètre à l'intérieur du boîtier, débranchez l'imprimante et faites-la vérifier par un technicien qualifié avant de la remettre en service. • Ne démontez jamais l'imprimante. • Pour débrancher le cordon d'alimentation, tirez-le par sa fiche. Ne tirez jamais sur le cordon luimême. • Si - Sony DPP-SV88 | Operating Instructions - Page 221
postaux non utilisés est également interdite par la loi. • Les émissions de télévision, les films, les cassettes vidéo, les portraits d'autres personnes et les autres supports audiovisuels peuvent être protégés par des droits d'auteur (copyright). L'impression vidéo non autorisée de ces - Sony DPP-SV88 | Operating Instructions - Page 222
un adaptateur de carte PC disponible dans le commerce. A propos du "Memory Stick" Le "Memory Stick" est un support amovible de stockage des données qui peut être utilisé avec un appareil photo numérique, un caméscope ou un PC. Il vous permet d'afficher, d'enregistrer et de supprimer facilement des - Sony DPP-SV88 | Operating Instructions - Page 223
davantage d'informations sur l'installation de la carte et de l'adaptateur, reportezvous aux instructions de fonctionnement de l'adaptateur de carte PC. • N'insérez pas ou ne retirez pas la carte flash compacte ou le support Smart Media de l'adaptateur de carte PC lorsque celui-ci est inséré dans - Sony DPP-SV88 | Operating Instructions - Page 224
pour le résoudre. Si le problème persiste, contactez votre revendeur Sony. Si vous imprimez à partir de votre ordinateur, consultez également -ci dans l'imprimante. Vérifiez que les images enregistrées par un appareil photo numérique ou un autre appareil sont enregistrées. m En cas d'enregistrement - Sony DPP-SV88 | Operating Instructions - Page 225
image est enregistrée en format de fichier incompatible que le DPPSV88 ne prend pas en charge ou l'image elle-même est en excès. m En fonction du modèle d'appareil photo numérique, le rapport hauteur/ largeur d'une image enregistr instructions affichées à l'écran. 111 FR Informations complémentaires - Sony DPP-SV88 | Operating Instructions - Page 226
magasin à papier pour dégager le papier coincé. Retirez doucement le papier coincé. Remarque Si vous ne parvenez pas à retirer le papier coincé, contactez votre revendeur Sony. 112 FR - Sony DPP-SV88 | Operating Instructions - Page 227
, du "Memory Stick" ou de la carte PC) Connecteurs entrée/sortie Connecteur USB (1) Connecteur (sortie) VIDEO OUT (prise phono x 1)/Connecteur (entrée) VIDEO JPEG ligne de base) BMP : vraies couleurs 24 bits, format Windows (certaines versions des formats de fichier peuvent ne pas être compatibles). - Sony DPP-SV88 | Operating Instructions - Page 228
de la) 23 Cartouche d'impression 23 CD Mavica 18, 31, 47 114 FR Configuration du système Macintosh 102 Windows 88 Connecteur S VIDEO IN 14 Connecteur S VIDEO OUT 13 Connecteur USB 20 Connecteur VIDEO IN 14 Connecteur VIDEO OUT 13 Cordon d'alimentation 15 Creative Print 67 D date (Impression de la - Sony DPP-SV88 | Operating Instructions - Page 229
Impression de toutes les images ou des images DPOF 32 à partir d'un ordinateur Macintosh 104 à partir d'un ordinateur Windows 99 d'images sélectionnées sur le support 27 d'images vidéo 35 Impression normale 27 index (Impression d'un) 86 Indicateur d'erreur cartouche 23 Indicateur d'erreur papier 26, - Sony DPP-SV88 | Operating Instructions - Page 230
los clientes en Europa Esta Fotoimpresora Digital está clasificada como producto LÁSER • Microsoft, MS, MS-DOS y Windows® son marcas comerciales registradas de Microsoft Corporation Power Macintosh y Mac OS son marcas son marcas comerciales de Sony Corporation. •Esta impresora utiliza manual. - Sony DPP-SV88 | Operating Instructions - Page 231
contenido del paquete, al proveedor del que lo obtuvo. Sony Corporation se reserva el derecho de realizar modificaciones en este manual o en la información que contiene en cualquier momento sin previo aviso. El programa de software descrito puede igualmente regirse por los términos establecidos en - Sony DPP-SV88 | Operating Instructions - Page 232
Índice Para empezar ¿Qué puede hacer con la impresora 6 Desembalaje de la impresora 8 Identificación de las piezas 9 Instalación 1 Conexión de la impresora 13 Conexión a un televisor 13 Conexión a un equipo de vídeo 14 Conexión del cable de alimentación de CA 15 Inserción de un "Memory Stick" - Sony DPP-SV88 | Operating Instructions - Page 233
86 Impresión mediante un ordenador Uso de la impresora con ordenadores equipados con Windows 88 Requisitos de sistema 88 Instalación del software 89 Uso del software lector 98 Impresión mediante un software de aplicación 99 Uso de la impresora con ordenadores Macintosh 102 Requisitos de - Sony DPP-SV88 | Operating Instructions - Page 234
Para empezar ¿Qué puede hacer con la impresora? Con la Fotoimpresora Digital DPP-SV88, puede imprimir imágenes de un "Memory Stick," tarjeta PC, disco Notas •Le recomendamos la utilización de discos CD-R/RW fabricados por Sony. •Utilice discos CD-R/RW no formateados disponibles en el mercado. 6 ES - Sony DPP-SV88 | Operating Instructions - Page 235
RW disc, o vídeo Puede imprimir imágenes de una cámara fija digital almacenadas en un "Memory Stick", en una tarjeta PC o en un disco USB adecuada con el ordenador Si instala el software del controlador de la impresora DPP-SV88 suministrado podrá imprimir imágenes desde su ordenador. Con el "Software - Sony DPP-SV88 | Operating Instructions - Page 236
de papel (1) - Sony DPP-SV88 Printer Driver Software for Windows® 98/ Me/2000 Professional/XP Home Edition/XP Professionl Version 1.0 for MAC OS 8.5.1./8.6/9.0/9.1/ 9.2 Version 1.0 - Memory Stick/PC card Reader Software for Windows® 98/ Me/2000 Professional/XP Home Edition/XP Professionl Version - Sony DPP-SV88 | Operating Instructions - Page 237
cartucho de la impresora. qa Cartucho de la impresora (páginas 22, 23) (No suministrado) Panel posterior de la impresora 1 Conector USB(página 20) Conecta con el conector USB del ordenador. 2 Conector S VIDEO OUT (página 13) 3 Conector VIDEO OUT (página 13) 4 Conector AC IN (página 15) 5 Rejillas de - Sony DPP-SV88 | Operating Instructions - Page 238
Identificación de las piezas 10 ES Indicadores de la impresora y panel de funcionamiento 1 Indicadores de entrada (páginas 20, 27, 35) El indicador para la actual señal de entrada se ilumina ("MEMORY STICK"/ PC CARD/CD-RW/VIDEO/PC). 2 Indicador PRINT (páginas 30, 34) 3 Indicador de error de papel - Sony DPP-SV88 | Operating Instructions - Page 239
Para empezar Mando a distancia 1 Botón AUTO PRINT (página 33) Cada vez que pulse el botón, los interruptores de modo de impresión ALL y DPOF se ilumina el correspondiente indicador de la impresora. 2 Botón INPUT SEL (SELECT) (páginas 20, 27, 35) Cambia la entrada. (El indicador de entrada - Sony DPP-SV88 | Operating Instructions - Page 240
Card/ CD-R/RW Indica que tipo de medio se utiliza actualmente. 4 Indicación de protección Indica que la imagen está protegida por una cámara digital fija. 5 Cursor (marco amarillo) Indica la imagen con el cursor. 6 Selección (naranja) Indica que se ha seleccionado la imagen. 7 Cantidad de imágenes - Sony DPP-SV88 | Operating Instructions - Page 241
Instalación Instalación 1 Conexión de la impresora Conexión a un televisor Conecte el conector de la impresora VIDEO OUT (salida) a la entrada de vídeo del televisor para visualizar las imágenes que hay que imprimir. Televisor Fije el selector de entrada VIDEO/TV en la posición VIDEO. A S VIDEO - Sony DPP-SV88 | Operating Instructions - Page 242
, utilice un cable de vídeo de los disponibles en el mercado o un cable de conexión de S video de 3 m de longitud como máximo. •Consulte también el manual de instrucciones del equipo de vídeo. - Sony DPP-SV88 | Operating Instructions - Page 243
Conexión del cable de alimentación de CA Después de hacer las conexiones, conecte el cable de alimentación de CA al conector AC IN de la impresora y a continuación a la toma de CA. El indicador POWER se ilumina en rojo. Instalación A la toma mural Cable de alimentación de CA (suministrado) - Sony DPP-SV88 | Operating Instructions - Page 244
1 Conexión de la impresora Nota Inserte únicamente el "Memory Stick". No inserte ningún otro objeto. Impresión de una imagen desde una tarjeta PC Abra la cubierta del panel de operaciones e inserte la tarjeta PC en la ranura de inserción PC CARD hasta que oiga un clic de fijación. Botón de extracci - Sony DPP-SV88 | Operating Instructions - Page 245
Instalación Inserción de un disco CD-R/RW Para leer o guardar las imágenes en carpetas, inserte un disco CD-R/RW en la bandeja del disco CD-R/RW de la impresora. Para obtener información sobre los tipos de discos que puede utilizar con la impresora y las precauciones de uso de un disco, consulte " - Sony DPP-SV88 | Operating Instructions - Page 246
CD-R/RW de 8 cm de la cámara digital CD Mavica Cuando utilice un disco CD-R/RW de 8 cm de la cámara digital CD Mavica con esta impresora, le recomendamos que 1 y 2. 1 Lado de la etiqueta (la parte posterior es para la grabación). 2 Lado con la impresión SONY (la parte posterior es brillante). 18 ES - Sony DPP-SV88 | Operating Instructions - Page 247
aplanarla. De lo contrario, la bandeja del disco CDR/RW podría no funcionar correctamente u oírse ruido. Nota El adaptador de CD suministrado con la cámara digital CD Mavica sirve únicamente para los discos CD-R/RW de 8 cm de la cámara CD Mavica. No utilice el adaptador con otros tipos de discos - Sony DPP-SV88 | Operating Instructions - Page 248
PC a su disco duro del ordenador. Para más información sobre cómo instalar y hacer funcionar el software, consulte "Imprimir desde su ordenador" (páginas 88-105). Ordenador Windows/ Macintosh Al conector USB Al conector USB Cuando conecte un ordenador que ya esté conectado a través de un conector - Sony DPP-SV88 | Operating Instructions - Page 249
Instalación 2 Preparación del mando a distancia 1 Retire el cierre de fricción del mando a distancia. Una vez retirado el cierre de fricción de la batería de litio, se puede utilizar el mando a distancia. Cierre de fricción 2 Apunte el mando a distancia hacia el sensor remoto de la impresora y, a - Sony DPP-SV88 | Operating Instructions - Page 250
3 Preparación del paquete de impresión Es necesario un paquete opcional de impresión diseñado para la impresora. El paquete contiene un juego de papel de impresión y un cartucho de impresión para impresiones de tamaño tarjeta postal (4x6 pulgadas) o pequeño (3,5x4 pulgadas). Seleccione el paquete - Sony DPP-SV88 | Operating Instructions - Page 251
cartucho de impresión en la impresora hasta que quede encajado en su sitio y cierre la tapa del compartimiento de cartuchos. Lado con el logotipo Sony Para sustituir el cartucho de impresión Cuando el cartucho de impresión se agota, el indicador de error de cartucho se ilumina y la pantalla muestra - Sony DPP-SV88 | Operating Instructions - Page 252
4 Carga del cartucho de impresión Notas •No introduzca nunca la mano en el compartimiento de cartuchos. El cabezal térmico alcanza altas temperaturas, especialmente después de varias impresiones. •No rebobine la cinta de tinta ni utilice el cartucho de impresión rebobinado para una nueva impresión. - Sony DPP-SV88 | Operating Instructions - Page 253
25 hojas de tamaño tarjeta postal y 30 hojas de papel de impresión de tamaño pequeño. Cuando inserte papel de tamaño pequeño, colóquelo en la parte trasera de la partición. Superficie de impresión Flecha Papel Al insertar papel de tamaño pequeño Cara frontal Nota No toque la superficie de impresi - Sony DPP-SV88 | Operating Instructions - Page 254
5 Inserción del papel de impresión 3 Cierre la tapa de la bandeja del papel. A continuación, empuje y abra la tapa del compartimiento de la bandeja del papel de la impresora e inserte la bandeja del papel en dicha impresora. Insértela firmemente hasta que quede encajada en su sitio. Notas •Si la - Sony DPP-SV88 | Operating Instructions - Page 255
Operaciones básicas de impresión Operaciones básicas de impresión Impresión de imágenes seleccionadas de la tarjeta o del disco Puede seleccionar una imagen grabada en el "Memory Stick," la tarjeta PC o disco CD-R/RW e imprimirla en tamaño completo (impresión estándar). 3 2 3-5 3,4 Botón CANCEL - Sony DPP-SV88 | Operating Instructions - Page 256
Impresión de imágenes seleccionadas de la tarjeta o del disco Acerca de INPUT SELECT Puede cambiar la entrada pulsando INPUT SELECT antes de que cambie la pantalla. Al cabo de un rato, se mostrará la pantalla seleccionada. Cuando seleccione el disco CD-RW Se mostrarán las cubiertas de las carpetas - Sony DPP-SV88 | Operating Instructions - Page 257
Operaciones básicas de impresión Para visualizar otra página En caso de existir múltiples páginas, es posible cambiar de página. Para visualizar la página siguiente, mueva el marco amarillo hacia la última línea de la lista de imágenes y pulse v. Para visualizar la página anterior, mueva el marco - Sony DPP-SV88 | Operating Instructions - Page 258
Impresión de imágenes seleccionadas de la tarjeta o del disco 5 Pulse ENTER/PRINT QTY para fijar la cantidad de impresión. Cada vez que pulse ENTER/PRINT QTY, aumentará la cantidad de impresiones. Para reiniciar la cantidad de impresiones a cero, pulse CANCEL. Para imprimir múltiples imágenes al - Sony DPP-SV88 | Operating Instructions - Page 259
tamaño de la imagen, puede tardar entre 5 y 60 segundos en visualizar la imagen de vista previa en la pantalla. •Dependiendo del tipo de cámara fija digital, se puede tardar cierto tiempo en visualizar la lista de imágenes en miniatura. •Cuando la anchura o la altura de la imagen es menor de - Sony DPP-SV88 | Operating Instructions - Page 260
las instrucciones de funcionamiento de la cámara fija digital que esté utilizando. Nota Algunos tipos de cámara fija digital no soportan la función DPOF o la impresora no soporta parte de las funciones de la cámara fija digital. 3 4 2 Botón CANCEL 5 1 2 3 4 Botón CANCEL 5 1 Inserte un "Memory - Sony DPP-SV88 | Operating Instructions - Page 261
Operaciones básicas de impresión 3 Pulse INPUT SELECT para encender el indicador "MEMORY STICK," PC CARD o CD-RW. Cuando conecte la impresora al televisor, las imágenes en miniatura del "Memory Stick" o las imágenes de la tarjeta PC se mostrarán en la pantalla. Cuando seleccione el disco CD-RW Se - Sony DPP-SV88 | Operating Instructions - Page 262
Impresión de todas las imágenes o imágenes predeterminadas DPOF a la vez 5 Pulse PRINT. En el mando a distancia, pulse a la vez los dos botones PRINT. Se inicia la impresión. Cuando seleccione ALL, todas las imágenes del "Memory Stick", la tarjeta PC o el disco CD-R/RW se imprimirán una a una en el - Sony DPP-SV88 | Operating Instructions - Page 263
. Las imágenes de reproducción aparecen en la pantalla (imagen de entrada). Para detalles sobre la reproducción en el equipo de vídeo, consulte el manual de instrucciones de su equipo de vídeo. Nota No se recomienda seleccionar una imagen mientras el equipo de vídeo está en pausa porque la calidad - Sony DPP-SV88 | Operating Instructions - Page 264
Impresión de una imagen desde un equipo de vídeo 4 Pulse ENTER/PRINT QTY cuando la imagen que desee imprimir aparezca en pantalla. La imagen seleccionada se captura en la memoria de la impresora y la vista previa de la imagen seleccionada (imagen de memoria) aparece en el centro de la pantalla. Para - Sony DPP-SV88 | Operating Instructions - Page 265
Guardado de imágenes Guardado de imágenes Guardado de imágenes del "Memory Stick" o tarjeta PC en un disco CD-R/RW Guardado de todas las imágenes del "Memory Stick" o de la tarjeta PC de una vez Puede guardar todas las imágenes de un "Memory Stick" o de una tarjeta PC de una sola vez en una nueva - Sony DPP-SV88 | Operating Instructions - Page 266
Guardado de imágenes del "Memory Stick" o tarjeta PC en un disco CD-R/RW 6 Pulse el botón de flecha (B/b)para seleccionar "Yes" y, a continuación, pulse ENTER/PRINT QTY. El disco CD-R/RW se inicializa y todas las imágenes del "Memory Stick" o de la tarjeta PC se guardan en el disco CD-R/RW. 7 Cuando - Sony DPP-SV88 | Operating Instructions - Page 267
4 Seleccione la imagen que desee guardar. x Cuando se muestran las imágenes en miniatura Pulse el botón de flecha ( B/b/V/v) para seleccionar la imagen que desee guardar y, a continuación, pulse ENTER/PRINT QTY. Puede seleccionar múltiples imágenes. Guardado de imágenes x Cuando se muestre la - Sony DPP-SV88 | Operating Instructions - Page 268
Guardado de imágenes del "Memory Stick" o tarjeta PC en un disco CD-R/RW Sugerencia Si selecciona como destino el "Memory Stick" o la tarjeta PC, de PC, podrá imágenes de una tarjeta a otra. No es posible seleccionar el mismo tipo de tarjeta (de "Memory Stick" a "Memory Stick", o de tarjeta PC a - Sony DPP-SV88 | Operating Instructions - Page 269
Guardado de imágenes Acerca de los nombres de carpetas y archivos para guardar imágenes en un disco CD-R/RW Acerca de las carpetas (álbumes) Las carpetas se nombran y se guardan en los discos CD-R/RW como "ALBUM001", "ALBUM002", "ALBUM003", etc. en el orden en que se crearon. Incluso si renombra - Sony DPP-SV88 | Operating Instructions - Page 270
Guardado de imágenes de disco CD-R/RW en el "Memory Stick" o tarjeta PC Guardado de todas las imágenes en una carpeta de CD-R/ RW a la vez Puede guardar todas las imágenes de una carpeta de un disco CD-R/RW en el "Memory Stick" o tarjeta PC a la vez. 1 Inserte en la impresora un "Memory Stick" o una - Sony DPP-SV88 | Operating Instructions - Page 271
Guardado de imágenes 7 Cuando aparezca el mensaje notificando que se completó el guardado, pulse ENTER/PRINT QTY. Notas •Mientras guarde la imagen no desconecte la alimentación de la impresora o extraiga el "Memory Stick," la tarjeta PC o el disco CD-R/RW de la impresora. Podrían dañarse el "Memory - Sony DPP-SV88 | Operating Instructions - Page 272
Guardado de imágenes de disco CD-R/RW en el "Memory Stick" o tarjeta PC 5 Seleccione la imagen que desee guardar. x Cuando se muestran las imágenes en miniatura Pulse el botón de flecha ( B/b/V/v) para seleccionar la imagen que desee guardar y, a continuación, pulse ENTER/PRINT QTY. Puede - Sony DPP-SV88 | Operating Instructions - Page 273
Guardado de imágenes Guardar la imagen de memoria de vídeo en un "Memory Stick," una tarjeta PC o un disco CDR/RW Las imágenes que se capturan y se imprimen desde un equipo de vídeo se almacenan en la memoria de la impresora. Si captura otra imagen, la imagen anterior se sobreescribe o se borra. - Sony DPP-SV88 | Operating Instructions - Page 274
Guardar la imagen de memoria de vídeo en un "Memory Stick," una tarjeta PC o un disco CD-R/RW 5 Pulse el botón de flecha (B/b) para seleccionar el destino ("Memory Stick," "PC Card" o "CD-R/RW") y, a continuación, pulse ENTER/PRINT QTY. •Cuando seleccione "Memory Stick" o tarjeta PC, la imagen de - Sony DPP-SV88 | Operating Instructions - Page 275
imágenes de un disco CD-R/RW de 8 cm grabado utilizando la cámara digital CD Mavica. Asimismo, puede copiar las imágenes en un "Memory Stick", una gina 31. •Le recomendamos la utilización de discos CD-R/RW fabricados por Sony. •Utilice discos CD-R/RW no formateados disponibles en el mercado. •No - Sony DPP-SV88 | Operating Instructions - Page 276
En discos CD-R/RW Acerca del manipulación de los discos Para evitar la pérdida de datos, observe lo siguiente. • No pegue papeles o etiquetas ni rasque la superficie del disco. • No toque la superficie de reproducción del disco (la superficie en la que no hay nada impreso). • No sitúe el disco en - Sony DPP-SV88 | Operating Instructions - Page 277
Flujo de funciones utilizando un disco CD-R/RW Para utilizar un disco CD-R/RW con la impresora, tendrá que realizar las siguientes operaciones: Inicio Nuevo disco [aprox. 20 seg.] Inicialización Consume 8 MB. [aprox. 15 seg.] Guardar todas las imágenes seleccionadas :CD-R :CD-RW [ ] :tiempo - Sony DPP-SV88 | Operating Instructions - Page 278
estructuras del disco, la impresora no podrá leer el disco.) Notas •Si el disco CD-R/RW está grabado utilizando el software de escritura de CD-R/RW estándar de Windows XP, sólo se visualizarán en la impresora los datos que se grabaron primero (los datos grabados en la primera sesión). •La impresora - Sony DPP-SV88 | Operating Instructions - Page 279
Utilización de un disco CD-R/RW Preparación de un disco CD-R/RW para guardar imágenes (Inicialización) Para utilizar un disco CD-R/RW con la impresora, deberá inicializar el disco. 1 Inserte un disco CD-R/RW no formateado en la bandeja del disco CD-R/RW. 2 Pulse INPUT SELECT para encender el - Sony DPP-SV88 | Operating Instructions - Page 280
Ajuste de carpetas en un disco CD-R/RW Puede añadir, suprimir o renombrar una carpeta en un disco CD-R/RW. Nota Si el espacio en disco es limitado, no podrá añadir, borrar o renombrar una carpeta. Creación de una nueva carpeta 1 Inserte un disco CD-R/RW en el que desee crear una nueva carpeta en - Sony DPP-SV88 | Operating Instructions - Page 281
Utilización de un disco CD-R/RW 4 Pulse el botón de flecha (B/b)para seleccionar "NEW" y pulse ENTER/PRINT QTY. Se mostrará un mensaje de confirmación para la creación de una nueva carpeta. Nota La cantidad máxima de carpetas en un disco es de 99. No se pueden crear más de 99 carpetas. 5 Pulse el - Sony DPP-SV88 | Operating Instructions - Page 282
Ajuste de carpetas en un disco CD-R/RW Para escribir una letra mayúscula Seleccione "CAPS" y pulse ENTER/ PRINT QTY para mostrar la tabla de mayúsculas. A continuación seleccione el carácter deseado y pulse ENTER/ PRINT QTY. Para escribir letras minúsculas, seleccione de nuevo "CAPS". Casilla de - Sony DPP-SV88 | Operating Instructions - Page 283
Utilización de un disco CD-R/RW Eliminación de una carpeta 1 Inserte un disco CD-R/RW que contenga una carpeta que desee borrar en la bandeja de disco CD-R/RW de la impresora. 2 Pulse INPUT SELECT para encender el indicador CD-RW. Se visualizan las cubiertas de las carpetas en el disco CD-R/RW. 3 - Sony DPP-SV88 | Operating Instructions - Page 284
: SO: Debe tener preinstalado Microsoft Windows 98/ Windows Me/ Windows 2000 Professional/Windows XP Home Edition/Windows XP Professional. Unidad de CD-ROM: Compatible con MultiRead Sistema Macintosh recomendado: SO: Debe tener preinstalado Mac OS 8.5.1/8.6/9.0/9.1/9.2 Unidad de CD-ROM - Sony DPP-SV88 | Operating Instructions - Page 285
Utilización de un disco CD-R/RW 4 Pulse el botón de flecha (B/b)para seleccionar "FORMAT" y pulse ENTER/PRINT QTY. Se muestra el submenú FORMAT. 5 Pulse el botón de flecha (B/b) para seleccionar "Finalizing CD- R/RW" y, a continuación, pulse ENTER/PRINT QTY. Se muestra el mensaje de confirmación. 6 - Sony DPP-SV88 | Operating Instructions - Page 286
Visualización de imágenes de un disco CD-R/RW en el ordenador Cancelación de la finalización (Anular la finalización) Si utiliza un disco CD-RW, podrá cancelar la finalización que haya realizado. Cuando realice la anulación de la finalización, el espacio de disco consumido por la finalización se - Sony DPP-SV88 | Operating Instructions - Page 287
Utilización de un disco CD-R/RW Formateo de un disco CD-RW Para borrar todas las imágenes guardadas o para utilizar un disco CD-RW formateado por otro dispositivo en la impresora, puede formatear el disco. Cuando formatee un disco, se inicializará automáticamente. Nota El formateo borrará todos los - Sony DPP-SV88 | Operating Instructions - Page 288
Ajuste de la velocidad de acceso de un disco CD-R/RW Puede ajustar la velocidad de grabación y escritura de la unidad de disco CDR/RW. Utilice normalmente los ajustes de velocidad iniciales que se relacionan a continuación. Sólo cuando las operaciones sean inestables, reduzca la velocidad a los - Sony DPP-SV88 | Operating Instructions - Page 289
Operaciones avanzadas de impresión Añadir efectos a la imagen ¿Qué puede hacer con el menú EFFECT El menú EFFECT le permite editar, ajustar o añadir filtros especiales a una imagen en el "Memory Stick," tarjeta PC card o disco CD-R/RW. Para visualizar el menú EFFECT 1 Seleccione la imagen que desee - Sony DPP-SV88 | Operating Instructions - Page 290
Añadir efectos a la imagen 3 Pulse el botón de flecha (B/b) para mover el cursor hacia el elemento deseado de la barra del menú y a continuación pulse ENTER/PRINT QTY para visualizar su submenú. Submenú +/- EDIT ADJUST FILTER RESET Funciones Amplia o reduce una imagen. (Página 63) Mueve, rota o - Sony DPP-SV88 | Operating Instructions - Page 291
Operaciones avanzadas de impresión Para guardar la imagen con los efectos seleccionados Para información detallada sobre los procedimientos de guardado, consulte las páginas 37 a 46. 1 Pulse SAVE. Se muestra un cuadro de diáolgo para seleccionar el destino. Puede selecionar el destino tanto desde - Sony DPP-SV88 | Operating Instructions - Page 292
Añadir efectos a la imagen Cambio de la posición de la imagen. El sub menú EDIT le permite mover, rotar o invertir una imagen. 1 En el menú EFFECT (página 61), pulse el botón de flecha (B/b) para seleccionar "EDIT." Se muestra el submenú EDIT. 2 Pulse el botón de flecha (V/v)para mover el cursor al - Sony DPP-SV88 | Operating Instructions - Page 293
Ajuste de las fotografías El submenú ADJUST permite ajustar el brillo, la profundidad de color, el tinte o los niveles de nitidez de las imágenes de fotografías. 1 En el menú EFFECT (página 61), pulse lel botón de flecha (B/b) para seleccionar "ADJUST" en la barra del menú y pulse ENTER/ PRINT QTY. - Sony DPP-SV88 | Operating Instructions - Page 294
Añadir efectos a la imagen Añadir un filtro especial a la imagen El submenú FILTER permite añadir un efecto especial a la imagen para imprimirla en tonos monocromo, pintura o sepia. 1 En el menú EFFECT (página 61), pulse el botón de flecha (B/b) para seleccionar "FILTER." Se muestra el submenú - Sony DPP-SV88 | Operating Instructions - Page 295
Realización de diversas impresiones (Creative Print) ¿Qué puede hacer con el menú Creative Print El menú Creative Print le permite realizar diversas impresiones utilizando una imagen del "Memory Stick," tarjeta PC, o disco CD-R/RW. Para visualizar el menú Creative Print, pulse CREATIVE PRINT. Nota - Sony DPP-SV88 | Operating Instructions - Page 296
Realización de diversas impresiones (Creative Print) Para cancelar y reiniciar operaciones Pulse CANCEL. La pantalla vuelve al procedimiento anterior; repita el procedimiento. Si resulta difícil volver al procedimiento anterior, se muestra el cuadro de diálogo para volver al menú principal de - Sony DPP-SV88 | Operating Instructions - Page 297
Operaciones avanzadas de impresión Realizar un calendario Es posible añadir un calendario seleccionado a una imagen o imágenes para hacer un calendario original. 1 Pulse el botón de flecha (B/b/v/ V) para mover el cursor hacia "Calendar" y, a continuación, pulse ENTER/PRINT QTY. Se muestran las - Sony DPP-SV88 | Operating Instructions - Page 298
Realización de diversas impresiones (Creative Print) 4 Configurar el calendario: 1 Fije el primer mes y el año de inicio del calendario: Pulse el botón de flecha (v/V) para seleccionar "Start month" y pulse la flecha (B/b) para mover el cursor hasta el año. Para fijar el número, pulse el botón de - Sony DPP-SV88 | Operating Instructions - Page 299
7 Pulse el botón de flecha (v/V) para mover el cursor hacia el elemento de ajuste deseado y, a continuación, pulse ENTER/ PRINT QTY. Para hacer ajustes múltiples, repita este paso. + - Move Cada vez que pulse ENTER/PRINT QTY, la imagen se amplia. Cada vez que pulse ENTER/PRINT QTY, la iamgen se - Sony DPP-SV88 | Operating Instructions - Page 300
Realización de diversas impresiones (Creative Print) 9 Para imprimir la imagen de Creative Print, pulse PRINT. Se inicia la impresión. Para parar la impresión Pulse CANCEL. Cuando se imprimen múltiples copias, la impresión de la siguiente copia se cancelará. 10 Pulse el botón de flecha (B/b/v/V) - Sony DPP-SV88 | Operating Instructions - Page 301
Operaciones avanzadas de impresión 3 Pulse ENTER/PRINT QTY. Se muestra la ventana de selección de saludos. 4 Pulse el botón de flecha (B/b/v/V) para mover el cursor hacia el saludo deseado y, a continuación, pulse ENTER/PRINT QTY. Se muestra la ventana de selección de color para el saludo. 5 Pulse - Sony DPP-SV88 | Operating Instructions - Page 302
Realización de diversas impresiones (Creative Print) 10 Pulse el botón de flecha (B/b/v/V) para mover el cursor hacia el carácter deseado y, a continuación, pulse ENTER/PRINT QTY para escribir el carácter de la primera línea. Los caracteres seleccionados se escriben en la casilla de entrada de - Sony DPP-SV88 | Operating Instructions - Page 303
Operaciones avanzadas de impresión 11 Pulse el botón de flecha (B/b/v/V) para mover el cursor hacia "NEXT" y, a continuación, pulse ENTER/PRINT QTY. Repita los pasos 10 y 11 para escribir el resto de líneas. Cuando termine, se mostrará la vista previa de la impresión que haya creado. En esta - Sony DPP-SV88 | Operating Instructions - Page 304
Realización de diversas impresiones (Creative Print) 3 Pulse ENTER/PRINT QTY. Se muestra la pantalla para seleccionar un marco. 4 Pulse el botón de flecha (B/b/V/v) para mover el cursor hacia el marco deseado. 5 Inserte en la impresora el "Memory Stick," la tarjeta PC, o el disco CD-R/RW y pulse - Sony DPP-SV88 | Operating Instructions - Page 305
Operaciones avanzadas de impresión Realización de una imagen con divisiones Puede hacer una impresión de imágenes con 4, 9, 13 ó 16 divisiones. 1 Pulse el botón de flecha (B/b/ v/V) para mover el cursor hacia "Split Images" y, a continuación, pulse ENTER/ PRINT QTY. Se muestran las plantillas de im - Sony DPP-SV88 | Operating Instructions - Page 306
Configuración de la impresora (MENU) ¿Qué puede hacer con el MENU? El MENU le permite cambiar la configuración de la impresora, suprimir imágenes, hacer diapositivas o una impresión de índices. Para visualizar la pantalla MENU, pulse MENU: Botón MENU Botón MENU Cursor Barra de MENU Cursor Submen - Sony DPP-SV88 | Operating Instructions - Page 307
Operaciones avanzadas de impresión Para visualizar otro submenú Pulse V hasta que el submenú actual desaparezca. Para salir del MENU Pulse el botón de flecha (V/v/B/b) para seleccionar "EXIT" en la pantalla del MENU o pulse MENU. Vuelve la pantalla visualizada antes de entrar en la pantalla MENU. - Sony DPP-SV88 | Operating Instructions - Page 308
una imagen con bordes alrededor de la imagen. (Las fotografía de 4:3 y 3:2 no se cortarán por la parte superior e inferior.) Imprime una imagen con la fecha grabada junto con la toma de su cámara fija digital. Notas • Puede imprimir la fecha sólo cuando la fecha de la imagen está grabada en formato - Sony DPP-SV88 | Operating Instructions - Page 309
Operaciones avanzadas de impresión Elementos Video input Clock Setting Ajustes Contenido Motion* Seleccione esta opción cuando capture una imagen de la reproducción de una videocámara. Si la imagen de la memoria es borrosa, la impresora automáticamente la corrije y ello tardará algunos segundos - Sony DPP-SV88 | Operating Instructions - Page 310
Supresión de imágenes Puede borrar imágenes del "Memory Stick," de la tarjeta PC, o del disco CDR/RW. También puede formatear el "Memory Stick" y el disco CD-RW (página 59). Notas •Mientras sumprima o formatee no desconecte la alimentació o retire el "Memory Stick," la tarjeta PC o el disco CD-R/Rw - Sony DPP-SV88 | Operating Instructions - Page 311
Operaciones avanzadas de impresión 3 En la pantalla MENU (página 78), pulse el botón de flecha (B/b) para seleccionar "DELETE/FORMAT" y pulse ENTER/PRINT QTY. Se muestra el submenú DELETE/ FORMAT. 4 Pulse el botón de flecha (V/V) para desplazar el cursor hasta "Supresión de imágenes" y pulse ENTER/ - Sony DPP-SV88 | Operating Instructions - Page 312
Visualización de la presentación de diapositivas Es posible realizar una presentación en diapositivas de las imñagenes guardadas en el "Memory Stick," la tarjeta PC o el disco CD-R/RW. 1 Inserte un "Memory Stick", una tarjeta PC o un disco CD-R/RW en la impresora. 2 Pulse INPUT SELECT para iluminar - Sony DPP-SV88 | Operating Instructions - Page 313
Para parar la presentación de diapositivas Pulse CANCEL. Notas •Dependiendo de la imagen, se puede tardar cierto tiempo en visualizar la imagen. •No es posible ver la presentación de diapositivas durante los modos Creative Print o EFFECT. •Desde la pantalla de las carpetas del disco CD-R/RW no - Sony DPP-SV88 | Operating Instructions - Page 314
Realización de una impresión de índices Puede imprimir una lista de imágenes almacenadas en un "Memory Stick", una tarjeta PC o una carpeta de un disco CD-R/RW (Impresión de índices). 1 Inserte un "Memory Stick", una tarjeta PC o un disco CD-R/RW en la impresora. 2 Pulse INPUT SELECT para iluminar - Sony DPP-SV88 | Operating Instructions - Page 315
Operaciones avanzadas de impresión 5 Pulse el botón de flecha (B/b/v/V) para mover el cursor hacia "Execute" y, a continuación, pulse ENTER/PRINT QTY. El índice de imágenes en el "Memory Stick", la tarjeta PC o en un disco CD-R/RW, se imprimirán según el patrón seleccionado. Cada imagen se imprime - Sony DPP-SV88 | Operating Instructions - Page 316
Impresión mediante un ordenador Uso de la impresora con ordenadores equipados con Windows El software suministrado permite imprimir imágenes del disco duro del ordenador con la fotoimpresora digital DPP-SV88. También puede ver, copiar o transferir las imágenes almacenadas en un "Memory Stick" o - Sony DPP-SV88 | Operating Instructions - Page 317
del ordenador el controlador de impresora y el software lector de tarjeta PC/Memory Stick incluidos en el CD-ROM suministrado. Cuando se utiliza Windows 98/98SE/Me Instalación del controlador USB 1 Encienda el ordenador y la impresora. 2 Inicie Windows y después conecte el ordenador y la impresora - Sony DPP-SV88 | Operating Instructions - Page 318
le solicite insertar el CD-ROM de OS de Windows. 6 Haga clic en "Finalizar". El controlador USB DPP-SV88 Sony se instala. Nota Después de hacer clic en en la ficha "Administrador de dispositivos". Si "Sony DPP-SV88 USB Digital Photo Printer" aparece enumerado en "Controlador de bus serie universal - Sony DPP-SV88 | Operating Instructions - Page 319
mediante un ordenador Instalación del controlador de impresora y del software lector 1 Inserte el CD-ROM suministrado en la unidad Los archivos se instalan por ajuste de fábrica en la carpeta "C:\Program Files\Sony\DPPSV88". Si desea instalarlos en otra carpeta, introduzca la carpeta de destino o - Sony DPP-SV88 | Operating Instructions - Page 320
Uso de la impresora con ordenadores equipados con Windows 7 Marque "Impresora local" y haga clic en "Siguiente Aceptar". Se muestra el cuadro de diálogo para seleccionar el nombre del modelo. 13 Seleccione "Sony DPP-SV77" y haga clic en "Siguiente". Se inicia la copia de archivos. Aparece el cuadro - Sony DPP-SV88 | Operating Instructions - Page 321
Impresión mediante un ordenador 14 Seleccione "Sony DPPUSB1: Sony Digital Photo Printer" en la lista y haga clic en "Siguiente". Aparece el cuadro de diálogo para seleccionar el nombre de la impresora. El nombre definido en fábrica es "Sony DPP-SV88". Si utiliza otro nombre, introdúzcalo en el - Sony DPP-SV88 | Operating Instructions - Page 322
con impresoras USB". Cuando aparezca Sony\DPPSV88". Si desea instalarlos en otra carpeta, especifique la carpeta de destino haciendo clic en el botón "Examinar". 8 Haga clic en "Siguiente". Aparece el cuadro de diálogo "Instalación completada". 94 ES Nota Si instala el software en Windows XP - Sony DPP-SV88 | Operating Instructions - Page 323
". Se muestra el archivo Readme. "Sony DPP-SV88" se añade a la ventana "Impresoras". Impresión mediante un ordenador Notas • Si no puede instalar el controlador de impresora con el programa de instalación suministrado, consulte "About the Printer Driver for Windows 2000 Professional" en el archivo - Sony DPP-SV88 | Operating Instructions - Page 324
Windows, haga clic en "Inicio", seleccione "Configuración" y, a continuación, "Panel de control". 3 Haga doble clic en "Sistema" para abrir "Propiedades de Sistema". 4 Abra el "Administrador de dispositivos", seleccione "Sony DPP- SV55 USB Digital Photo Printer"/"Sony DPP-SV77 Digital Photo Printer - Sony DPP-SV88 | Operating Instructions - Page 325
Haga clic en "Examinar", seleccione la unidad de CD-ROM en la que ha introducido el Sony DPP-SV88 y haga clic en "Aceptar". 11 Haga clic en "Aceptar" 12 Haga clic en " "Cerrar" 2 Verifique que la descripción es ahora "Sony DPP-SV88 USB Digital Photo Printer" y haga clic en "Aceptar". Continúa 97 ES - Sony DPP-SV88 | Operating Instructions - Page 326
"Setup.exe" en el CD-ROM. Uso del software lector Puede ver las imágenes de un "Memory Stick" o tarjeta PC insertada en la impresora como una unidad en el monitor del ordenador. 1 En la ventana "Mi PC" o "Windows Explorer", haga doble clic en "Sony DPP-SV88". 2 Haga clic en el icono de "Memory Stick - Sony DPP-SV88 | Operating Instructions - Page 327
. 1 Inicie el software de aplicación que utilice para imprimir y seleccione la imagen que desee imprimir. 2 Haga clic en "Configurar impresión" en el menú "Archivo" de la aplicación. Aparece el cuadro de diálogo "Configurar impresión". 3 Ajuste la impresora. Seleccione "Sony DPP-SV88" como impresora - Sony DPP-SV88 | Operating Instructions - Page 328
Uso de la impresora con ordenadores equipados con Windows 1 Ajuste "Impresora" en "Sony DPP-SV88". 2 Ajuste "Tamaño del papel". Elija Tarjeta postal (sin borde) Tarjeta postal Pequeño Cuando realice Impresiones sin borde y tamaño tarjeta postal Impresiones con borde y tamaño tarjeta - Sony DPP-SV88 | Operating Instructions - Page 329
Haga clic en "Inicio" en la barra de tareas de Windows, seleccione "Configuración" y haga clic en "Impresoras". Se muestra la ventana "Impresoras". 2 Haga un doble clic sobre el icono "Sony DPP-SV88". Se muestra la ventana "Sony DPP-SV88". En esta ventana se listan los documentos en cola de impresi - Sony DPP-SV88 | Operating Instructions - Page 330
utilizar la impresora mediante otro dispositivo USB que se utiliza simultáneamente. Instalación del controlador de impresora Instale el Sony DPP-SV88 Printer Driver Software Version 1.0 para Mac OS Ver. 8.5.1/8.6/9.0/9.1/9.2 ("controlador de impresora" en este manual) en el Macintosh. 1 Conecte el - Sony DPP-SV88 | Operating Instructions - Page 331
Impresión mediante un ordenador 3 Inserte el CD-ROM suministrado en la unidad de CD-ROM. 4 Seleccione el idioma del software haciendo doble clic en la carpeta correspondiente del CD-ROM. Se abre la carpeta del idioma seleccionada. 5 Haga doble clic en "Setup Program". 6 Haga clic - Sony DPP-SV88 | Operating Instructions - Page 332
(puntos) x 2466 (puntos) y la resolución en 403 dpi. 1 Inicie el software de aplicación que utilice para imprimir y seleccione la imagen que desee imprimir. 2 Seleccione "Chooser" en el menú Apple, haga clic en "Sony DPP-SV88" dentro de "Chooser" y, a continuación, cierre "Chooser". 3 Haga clic en - Sony DPP-SV88 | Operating Instructions - Page 333
Papel/Margen Para realizar impresiones sin borde y tamaño tarjeta postal, haga clic en "tamaño tarjete postal" y en el icono que especifica "sin margen" . Para realizar impresiones con borde y tamaño tarjeta postal, haga clic en "tamaño tarjete postal" y en el icono que especifica "con margen" . - Sony DPP-SV88 | Operating Instructions - Page 334
Información complementaria Precauciones Seguridad • Alimente la impresora con 120 V CA, 60 Hz (modelo para 120 V zonas) o 220 a 240 V CA, 50/60 Hz (modelos para otras zonas) solamente. • Tenga cuidado de no colocar ni dejar caer objetos pesados sobre el cable de alimentación, ni de dañarlo de forma - Sony DPP-SV88 | Operating Instructions - Page 335
Transporte Cuando vaya a transportar la impresora, extraiga el cartucho de impresión, la bandeja del papel, el "Memory Stick" o tarjeta PC de la misma e introduzca dicha impresora y sus periféricos en la caja original con el material de protección. Si ya no dispone de la caja original ni de los - Sony DPP-SV88 | Operating Instructions - Page 336
Acerca de "Memory Stick" y tarjeta PC La impresora puede leer y escribir en "Memory Stick" y tarjetas PC (tarjetas de memoria instantánea tipo II compatibles con PCMCIA ATA con especificación de alimentación de 5V o 3,3/5V). El uso de un adaptador de tarjeta PC disponible en el mercado permite - Sony DPP-SV88 | Operating Instructions - Page 337
en el adaptador y, a continuación, insértelo en la impresora. Para obtener información sobre cómo instalar la tarjeta y el adaptador, consulte el manual de instrucciones del adaptador de tarjeta PC. • Evite insertar o extraer la tarjeta tipo "compact flash" o el Smart Media en o del adaptador - Sony DPP-SV88 | Operating Instructions - Page 338
, consulte con el proveedor Sony. Cuando imprima desde su ordenador, consulte también el manual del ordenador. No es posible segura en la impresora. Compruebe que las imágenes grabadas por la cámara fija digital u otro aparato están grabadas. m Cuando graba de su videograbadora, conecte la impresora - Sony DPP-SV88 | Operating Instructions - Page 339
incompatible que DPP-SV88 no las imágenes restantes. m Dependiendo del tipo de cámara fija digital que utilice, la relación de aspecto de la imagen grabada difiere el orificio de extracción manual de la bandeja del disco CD-R/RW en la impresora. Orificio de extracción manual No se puede retirar - Sony DPP-SV88 | Operating Instructions - Page 340
bandeja del papel para retirar el papel atascado. Tire lentamente del papel atascado. Nota Si no puede retirar el papel atascado, contacte con su proveedor Sony. 112 ES - Sony DPP-SV88 | Operating Instructions - Page 341
" o la tarjeta PC) Conectores de entrada/salida Conector USB (1) VIDEO OUT (salida) conector (toma de teléfono BMP: 24 bits color completo, formato Windows (Observe que algunas versiones del formato del x 84 x 267 mm (anch/alt/fond, excluyendo las partes salientes) (11 1/8 x 3 3/8 x 10 5/8 pulgadas - Sony DPP-SV88 | Operating Instructions - Page 342
VIDEO IN 14 Conector S VIDEO OUT 13 Conector USB 20 Conector VIDEO IN 14 Conector VIDEO OUT 13 ón de una nueva carpeta 52 D Desinstalación del software 95, 103 Disco CD-R 47 Disco CD-R/RW 29 Impresión Desde un ordenador Macintosh 104 Desde un ordenador Windows 99 Imágenes de vídeo 35 Imágenes DPOF - Sony DPP-SV88 | Operating Instructions - Page 343
ón Cartucho de impresión 23 Bandeja de papel 26 Disco CD-R/RW 17 "Memory Stick" 15 Tarjeta PC 16 Papel de impresión 25 Instalación del software Macintosh 102 Windows 89 L Limpieza 107 Lista de imágenes en miniatura 12, 31 M Mando a distancia 11, 21 Marco 76 "Memory Stick" Guardado de imágenes de - Sony DPP-SV88 | Operating Instructions - Page 344
Sony Corporation Printed in Japan
-
 1
1 -
 2
2 -
 3
3 -
 4
4 -
 5
5 -
 6
6 -
 7
7 -
8
-
9
-
10
-
11
-
12
-
13
-
14
-
15
-
16
-
17
-
18
-
19
-
20
-
21
-
22
-
23
-
24
-
25
-
26
-
27
-
28
-
29
-
30
-
31
-
32
-
33
-
34
-
35
-
36
-
37
-
38
-
39
-
40
-
41
-
42
-
43
-
44
-
45
-
46
-
47
-
48
-
49
-
50
-
51
-
52
-
53
-
54
-
55
-
56
-
57
-
58
-
59
-
60
-
61
-
62
-
63
-
64
-
65
-
66
-
67
-
68
-
69
-
70
-
71
-
72
-
73
-
74
-
75
-
76
-
77
-
78
-
79
-
80
-
81
-
82
-
83
-
84
-
85
-
86
-
87
-
88
-
89
-
90
-
91
-
92
-
93
-
94
-
95
-
96
-
97
-
98
-
99
-
100
-
101
-
102
-
103
-
104
-
105
-
106
-
107
-
108
-
109
-
110
-
111
-
112
-
113
-
114
-
115
-
116
-
117
-
118
-
119
-
120
-
121
-
122
-
123
-
124
-
125
-
126
-
127
-
128
-
129
-
130
-
131
-
132
-
133
-
134
-
135
-
136
-
137
-
138
-
139
-
140
-
141
-
142
-
143
-
144
-
145
-
146
-
147
-
148
-
149
-
150
-
151
-
152
-
153
-
154
-
155
-
156
-
157
-
158
-
159
-
160
-
161
-
162
-
163
-
164
-
165
-
166
-
167
-
168
-
169
-
170
-
171
-
172
-
173
-
174
-
175
-
176
-
177
-
178
-
179
-
180
-
181
-
182
-
183
-
184
-
185
-
186
-
187
-
188
-
189
-
190
-
191
-
192
-
193
-
194
-
195
-
196
-
197
-
198
-
199
-
200
-
201
-
202
-
203
-
204
-
205
-
206
-
207
-
208
-
209
-
210
-
211
-
212
-
213
-
214
-
215
-
216
-
217
-
218
-
219
-
220
-
221
-
222
-
223
-
224
-
225
-
226
-
227
-
228
-
229
-
230
-
231
-
232
-
233
-
234
-
235
-
236
-
237
-
238
-
239
-
240
-
241
-
242
-
243
-
244
-
245
-
246
-
247
-
248
-
249
-
250
-
251
-
252
-
253
-
254
-
255
-
256
-
257
-
258
-
259
-
260
-
261
-
262
-
263
-
264
-
265
-
266
-
267
-
268
-
269
-
270
-
271
-
272
-
273
-
274
-
275
-
276
-
277
-
278
-
279
-
280
-
281
-
282
-
283
-
284
-
285
-
286
-
287
-
288
-
289
-
290
-
291
-
292
-
293
-
294
-
295
-
296
-
297
-
298
-
299
-
300
-
301
-
302
-
303
-
304
-
305
-
306
-
307
-
308
-
309
-
310
-
311
-
312
-
313
-
314
-
315
-
316
-
317
-
318
-
319
-
320
-
321
-
322
-
323
-
324
-
325
-
326
-
327
-
328
-
329
-
330
-
331
-
332
-
333
-
334
-
335
-
336
-
337
-
338
-
339
-
340
-
341
-
342
-
343
-
344
 |
 |
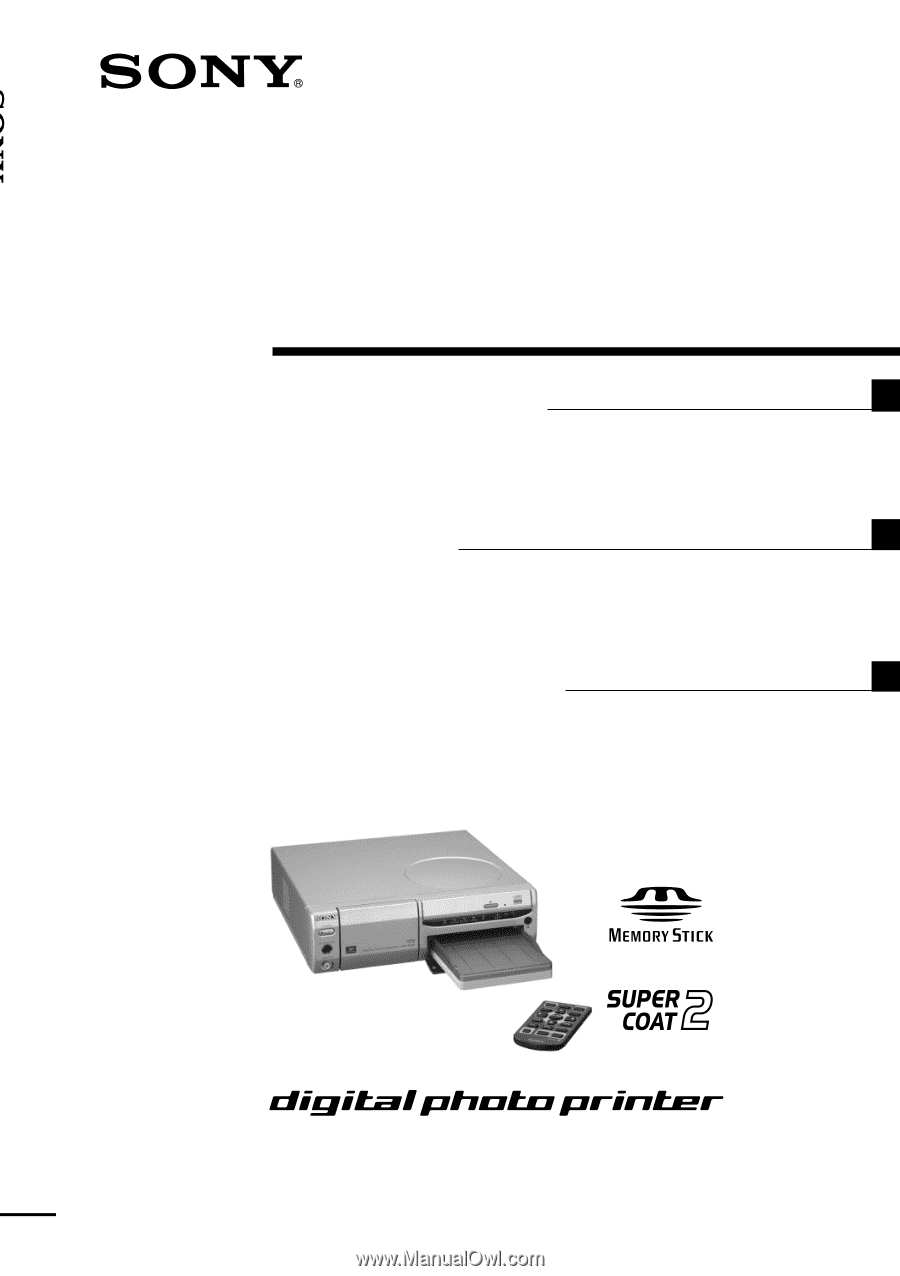
DPP-SV88
3-205-930-
11
(1)
2001 Sony Corporation
Digital Photo
Printer
GB
FR
Operating Instructions
Before operating this printer, please read this
manual thoroughly and retain it for future
reference.
Mode d’emploi
Avant d’utiliser cette imprimante, veuillez lire
attentivement ce manuel et le conserver pour toute
référence ultérieure.
Manual de instrucciones
Antes de utilizar esta impresora, lea este manual
atentamente y consérvelo para consultarlo en el
futuro.
Digital P
h
oto Pri
n
ter
DPP-SV88
ES