Sony DSC-S40 Operating Instructions (Camera) - Page 48
Change REC. Folder
 |
View all Sony DSC-S40 manuals
Add to My Manuals
Save this manual to your list of manuals |
Page 48 highlights
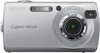
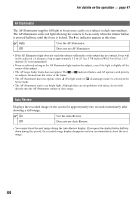
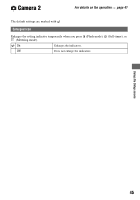
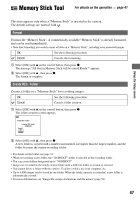
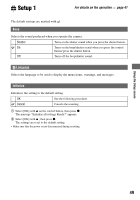
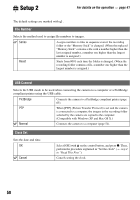
For details on the operation t page 41 Change REC. Folder Changes the folder currently used for recording images. OK See the following procedure. Cancel Cancels changing the recording folder. 1 Select [OK] with v on the control button, then press z. The folder selection screen appears. Select REC. Folder 102 2/2 Folder Name:102MSDCF No. Of Files: 0 Created: 2005 1 1 1:05:34AM OK Cancel BACK/NEXT 2 Select the desired folder with b/B, and [OK] with v , then z. • You cannot select the "100MSDCF" folder as a recording folder. • You cannot move recorded images to a different folder. Copy Copies all images in the internal memory to a "Memory Stick". OK See the following procedure. Cancel Cancels the copying. 1 Insert a "Memory Stick" having 32 MB or larger capacity. 2 Select [OK] with v on the control button, then press z. The message "All data in internal memory will be copied Ready?" appears. 3 Select [OK] with v , then press z. Copying starts. Copying 102_COPY • Use batteries with enough capacity or the AC Adaptor (not supplied). If you attempt to copy image files using batteries with little remaining capacity, the batteries may run out, causing copying to fail or possibly corrupting the data. • You cannot copy individual images. • The original images in the internal memory are retained even after copying. To delete the contents of the internal memory, remove the "Memory Stick" after copying, then execute the [Format] command in Internal Memory Tool (page 46). • You cannot select a folder copied on a "Memory Stick". • The setting of (Print order) marks is not copied even when you copy data. 48
-
 1
1 -
2
-
3
-
4
-
5
-
6
-
7
-
8
-
9
-
10
-
11
-
12
-
13
-
14
-
15
-
16
-
17
-
18
-
19
-
20
-
21
-
22
-
23
-
24
-
25
-
26
-
27
-
28
-
29
-
30
-
31
-
32
-
33
-
34
-
35
-
36
-
37
-
38
-
39
-
40
-
41
-
42
-
 43
43 -
 44
44 -
 45
45 -
 46
46 -
 47
47 -
 48
48 -
 49
49 -
 50
50 -
 51
51 -
 52
52 -
 53
53 -
54
-
55
-
56
-
57
-
58
-
59
-
60
-
61
-
62
-
63
-
64
-
65
-
66
-
67
-
68
-
69
-
70
-
71
-
72
-
73
-
74
-
75
-
76
-
77
-
78
-
79
-
80
-
81
-
82
-
83
-
84
-
85
-
86
-
87
-
88
-
89
-
90
-
91
 |
 |