Sony ICD-BM1DR9 Operating Instructions - Page 42
Setting the Overwrite Mode continued, Press the jog lever up or down, to select OVER or CUT, then
 |
View all Sony ICD-BM1DR9 manuals
Add to My Manuals
Save this manual to your list of manuals |
Page 42 highlights
Setting the Overwrite Mode (continued) •CUT: The portion left after the overwrite recording will be deleted. Starting point of the overwrite Stopping point for the overwrite recording recording The remaining portion in Message 2 Message 1 Message 2 Message 3 Message 1 Message 2 Message 3 Added overwrite recording in Message 2 3 Press the jog lever up or down (>/ .) to select "OVER" or "CUT", then press ENTER. 4 Press MENU to exit the menu mode. The normal display appears. When you add an overwrite recording (page 15), the recording will be added in the selected overwrite mode. To cancel setting Press CANCEL. The window returns to that of the previous step. 42GB
-
 1
1 -
2
-
3
-
4
-
5
-
6
-
7
-
8
-
9
-
10
-
11
-
12
-
13
-
14
-
15
-
16
-
17
-
18
-
19
-
20
-
21
-
22
-
23
-
24
-
25
-
26
-
27
-
28
-
29
-
30
-
31
-
32
-
33
-
34
-
35
-
36
-
 37
37 -
 38
38 -
 39
39 -
 40
40 -
 41
41 -
 42
42 -
 43
43 -
 44
44 -
 45
45 -
 46
46 -
 47
47 -
48
-
49
-
50
-
51
-
52
-
53
-
54
-
55
-
56
-
57
-
58
-
59
-
60
-
61
-
62
-
63
-
64
-
65
-
66
-
67
-
68
 |
 |

42
GB
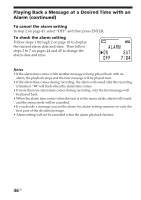
•CUT:
The portion left after the overwrite recording will be deleted.
3
Press the jog lever up or down
(
>/
.
) to select “OVER” or “CUT”, then
press ENTER.
4
Press MENU to exit the menu mode.
The normal display appears.
When you add an overwrite recording (page
15), the recording will be added in the
selected overwrite mode.
To cancel setting
Press CANCEL. The window returns to that of the previous step.
The remaining portion in Message 2
Added overwrite recording in Message 2
Message 2
Message 3
Message 3
Message 2
Starting point of the overwrite
recording
Stopping point for the overwrite recording
Message 1
Message 1
Setting the Overwrite Mode (continued)