Sony KV-27HS420 Instructions: TV stand (primary manual) - Page 4
What You Need Here, Lo Que Necesita Aqui, Ce Qu'il Faut Ici
 |
View all Sony KV-27HS420 manuals
Add to My Manuals
Save this manual to your list of manuals |
Page 4 highlights
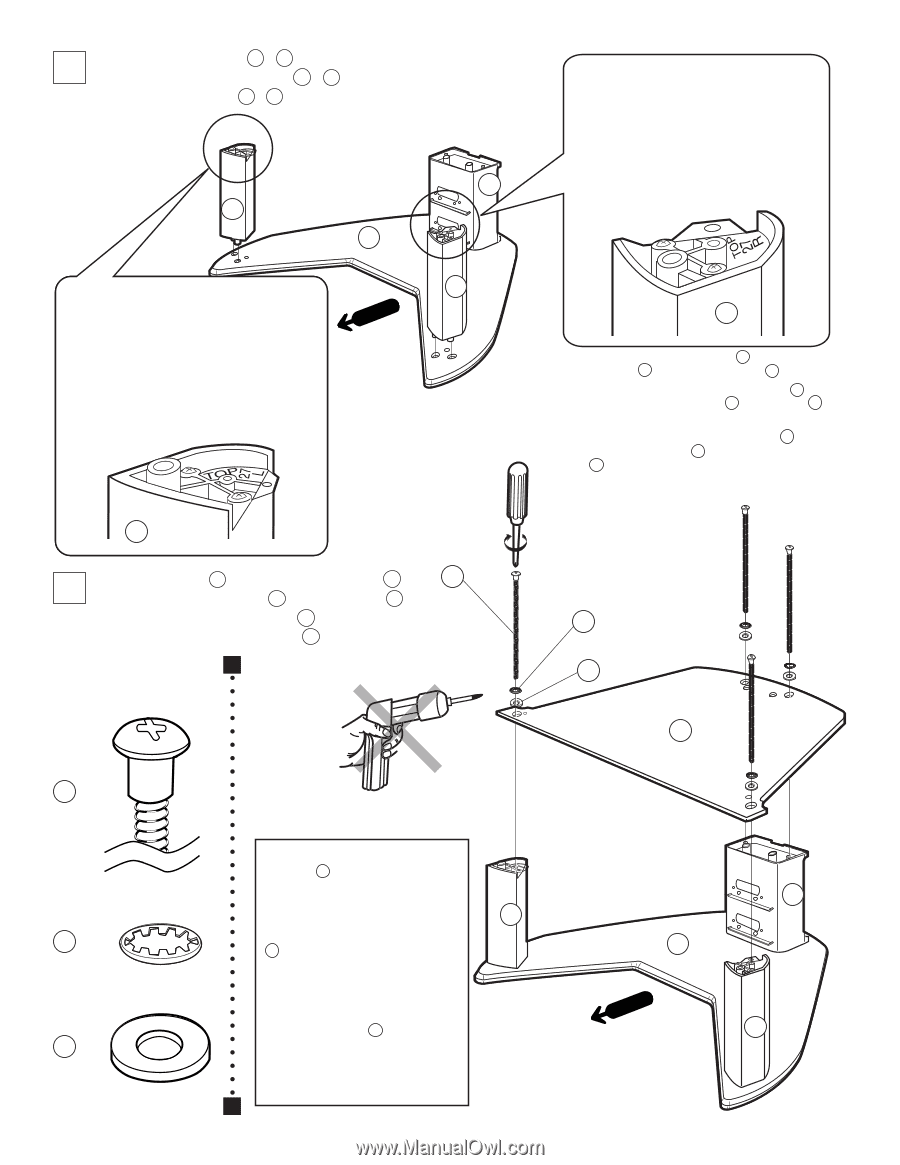
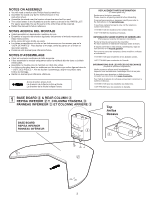
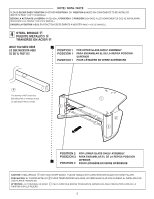
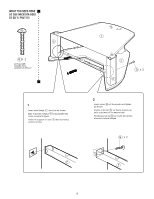
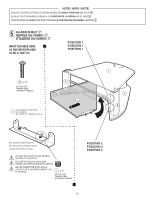
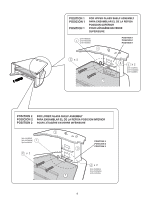
2 FRONT PILLARS 5 , 6 PILARES FRONTALES 5 , 6 PILIERS AVANT 5 , 6 5 2 Fig. 1 Correct orientation of front pillar (left) displays text on top surface of pillar as shown. Cuando el pilar frontal (izquierdo) esté orientado correctamente, el texto queda en la superficie superior del pilar, tal como se muestra. Le texte en haut du pilier avant gauche est visible quand l'orientation est correcte, comme montré. Fig. 2 Correct orientation of front pillar (right) displays text on top surface of pillar as shown. Cuando el pilar frontal (derecho) esté orientado correctamente, el texto queda en la superficie superior del pilar, tal como se muestra. 3 Le texte en haut du pilier avant droit est visible quand l'orientation est correcte, comme montré. 6 6 INSERT FRONT PILLAR (RIGHT) 6 AND FRONT PILLAR (LEFT) 5 INTO BASE BOARD 2 AS SHOWN. INSERTE EL PILAR FRONTAL (DERECHO) 6 Y EL PILAR FRONTAL (IZQUIERDO) 5 A LA BASE 2 COMO SE MUESTRA. INTRODUISEZ LE PILIER AVANT DROIT 6 ET LE PILIER AVANT GAUCHE 5 DANS LA PLANCHE DE BASE 2 COMME MONTRÉ. 5 3 TOP BOARD 1 CAPNUT SCREW D REPISA SUPERIOR 1 TORNILLO D PANNEAU SUPÉRIEUR 1 VIS À ÉCROU BORGNE D D x4 CORRECT CORRECTO CORRECT A x4 WHAT YOU NEED HERE LO QUE NECESITA AQUI CE QU'IL FAUT ICI B x4 1 D x4 ACTUAL SIZE TAMAÑO REAL GRANDEUR RÉELLE A x4 ACTUAL SIZE TAMAÑO REAL GRANDEUR RÉELLE B x4 ACTUAL SIZE TAMAÑO REAL GRANDEUR RÉELLE INCORRECT INCORRECTO INCORRECT WHEN TIGHTENING THE CAPNUT SCREW D , PLEASE USE A PHILLIPS HEAD SCREWDRIVER. DO NOT USE AN ELECTRIC SCREW DRIVER. 5 CUANDO APRIETE EL TORNILLO D , POR FAVOR USE UN DESARMADOR DE CRUZ. NO UTILIZE UN DESARMADOR ELECTRICO. LORS DU SERRAGE DE LA VIS ACROU BORGNE D , UTILISER UN TOURNEVIS À TÊTE CRUCIFORME. NE PAS UTILISER DE TOURNEVIS ÉLECTRIQUE. 4 3 2 6
-
 1
1 -
 2
2 -
 3
3 -
 4
4 -
 5
5 -
 6
6 -
 7
7 -
 8
8 -
 9
9 -
 10
10 -
11
-
12
-
13
-
14
-
15
-
16
 |
 |