Sony KV-36FS320 Operating Instructions
Sony KV-36FS320 - 36" Fd Trinitron Wega Manual
 |
View all Sony KV-36FS320 manuals
Add to My Manuals
Save this manual to your list of manuals |
Sony KV-36FS320 manual content summary:
- Sony KV-36FS320 | Operating Instructions - Page 1
- Sony KV-36FS320 | Operating Instructions - Page 2
important operating and maintenance (servicing) instructions in the literature accompanying the manual and at the rear of your TV. Trademarks and Copyrights ENERGY STAR is a registered mark. As an ENERGY STAR® Partner, Sony . WEGA, FD Trinitron, Memory Stick, Steady Sound, ClearEdge VM, - Sony KV-36FS320 | Operating Instructions - Page 3
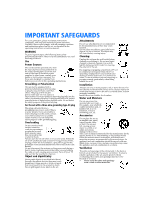
User Guide IMPORTANT SAFEGUARDS For your protection, please read these instructions completely, and keep this manual for future reference. Carefully observe and comply with all warnings, cautions and instructions placed on the set, or described in the operating instructions or service manual. - Sony KV-36FS320 | Operating Instructions - Page 4
instructions. Adjust only those controls that are specified in the operating instructions. Improper adjustment of other controls parts. Unauthorized substitutions may result in fire, electric shock, or other hazards. Safety Check Upon completion of any service or repairs to the set, ask the service - Sony KV-36FS320 | Operating Instructions - Page 5
User Guide - Sony KV-36FS320 | Operating Instructions - Page 6
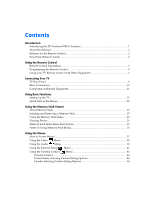
the FD Trinitron WEGA Features 1 About this Manual...2 Batteries for the Remote Control 2 Front Panel Menu Controls ...2 Using the Remote Control Remote Control Description...3 Programming the Remote Control 5 Using your TV Remote Control with Other Equipment 7 Connecting Your TV TV Rear - Sony KV-36FS320 | Operating Instructions - Page 7
Using the Timer Using the Setup Menu ...49 Menu...50 Other Information Troubleshooting ...51 Specifications ...56 Index...57 - Sony KV-36FS320 | Operating Instructions - Page 8
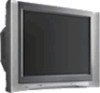
on your purchase of the Sony FD Trinitron WEGA®. Introducing the FD Trinitron WEGA® Features Some of the features you will enjoy include: ❏ FD Trinitron Flat CRT - Delivers a picture with uncompromising accuracy and outstanding image detail via a technologically advanced tube. ❏ Memory Stick® Viewer - Sony KV-36FS320 | Operating Instructions - Page 9
this Manual This manual provides instructions to help you enjoy your new TV. It shows you how to connect to an antenna or cable, cable box, VCR, DVD, satellite receiver, stereo system, or camcorder. Once your TV is connected, follow the instructions and use the remote control to access the on-screen - Sony KV-36FS320 | Operating Instructions - Page 10
details, see "Using the Memory Stick Viewer" on page 25. 9 RESET Press to return to factory settings while in an on-screen menu. q; VOL (volume) Press (+) or (-) to adjust the volume. qa CODE SET Press to program your remote control to operate connected video equipment. See "Programming the - Sony KV-36FS320 | Operating Instructions - Page 11
turn on and off the TV and other audio/ video equipment you have programmed into the remote control. For instructions, see "Programming the Remote Control" on page 5. qd FUNCTION buttons Press to select the equipment (VCR/DVD, SAT/ CABLE, TV on-screen menu. Press again to exit the menu at any time. - Sony KV-36FS320 | Operating Instructions - Page 12
the TV's remote control at the component and press the green POWER button (VCR/DVD, SAT/CABLE) that corresponds with that component. If it responds, you are done. If not try using another code listed for that manufacturer. ✍ If you have problems programming your remote control, see "Troubleshooting - Sony KV-36FS320 | Operating Instructions - Page 13
Remote Control Manufacturer's Codes VCRs Manufacturer Code Sony Admiral (M. Ward) Aiwa Audio Dynamic Broksonic , 211 Tocom 216, 217 Zenith 212, 213 Satellite Receivers Manufacturer Code Sony 801 DIRECT TV 809 Dish Network 810 Echostar 810 General Electric 802 Hitachi 805 Hughes - Sony KV-36FS320 | Operating Instructions - Page 14
video tape Stop or Rewind or Fast - forward a video tape Pause and (Simultaneously) Record Switch between VCR and TV inputs Operating a DVD Player Press To Activate the remote control to operate the VCR (FUNCTION button) Power on/off the DVD (VCR/DVD green button) 0 9 , ENTER Select - Sony KV-36FS320 | Operating Instructions - Page 15
, and the center button to select an option (satellite receiver) Press to switch between the TV and SAT inputs (satellite receiver) Operating a DVD/VCR Combination Unit Press To Activate the remote control to operate the DVD/VCR (FUNCTION button) Power on/off the DVD/VCR Combination unit (VCR - Sony KV-36FS320 | Operating Instructions - Page 16
this section before setting up your TV for the first time. This section explains how to make the basic connections and how to connect optional equipment. TV Rear Panel Connections 1 1 34 5 Y S VIDEO PB PR VIDEO L L (MONO) R AUDIO OUT (VAR/FIX) L (MONO) R Jack 1 VHF/UHF 2 S VIDEO 3 VIDEO - Sony KV-36FS320 | Operating Instructions - Page 17
your home, choose one of the connections below: Use option A to connect the TV to a cable system or an antenna with a 75-ohm cable (usually built into known as a 300-to-75 ohm antenna adapter. Use option B to connect the TV to a dipole antenna, also known as a "rabbit ears antenna" (usually found in - Sony KV-36FS320 | Operating Instructions - Page 18
(white) Video (yellow) Optional connection 1 Connect the coaxial cable from your TV antenna or cable service to the IN jack on your VCR. 2 Connect a coaxial cable (not your TV with this connection ❏ Program your Sony remote control to operate your VCR (see page 5). ❏ To activate your remote, press - Sony KV-36FS320 | Operating Instructions - Page 19
Connect the coaxial cable from your cable service to the IN jack on your cable box. 2 Connect a coaxial cable (not supplied) from the OUT jack on your cable box to the VHF/UHF jack on your TV. Using your TV with this connection ❏ Program your Sony remote control to operate your cable box (see page - Sony KV-36FS320 | Operating Instructions - Page 20
box or VCR when you are receiving a scrambled signal ❏ change channels through your TV Rear of TV 2b VCR LINE IN VIDEO AUDIO L AUDIO R LINE OUT 3 Cable box 4 a) the IN jack on your cable box b) the VHF/UHF jack on the TV 3 Using a coaxial cable (not supplied), connect the OUT jack on your cable - Sony KV-36FS320 | Operating Instructions - Page 21
does not provide sound, so you still must connect the audio cables. Using your TV with this connection ❏ Program your Sony remote control to operate your VCR or cable box (see page 5). ❏ To activate your remote, press (FUNCTION button) to operate your VCR or (FUNCTION button) to operate your - Sony KV-36FS320 | Operating Instructions - Page 22
to AUDIO/VIDEO IN on your TV. Using your TV with this connection ❏ Program your Sony remote control to operate your satellite receiver (see page 5). ❏ To activate your remote, press (FUNCTION button) to operate your satellite receiver. See page 7 for instructions on how to operate other - Sony KV-36FS320 | Operating Instructions - Page 23
VIDEO OUT on your satellite receiver to AUDIO/VIDEO IN on your TV. Using your TV with this connection ❏ Program your Sony remote control to operate your VCR or satellite receiver (see page 5). ❏ To activate your remote, press (FUNCTION button) to operate your VCR or (FUNCTION button) to operate - Sony KV-36FS320 | Operating Instructions - Page 24
to SATELLITE IN on the satellite receiver. 2 Connect the coaxial cable from your cable service or antenna to the IN jack on your VCR. 3 Using a coaxial cables TV. Using your TV with this connection ❏ Program your Sony remote control to operate your VCR or satellite receiver (see page 5). ❏ Turn - Sony KV-36FS320 | Operating Instructions - Page 25
CB, and CR or Y, B-Y, and R-Y. If so, connect the cables to like colors. Using your TV with this connection ❏ Program your Sony remote control to operate your DVD (see page 5). ❏ To activate your remote, press (FUNCTION button) to operate your DVD. ❏ Press repeatedly to switch to the DVD player - Sony KV-36FS320 | Operating Instructions - Page 26
. For more instructions, see "Using the Audio Menu" on page 39. 3 After you connect the audio system, you can control the volume level from your TV or audio system. ❏ To control the volume from the TV, use the front panel controls or the VOL +/- buttons on the remote. ❏ To control the volume through - Sony KV-36FS320 | Operating Instructions - Page 27
OUT on the second VCR to AUDIO/VIDEO IN on your TV. Using your TV with this connection ❏ Program your Sony remote control to operate your VCR (see page 5). ❏ To activate your remote, press (FUNCTION button) to operate your VCR. See page 7 for instructions on how to operate other functions. 20 - Sony KV-36FS320 | Operating Instructions - Page 28
connect cable/antenna Auto Program [CH+] Exit [CH-] 2 Press on the remote control or on the TV front panel to start Auto Program, or press to exit. ✍ The Initial Setup screen appears each time you turn on the TV until you perform Auto Program. To perform Auto Program again 1 Press . 2 Press - Sony KV-36FS320 | Operating Instructions - Page 29
to the Menus The following settings are available in your on-screen menus. For more details on how to use the menus, see Auto Program Channel Skip/Add Channel Label Move Select End Parental Control Password: Change your audio settings. Customize your channel settings. Move 22 Set rating - Sony KV-36FS320 | Operating Instructions - Page 30
Move Select End Allows you to Set the clock on your TV and program scheduled viewing using Timer 1 and Timer 2. Select closed captioning options (Caption Vision), display the name of the current program and its remaining time (Info Banner), label video inputs, adjust tilt correction, enhance DVD - Sony KV-36FS320 | Operating Instructions - Page 31
- Sony KV-36FS320 | Operating Instructions - Page 32
MP3 files stored on your Memory Stick. ✍ Memory Stick Viewer only supports 128 Kbps fixed rate MP3 files. ✍ For more information about handling Stick Media with Memory Select Function ✍ The Memory Stick slot on your TV has been designed to accommodate standard and compact versions of Memory Stick. - Sony KV-36FS320 | Operating Instructions - Page 33
Stick PRO in this television has been tested to support up to 1 GB media capacity and does not support high-speed transfer, MagicGate copyright protection technology, or access control security features. Memory Stick Functionality Sony cannot guarantee or assure the Memory Stick functionality on - Sony KV-36FS320 | Operating Instructions - Page 34
and Removing a Memory Stick ✍ The Memory Stick slot on your TV has been designed to accommodate standard and compact versions of Memory Stick . Attempting to insert other objects into the slot may damage the TV. To remove the Memory Stick, see "Removing a Memory Stick" on page 28. Memory Stick 27 - Sony KV-36FS320 | Operating Instructions - Page 35
slot, and then release it. The Memory Stick media is ejected. ✍ Do not pull out the Memory Stick without first pushing it in; otherwise, the TV's locking mechanism may become damaged. 3 Pull the Memory Stick completely out of the slot. ✍ To protect small children from injury from Memory Stick media - Sony KV-36FS320 | Operating Instructions - Page 36
Turn on the TV and insert a Memory Stick that contains the photo files you want to view. For details, see page 27. ✍ If the Memory Stick Index does not appear, press the MEMORY STICK button on the remote control , see "Protect" on page 32. About caution displays Indicates the thumbnail (JPEG file - Sony KV-36FS320 | Operating Instructions - Page 37
To Do This ... Move the highlight to a photo thumbnail Display the highlighted photo file full screen Display the next page of thumbnails Display the previous or next page of thumbnails Use the Memory display the next page of thumbnails. Press the MEMORY STICK button on the remote control. 30 - Sony KV-36FS320 | Operating Instructions - Page 38
may appear to display motion in full screen. This is a result of the way digital video cameras record still images, and is not a result of a TV malfunction. Photo Controls ✍ When the menu is hidden, use "Photo Menu Bar Options" on page 32. Press the MEMORY STICK button on the remote control. 31 - Sony KV-36FS320 | Operating Instructions - Page 39
photo in 90 degree increments clockwise or counterclockwise. For details, see "Using Rotate" on page 32. Protect Allows you to the protect the JPEG file from any changes. When a JPEG g, G) to highlight Counterclockwise and press . ✍ The photo rotates 90 degrees each time you press . Memory Stick - Sony KV-36FS320 | Operating Instructions - Page 40
29), or Photo (page 32) menus. Music Allows you files currently listed in your screen; select Complete List to display Plays the MP3 file stored in the TV's internal memory. Complete Displays a slide after a selected time interval. Advance Fast Slide 12 seconds. Manual Slide advances only - Sony KV-36FS320 | Operating Instructions - Page 41
different folders to view in the Memory Stick Viewer. Digital Camera Folders Selects all folders within the directories defined by the DCF rules used by Sony digital cameras (see page 35). JPEG files in those directories are recognized even if they do not conform to the DCF file naming rules - Sony KV-36FS320 | Operating Instructions - Page 42
camera's instruction manual handy in order to check how files and directories are organized for your specific model of digital camera. DCF stands for " : ❏ To avoid permanent damage to still image data, do not turn off the TV or remove Memory Stick media from the insertion slot while data is - Sony KV-36FS320 | Operating Instructions - Page 43
- Sony KV-36FS320 | Operating Instructions - Page 44
up and adjusting the TV. Using the Remote Control to Navigate the On-Screen Menus Move Select To navigate on the on-screen menus, use the up and down through the features. 4 Follow the instructions on the screen. 5 For instructions on using a specific menu, see the page in this section that talks - Sony KV-36FS320 | Operating Instructions - Page 45
: Select for a standard picture. Movie: Select for a finely detailed picture. Pro: Select for natural picture and sharpness. ✍ Press on the remote control for direct access to the picture modes (Vivid, Standard, Movie, Pro). Picture Brightness Color Hue Sharpness Color Temp. White tint - Sony KV-36FS320 | Operating Instructions - Page 46
to highlight one of the following options, then press to select it. On: Select to stabilize the volume when changing channels. Off: Select to turn Steady Sound off. Effect ✍ Press Use the F or f buttons to highlight one of the following options, then press to select it. Simulated: Simulates - Sony KV-36FS320 | Operating Instructions - Page 47
: Select to listen to the sound from the TV speakers with or without a separate stereo system. Off: Select to turn off the TV speakers and listen to the TV's sound only through external audio system speakers. Audio Out Use to control the TV's volume through a stereo Use the F or f buttons to - Sony KV-36FS320 | Operating Instructions - Page 48
receiving cable channels with a CATV cable. Off: Select if you are using a TV antenna. ✍ After changing your cable settings, you will need to perform Auto Program 3 or 4) and use the cable box's or VCR's remote control for channel selection. Video 1: Select from available video inputs when - Sony KV-36FS320 | Operating Instructions - Page 49
Auto Program Channel Skip/Add Perform Auto Program whenever setting up your TV. Auto Program will search for available channels and program receivable channels. Use this feature after you run Auto Program to skip unwanted channels or add - Sony KV-36FS320 | Operating Instructions - Page 50
menu settings without this password. 1 Use the 0 9 buttons to enter a 4-digit password. 2 Confirm your password by entering it again. ✍ Keep this manual in a safe place. You need your password for any future access to the Parental Control menu. If you forget your password, see page 51. Menus 43 - Sony KV-36FS320 | Operating Instructions - Page 51
G, C (Canada) TV-PG, PG (U.S.), 8 ans + (Canada) TV-14, PG-13 (U.S.), 14+ (Canada) Select to set more restrictive ratings (see next section) Changing your Password 1 Use the F or f buttons to highlight Change Password and press . 2 Follow steps 1 and 2 for "Using the Parental Control Menu" on page - Sony KV-36FS320 | Operating Instructions - Page 52
your password to view a blocked program will temporarily turn Lock to Off. To reactivate your Lock settings, turn the TV off then back on; the TV will return to the settings that you have selected. Using the Custom Menu Follow the instructions on the screen to make your custom settings. Select the - Sony KV-36FS320 | Operating Instructions - Page 53
the Custom Rating menu includes the following options: Movie Rating, TV Rating, and Unrated. (For Canada, see page 48.) Movie TV Rating TV-Y: TV-Y7: FV TV-G: Age TV-PG: TV-14: D LS V D LS V TV-MA: LS V Press to block Return Select End Content Menus Age TV-Y TV-Y7 TV-G TV-PG TV-14 TV - Sony KV-36FS320 | Operating Instructions - Page 54
rated. Allow Block Allows all unrated programs Blocks all unrated programs Custom Rating Movie Rating TV Rating Unrated: Allow Return Select End ✍ If you choose to block unrated TV programs, please be aware that the following programs may be blocked: emergency broadcasts, political programs - Sony KV-36FS320 | Operating Instructions - Page 55
+ Not recommended for ages Return Select End under 16 18 ans+ This program is restricted to adults U.S.A. Rating For programs from the United States, see "TV Rating" on page 46. Menus 48 - Sony KV-36FS320 | Operating Instructions - Page 56
you can use Timer 1 or Timer 2. Timer 1 and Timer 2 Scheduled viewing Use the timers to program your TV to turn on and off by day, time, duration, and channel. The timer duration is a maximum of six hours. When the channel is fixed, it is not necessary to set the channel. 1 Use - Sony KV-36FS320 | Operating Instructions - Page 57
. Info Banner Displays the name of the current program and its remaining time (if available) when you change the channel or press the DISPLAY button video components connected to the TV: VCR, DVD, etc. When you press TV/VIDEO to switch inputs, the Video Label appears on-screen. 1 Press the F - Sony KV-36FS320 | Operating Instructions - Page 58
, see "Contacting Sony" at the end of this section. General Problem Possible Remedies I want to reset the TV ❏ to the factory settings Turn on the TV. While holding down the RESET button on the remote control, press the POWER button on the TV front panel. The TV will turn itself off, then - Sony KV-36FS320 | Operating Instructions - Page 59
nearest dealer please call our Sony Direct Accessory and Part Center at 1-800-488-7669 (U.S. residents only). Programming The Remote Control Problem More than one code is listed I entered the wrong code number I cannot operate a component with the remote control When I changed the batteries, the - Sony KV-36FS320 | Operating Instructions - Page 60
cord. If the problem continues, call your local service center. ❏ Check the TV/VIDEO setting. When watching TV, set it to TV; when watching video equipment, set it to VIDEO 1, 2, 3 or 4 (page 4). ❏ Make sure you have inserted the batteries correctly into the remote control (page 2). ❏ Try another - Sony KV-36FS320 | Operating Instructions - Page 61
Problem supported. Memory Stick Index is not visible ❏ Press the Memory Stick button on the remote control. ❏ Reinsert the Memory Stick, confirm that the Memory Stick is inserted properly (see page 27). ❏ Try a different Memory Stick. ❏ Reset the Memory Stick Viewer by turning the TV full screen - Sony KV-36FS320 | Operating Instructions - Page 62
(Built-in) or turn Music to Off. •Delete non-128 kbps fixed rate MP3 files from your Memory Stick. The Memory Stick Viewer supports only MP3 files with is not a valid JPEG format. The file is unreadable. Channels Problem Possible Remedies I cannot receive ❏ higher number channels (UHF) when - Sony KV-36FS320 | Operating Instructions - Page 63
21). Contacting Sony Before calling our Customer Information Services Center, reset the TV to factory settings (see page 21). Please have your TV serial number ready. The number is located on the rear of your TV and on the front cover of this manual. Our Customer Information Services Center phone - Sony KV-36FS320 | Operating Instructions - Page 64
FD Trinitron® tube 120V, 60 Hz Size AA (R6) batteries (2) Remote Control RM-Y196 (1) Inputs 1 video, 1 audio (front) Outputs 2 video, 2 audio (rear) 1 S VIDEO 1 RF 2 Y, PB, PR, 2 audio TV Stand: SU-27F2 for KV-27FS320 SU-32F2 for KV-32FS320 SU-36F2 for KV-36FS320 1 AUDIO OUT Visible screen - Sony KV-36FS320 | Operating Instructions - Page 65
- Sony KV-36FS320 | Operating Instructions - Page 66
Inserting in remote 2 Brightness 's Codes 6 Troubleshooting 54 TV, VCR, and Satellite Receiver using Viewer, described 31 Composite Video (VIDEO/AUDIO Viewing Photos 31 L(MONO), R) 16 Menus Video Tape Editing Audio 39 (VCR and Camcorder) 20 Channel Setup 41 Current Time 49 Parental Control - Sony KV-36FS320 | Operating Instructions - Page 67
the Remote Control 5 R Remote Control Programming 5 S Setting the Rating English Rating 48 French Rating 48 Movie Rating 46 TV Rating 46 U.S.A. Rating 48 Unrated 47 Sharpness 38 SLEEP 3 Speaker 40 Specifications 56 Steady Sound 39 T Tilt Correction 50 Timer 1 and Timer 2 49 Treble 39 Troubleshooting - Sony KV-36FS320 | Operating Instructions - Page 68
- Sony KV-36FS320 | Operating Instructions - Page 69
- Sony KV-36FS320 | Operating Instructions - Page 70
63
-
 1
1 -
 2
2 -
 3
3 -
 4
4 -
 5
5 -
 6
6 -
 7
7 -
8
-
9
-
10
-
11
-
12
-
13
-
14
-
15
-
16
-
17
-
18
-
19
-
20
-
21
-
22
-
23
-
24
-
25
-
26
-
27
-
28
-
29
-
30
-
31
-
32
-
33
-
34
-
35
-
36
-
37
-
38
-
39
-
40
-
41
-
42
-
43
-
44
-
45
-
46
-
47
-
48
-
49
-
50
-
51
-
52
-
53
-
54
-
55
-
56
-
57
-
58
-
59
-
60
-
61
-
62
-
63
-
64
-
65
-
66
-
67
-
68
-
69
-
70
 |
 |
