Sony MHC-GX90D Operating Instructions (primary manual) - Page 48
Recording to a tape— CD Synchro Recording/Recording Manually/Program Edit
 |
View all Sony MHC-GX90D manuals
Add to My Manuals
Save this manual to your list of manuals |
Page 48 highlights
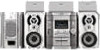
Recording to a tape - CD Synchro Recording/Recording Manually/Program Edit You can record from a disc (DVD, VIDEO CD, CD, MP3), tape, radio or other connected component. You can use TYPE I (normal) tapes. The recording level is adjusted automatically. Steps 1 2 3 4 5 6 Recording from a disc (CD Synchro Recording) Recording from a disc/tape/radio manually Load a recordable tape into deck B. Press DVD. Press a function button for the recording source. Load the disc you want to record. Load the disc or tape (or other audio source), or tune in the station you want to record. Press CD SYNC. Press REC PAUSE/START. Deck B stands by for recording. "REC" flashes. Press DIRECTION repeatedly to select g to record on one side. Select j (or RELAY) to record on both sides. Press REC PAUSE/START. Recording starts. Press REC PAUSE/START, and then start playing the recording source. To stop recording Press x. Tips • If you want to record from the reverse side, press TAPE A/B to select deck B after step 1. Press hH (or nN on the remote) to start playback of the reverse side, then press x to start recording. The TAPE B reverse indicator lights up. • When you record on both sides, be sure to start from the front side. If you start from the reverse side, recording stops at the end of the reverse side. • For recording from the radio: If noise is heard while recording from the radio, move the respective antenna to reduce the noise. Notes • You cannot listen to other sources while recording. • CD Synchro Recording is not available with DVDs. 48GB
-
 1
1 -
2
-
3
-
4
-
5
-
6
-
7
-
8
-
9
-
10
-
11
-
12
-
13
-
14
-
15
-
16
-
17
-
18
-
19
-
20
-
21
-
22
-
23
-
24
-
25
-
26
-
27
-
28
-
29
-
30
-
31
-
32
-
33
-
34
-
35
-
36
-
37
-
38
-
39
-
40
-
41
-
42
-
 43
43 -
 44
44 -
 45
45 -
 46
46 -
 47
47 -
 48
48 -
 49
49 -
 50
50 -
 51
51 -
 52
52 -
 53
53 -
54
-
55
-
56
-
57
-
58
-
59
-
60
-
61
-
62
-
63
-
64
-
65
-
66
-
67
-
68
-
69
-
70
-
71
-
72
-
73
-
74
-
75
-
76
-
77
-
78
-
79
-
80
 |
 |
