Sony NEX-5 Instruction Manual - Page 20
Removing the lens, toward the camera, turn
 |
UPC - 027242797505
View all Sony NEX-5 manuals
Add to My Manuals
Save this manual to your list of manuals |
Page 20 highlights
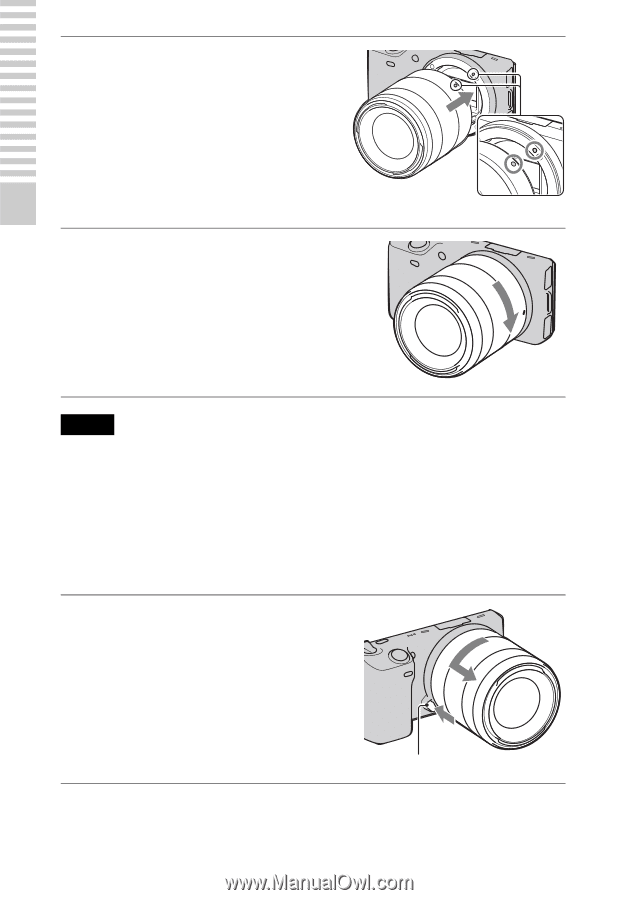
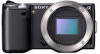
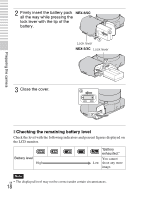
2 Mount the lens by aligning the white index marks on the lens and the camera. • Hold the camera's face downward to prevent the dust from entering into the camera. 3 While pusing the lens lightly toward the camera, turn the lens clockwise until it clicks into the locked position. • Be sure to put the lens on straight. White index marks Preparing the camera Notes • When attaching a lens, do not press the lens release button. • Do not use force when attaching a lens. • The Mount Adaptor (sold separately) is required to use an A-mount lens (sold separately). For details, refer to the operating manual supplied with the Mount Adaptor. x Removing the lens 1 Press the lens release button all the way in and turn the lens counterclockwise until it stops. Lens release button GB 20
-
 1
1 -
2
-
3
-
4
-
5
-
6
-
7
-
8
-
9
-
10
-
11
-
12
-
13
-
14
-
 15
15 -
 16
16 -
 17
17 -
 18
18 -
 19
19 -
 20
20 -
 21
21 -
 22
22 -
 23
23 -
 24
24 -
 25
25 -
26
-
27
-
28
-
29
-
30
-
31
-
32
-
33
-
34
-
35
-
36
-
37
-
38
-
39
-
40
-
41
-
42
-
43
-
44
-
45
-
46
-
47
-
48
-
49
-
50
-
51
-
52
-
53
-
54
-
55
-
56
-
57
-
58
-
59
-
60
-
61
-
62
-
63
-
64
-
65
-
66
-
67
-
68
-
69
-
70
-
71
-
72
-
73
-
74
-
75
-
76
-
77
-
78
-
79
-
80
-
81
-
82
 |
 |