Sony PC120BT Network Function Operating Instructions
Sony PC120BT - MiniDV Camcorder w/ 2.5" LCD Manual
 |
UPC - 027242595996
View all Sony PC120BT manuals
Add to My Manuals
Save this manual to your list of manuals |
Sony PC120BT manual content summary:
- Sony PC120BT | Network Function Operating Instructions - Page 1
3-071-132-12 (1) DCR-IP7BT/IP7E/ PC120BT/PC120E Network Function Operating Instructions Mode d'emploi de la fonction réseau © 2001 Sony Corporation - Sony PC120BT | Network Function Operating Instructions - Page 2
be lost when the camcorder is repaired by repair services. •The reset button cannot reset the network preferences. Note on network operation when using the battery pack When the remaining battery time is insufficient in NETWORK mode, use the AC power adaptor or replace the battery pack with a fully - Sony PC120BT | Network Function Operating Instructions - Page 3
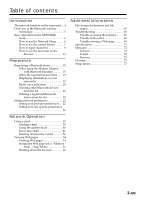
Web page into a "Memory Stick" - Page Memo 61 Shutting down the browser 66 Additional Information File storage destinations and file names 67 Troubleshooting 68 Trouble accessing the Internet .......... 68 Trouble with e-mail 68 Trouble viewing a Web page 69 Specifications 71 Messages 72 - Sony PC120BT | Network Function Operating Instructions - Page 4
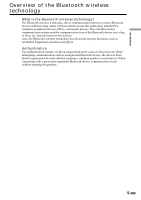
images recorded with your camcorder attached. Bluetooth specification ver. 1.1 has been adopted for the communication system of the camcorder, and compatible Bluetooth profiles are the "Generic Access Profile" and the "Dial-up Networking Profiles". Your camcorder A Bluetooth device, such as the - Sony PC120BT | Network Function Operating Instructions - Page 5
as scrambled frequencies and data encryption. Authentication The authentication routine can block unspecified users' access to this network. When attempting communication with an unregistered Bluetooth device, the devices must first be registered with each other by entering a common passkey to each - Sony PC120BT | Network Function Operating Instructions - Page 6
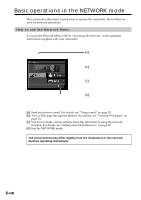
basic control ways to operate the camcorder, those which are used for network operations. How to use the Network Menu To access the Network Menu, refer to "Accessing the network" in the operating instructions supplied with your camcorder. [a] [b] [c] [d] [a]: Send and receive e-mail. For details - Sony PC120BT | Network Function Operating Instructions - Page 7
network operations are carried out by the control button. Select a button on the screen using the control button, then enter it by pressing the control button. Note The shape of the control button differs depending on your camcorder button" in this network function operating instructions. 7-GB - Sony PC120BT | Network Function Operating Instructions - Page 8
mode How to input characters You have to frequently enter characters, such as e-mail addresses, or Web page addresses (URL), to use the network function. This section describes how to input characters. 1 Selecting the character type (1) Display the character input screen. (2) Select either of the - Sony PC120BT | Network Function Operating Instructions - Page 9
Introduction Basic operations in the NETWORK mode (2) Press the centre z on the control button to enter the character. Pressing it repeatedly selects the other characters on the key. When inputting the - Sony PC120BT | Network Function Operating Instructions - Page 10
Basic operations in the NETWORK mode E.g., Enter "Hello" into the Subject item on the Send screen (1) Select the abc tab. (2) Select [ghi], then press the centre z on the control button - Sony PC120BT | Network Function Operating Instructions - Page 11
Introduction Basic operations in the NETWORK mode (5) Select [ ], then press the centre z on the control button. The cursor moves to the next position. , (6) Select [jkl], then press the centre z on the - Sony PC120BT | Network Function Operating Instructions - Page 12
Basic operations in the NETWORK mode The available characters list Alphabetical characters Key Character abc a t b t c t A t B t C t a t... def d t e t f t D t E t F t d t... ghi g t h t i t G t H t I t g t... jkl j t k t l t J t K t L t j t... mno m t n t o t M t N t O t m t... pqrs - Sony PC120BT | Network Function Operating Instructions - Page 13
Introduction Basic operations in the NETWORK mode Numerical characters Key Character 0/ 0 1 1 2 2 3 3 4 4 5 5 6 6 BROWSER MENU, refer to the operating instructions of the camcorder. To show the menu bar (1) Press BROWSER MENU on the camcorder. The following menu bar appears. (2) - Sony PC120BT | Network Function Operating Instructions - Page 14
NETWORK (Bookmark) Bookmark the current page. (Bookmarks are stored in the camcorder.) Bookmarking is convenient to access frequently-visited pages. (Line Close) URL of the current page. Store the current page in the "Memory Stick". You can then view the page without accessing the Internet. Note - Sony PC120BT | Network Function Operating Instructions - Page 15
instructions supplied with the Bluetooth device. For more information about Bluetooth devices compatible with the camcorder, access the following URL: • http://www.sony.ca/service •http://www.sony-europe.com/imaging, then click "support" • http://www.sony-asia.com.sg/helpdesk Only for the DCR-IP7BT - Sony PC120BT | Network Function Operating Instructions - Page 16
device 2 Specifying the Modem Adaptor with Bluetooth Function as the connection device (1) Open the Network Menu. For details on how to open the Network Menu, refer to "Accessing the network" in the operating instructions supplied with your camcorder. (2) Select [ Setup], then press the centre - Sony PC120BT | Network Function Operating Instructions - Page 17
listed next to [ New]. (5) Select [ New], then press the centre z on the control button. The camcorder starts searching for the Bluetooth devices. When the searching is completed, the available Bluetooth devices list appears. , Notes • The search takes from about 10 to 60 seconds. The time depends - Sony PC120BT | Network Function Operating Instructions - Page 18
Setup screen appears again. For details on how to turn off the Modem Adaptor with Bluetooth Function, refer to the operating instructions supplied with the Modem Adaptor with Bluetooth Function. (10) Select [Exit], then press the centre z on the control button. The Network Menu appears again. 18-GB - Sony PC120BT | Network Function Operating Instructions - Page 19
Menu. For details on how to open the Network Menu, refer to "Accessing the network" in the operating instructions supplied with your camcorder. (2) Select [ Setup], then press the centre z on the control button. The Setup screen appears. , (3) Select [Bluetooth Setup], then press the centre z on the - Sony PC120BT | Network Function Operating Instructions - Page 20
list Up to three Bluetooth devices can be registered on the camcorder. When deleting a Bluetooth device from the list, follow the procedure below. (1) Open the Network Menu. For details on how to open the Network Menu, refer to "Accessing the network" in the operating instructions supplied with your - Sony PC120BT | Network Function Operating Instructions - Page 21
(2) Select [ Setup], then press the centre z on the control button. The Setup screen appears. Preparation , (3) Select [Bluetooth Setup], then press the centre z on the control button. The Bluetooth Setup screen appears. , (4) Select [Select], then press the centre z on the control button. The - Sony PC120BT | Network Function Operating Instructions - Page 22
you do not understand the setup items, consult your provider. (1) Open the Network Menu. For details on how to open the Network Menu, refer to "Accessing the network" in the operating instructions supplied with your camcorder. (2) Select [ Setup], then press the centre z on the control button. The - Sony PC120BT | Network Function Operating Instructions - Page 23
password you use for accessing your provider using a dial-up connection. Tip on "Password" This "Password" is also referred to as a "PPP password", "network password", "connection password", etc. Tip on dial-up connection The dial-up connection is used to access the Internet using a phone line. DNS1 - Sony PC120BT | Network Function Operating Instructions - Page 24
Setting network preferences (5) Select the Mail tab. The Mail screen appears. (6) Set up the following items: use APOP. Tip on "APOP" APOP is an authentication protocol for security. When your provider supports APOP, we recommend that you check this item. For more information on whether the provider - Sony PC120BT | Network Function Operating Instructions - Page 25
Preparation Setting network preferences (7) Select the Browser tab. The Browser screen appears. (8) Select [Exit], then press the centre z on the control button. The setup is completed, and the Network Setup screen appears again. (10) Select [Exit], then press the centre z on the control button. - Sony PC120BT | Network Function Operating Instructions - Page 26
the items on the Network Options screen. (1) Display the Setup screen. (2) Select [Network Options], then press the centre z on the control button. The Network Options screen appears. if no communication is made for specific time (1 minute, 2 minutes, 5 minutes, 15 minutes, or 30 minutes). 26-GB - Sony PC120BT | Network Function Operating Instructions - Page 27
Preparation Setting network preferences Note Although you have selected a specific time for the "Time Out" function, the line connection may not be cancelled automatically, depends on the Web page you access. In this case, you can cancel the line connection manually. Mail Send&Receive: Select - Sony PC120BT | Network Function Operating Instructions - Page 28
Setting network preferences Note on "Save Mail to Server" When "Save Mail to Server than 4000. 3) c The camcorder cannot receive an e-mail message that has 4000 characters or more. 4) Memory Stick Directory Error c Insert another "Memory Stick" that has sufficient memory, then download your e-mail - Sony PC120BT | Network Function Operating Instructions - Page 29
the destination address from the address book" on page 45. (1) Open the Network Menu. For details on how to open the Network Menu, refer to "Accessing the network" in the operating instructions supplied with your camcorder. (2) Select [ Mail], then press the centre z on the control button. The Send - Sony PC120BT | Network Function Operating Instructions - Page 30
Using e-mail (3) Select [To], then press the centre z on the control button. The address list appears. The list shows the addresses that are registered in the address book. For details on the address book, see "Using the address book" on page 40. , When you have selected an address listed in the - Sony PC120BT | Network Function Operating Instructions - Page 31
Network Operation Using e-mail Tip If you notice that the e-mail address is wrong, you can correct it in the address book. For details on the - Sony PC120BT | Network Function Operating Instructions - Page 32
Using e-mail 2 Entering the subject of a message (1) Select [Subject], then press the centre z on the control button. The subject list appears. The list shows up to six subjects. , When you want to use a subject shown on the list, select the subject, then press the centre z on the control button. - Sony PC120BT | Network Function Operating Instructions - Page 33
Network Operation Using e-mail 3 Entering the text of a message Enter the text of the message. You can select the text from the message list, or modify - Sony PC120BT | Network Function Operating Instructions - Page 34
control button. The screen for verifying the connection appears. Set the Bluetooth device to connection standby with the camcorder beforehand. For details, refer to the operating instructions supplied with the Bluetooth device. , (4) Check the telephone number. When dialling other telephone numbers - Sony PC120BT | Network Function Operating Instructions - Page 35
Network Operation Using e-mail (5) Select [Connect], then press the centre z on the control button. The camcorder starts dialling the selected telephone number. After the sending is completed, the message "Sending Mail Complete" appears. The phone line is automatically disconnected. , (6) Select [ - Sony PC120BT | Network Function Operating Instructions - Page 36
Using e-mail (3) Select the message you want to check or modify, then press the centre z on the control button. The following screen appears. , (4) Check or modify the message. When the message is long, select the message area, then press the control button V repeatedly to scroll the message. When - Sony PC120BT | Network Function Operating Instructions - Page 37
Network Operation Using e-mail Attaching images to e-mail You can send images by attaching them to e-mail messages. Preparation Store the desired images in the "Memory Stick" and insert it into the camcorder. (1) Follow these procedures: "1 Specifying the destination address" on page 29, "2 - Sony PC120BT | Network Function Operating Instructions - Page 38
image file size. Attaching your signature to a message You can attach your signature to the last column of the e-mail message. (1) Open the Network Menu. For details on how to open the Network Menu, refer to "Accessing the network" in the operating instructions supplied with your camcorder. 38-GB - Sony PC120BT | Network Function Operating Instructions - Page 39
Select [ Setup], then press the centre z on the control button. The Setup screen appears. , (3) Select [Network Options], then press the centre z on the control button. The Network Options screen appears. , (4) Select [Signature], then press the centre z on the control button. The character input - Sony PC120BT | Network Function Operating Instructions - Page 40
book, you can send email without entering the e-mail address manually. Registering destination addresses in the address book You can register the Network Menu. For details on how to open the Network Menu, refer to "Accessing the network" in the operating instructions supplied with your camcorder. 40 - Sony PC120BT | Network Function Operating Instructions - Page 41
Network Operation Using e-mail (2) Select [ Mail], then press the centre z on the control button. If the Address screen is not displayed, select the Address tab. The - Sony PC120BT | Network Function Operating Instructions - Page 42
Using e-mail (6) Select [Enter], then press the centre z on the control button. The Address Book: New screen appears again. , (7) Select [Address], then press the centre z on the control button. The character input screen appears. , (8) Enter the e-mail address. For details on how to input - Sony PC120BT | Network Function Operating Instructions - Page 43
Operation Using e-mail (11) Select [Exit], then press the centre z on the control button. The Network Menu appears again. Tips •The addresses are listed in alphabetical order. •When you reply to the address of a previously received e-mail message, the address will - Sony PC120BT | Network Function Operating Instructions - Page 44
z on the control button. The Address screen appears again. , (7) Check the name or address. (8) Select [Exit], then press the centre z on the control button. The Network Menu appears again. 44-GB - Sony PC120BT | Network Function Operating Instructions - Page 45
Network Operation Using e-mail Selecting the destination address from the address book You can select the destination address from the address book. (1) Follow steps 1 and 2 in " - Sony PC120BT | Network Function Operating Instructions - Page 46
•Insert a "Memory Stick" into the camcorder, for storing images. •Release the lock of the "Memory Stick". Checking your e-mail inbox Tip You can keep copies of your messages on your server even if you download the message using the camcorder. For details, see "Setting network options preferences" on - Sony PC120BT | Network Function Operating Instructions - Page 47
Network Operation Using e-mail (3) Select [Receive], then press the centre z on the control button. The screen for verifying the connection appears. Set the Bluetooth device to connection standby with the camcorder beforehand. For details, refer to the operating instructions supplied with the - Sony PC120BT | Network Function Operating Instructions - Page 48
in the e-mail message. The camcorder cannot play back the attached image if the file is in an incompatible format. To view an attached image Exit the NETWORK mode, then view the image following the same procedure as that for viewing an image recorded in a "Memory Stick". In such cases, the attached - Sony PC120BT | Network Function Operating Instructions - Page 49
check the e-mail inbox after sending e-mail. For details, see "Setting network options preferences" on page 26. •You can skip an e-mail message if its file items, you cannot read the subject and the sender name on the camcorder. Sending your answer - Reply You can quickly reply to an e-mail message without - Sony PC120BT | Network Function Operating Instructions - Page 50
Using e-mail (2) Select the area where a message is indicated, then select the message you want to reply to using the control button b/B, then press the centre z on the control button. The selected message is displayed. , (3) Select [Reply], then press the centre z on the control button. The Send - Sony PC120BT | Network Function Operating Instructions - Page 51
Network Operation Using e-mail Forwarding the message to another person - Forward You can forward a downloaded message to another person. (1) Display the Receive screen. (2) Select the area - Sony PC120BT | Network Function Operating Instructions - Page 52
want to delete is stored. •Release the lock of the "Memory Stick". (1) Open the Network Menu. For details on how to open the Network Menu, refer to "Accessing the network" in the operating instructions supplied with your camcorder. (2) Select [ Mail], then press the centre z on the control button - Sony PC120BT | Network Function Operating Instructions - Page 53
Network Operation Using e-mail (3) Select the area where a message is indicated, then select the message you want to delete using the control button b/B, then press the - Sony PC120BT | Network Function Operating Instructions - Page 54
is called a URL. This URL is required to access a Web site. (1) Open the Network Menu. For details on how to open the Network Menu, refer to "Accessing the network" in the operating instructions supplied with your camcorder. (2) Select [ Browser], then press the centre z on the control button. The - Sony PC120BT | Network Function Operating Instructions - Page 55
button. The screen used for verifying the connection appears. Set the Bluetooth device to connection standby with the camcorder beforehand. For details, refer to the operating instructions supplied with the Bluetooth device. , (6) Check the telephone number. When dialling other telephone numbers - Sony PC120BT | Network Function Operating Instructions - Page 56
top of the screen. This item also shows a connected time and the address of the Web page. The connecting time indication should be used as a guide. Off Line: being offline Loading: Loading a Web page On Line: being online Notes •When the address is too long to display, the whole of the - Sony PC120BT | Network Function Operating Instructions - Page 57
Network Operation Viewing Web pages (2) When the menu bar is not displayed, press BROWSER MENU on the camcorder. The menu bar appears. (3) Select (Bookmark), then press the centre z on the control button. The bookmark list appears. , (4) Select [ Add], then press the centre z on - Sony PC120BT | Network Function Operating Instructions - Page 58
Viewing Web pages (2) Select the bookmark you want to edit, then press the centre z on the control button. The title and URL are indicated. , (3) Select [Edit], then press the centre z on the control button. The character input screen appears. , (4) Edit the name. For details on how to input - Sony PC120BT | Network Function Operating Instructions - Page 59
Network Operation Viewing Web pages To delete bookmarks You can delete bookmarks. We recommend that you delete unnecessary bookmarks since you can only store up to - Sony PC120BT | Network Function Operating Instructions - Page 60
in step 4. 3 Jumping to the Web page specified by the bookmark (1) When the menu bar is not displayed, press BROWSER MENU on the camcorder. The menu bar appears. (2) Select (Bookmark), then press the centre z on the control button. The bookmark list appears. , (3) Select the bookmark, then press - Sony PC120BT | Network Function Operating Instructions - Page 61
Network Operation Viewing Web pages (4) Select [Go], then press the centre z on the control button. The screen used for verifying the connection appears. Set the Bluetooth device to connection standby with the camcorder beforehand. For details, refer to the operating instructions supplied with the - Sony PC120BT | Network Function Operating Instructions - Page 62
You cannot store the Web page while loading it. Editing the title of a page memo You can edit the title of a page memo stored in a "Memory Stick". Preparation • Insert a "Memory Stick" into the camcorder, for storing images. • Release the lock of the - Sony PC120BT | Network Function Operating Instructions - Page 63
Network Operation Viewing Web pages (1) Select (Page Memo), then press the centre z on the control button. The page memo list appears. , (2) Select the page memo you - Sony PC120BT | Network Function Operating Instructions - Page 64
you delete unnecessary page memos since you can only store up to 30 page memos. Preparation •Insert a "Memory Stick" into the camcorder, for storing page memos. •Release the lock of the "Memory Stick". (1) Select (Page Memo), then press the centre z on the control button. The page memo list appears - Sony PC120BT | Network Function Operating Instructions - Page 65
Network Operation Viewing Web pages (3) Select [Delete], then press the centre z on the page stored in page memo You can display a page memo stored in a "Memory Stick". Preparation Insert the "Memory Stick" into the camcorder, which the page memo you want to display is stored. (1) Select (Page Memo - Sony PC120BT | Network Function Operating Instructions - Page 66
appears. Select another page memo. Shutting down the browser To finish viewing the Web page, and disconnect the phone line (1) Press BROWSER MENU on the camcorder to display the menu bar. (2) Select END (End), then press the centre z on the control button. The browser is closed, then the phone line - Sony PC120BT | Network Function Operating Instructions - Page 67
100MSDCF DSCsssss.JPG Still image file MOVsssss.MPG Moving image file 700MSNET XXXsssss.JPG Still image file over the network XXXsssss.MPG Moving image file over the network CAM NET01 RCV.MBX Incoming e-mail list* IMAGEMEM.CNF Page memo management file* MEMOssss MEMOssss.HTM Page memo HTML - Sony PC120BT | Network Function Operating Instructions - Page 68
access the Internet. c The Bluetooth device may be deleted from the registration. Set it up again. The message "Low Battery" is indicated and the camcorder cannot access the Internet. c Charge the battery pack or use the AC power adaptor, then connect again. Trouble with e-mail The message "DNS - Sony PC120BT | Network Function Operating Instructions - Page 69
Information Troubleshooting The camcorder cannot receive e-mail. c The clock of the camcorder is not set up. Set it up. c Check your setup according to the procedure described in "Setting network preferences" on page 22. c All of your downloaded e-mail messages are stored in the "Memory Stick - Sony PC120BT | Network Function Operating Instructions - Page 70
Troubleshooting The Web page is not loaded. c When entering its URL Check that the address http://www.sony.co.jp/) The Web page cannot make a transition. c The item "Cookie" may not be checked. Check the item "Cookie" on the Network Options screen. The cookie is not saved. c Exit the NETWORK mode, - Sony PC120BT | Network Function Operating Instructions - Page 71
Specifications Bluetooth The number of registered devices available 3 E-mail characters of an e-mail message Approx. 4000 The maximum number of email messages recordable in a "Memory Stick" 50 Browser The number of bookmarks available 30 The maximum number of characters of a bookmark title - Sony PC120BT | Network Function Operating Instructions - Page 72
Change the battery pack or use the AC power adaptor. Check the setup. If an entry is missing, set up again referring to your notes. Exit the NETWORK mode, then enter the NETWORK mode again. The "Memory Stick" may be broken. Do the following; exit the NETWORK mode, turn off the camcorder, remove and - Sony PC120BT | Network Function Operating Instructions - Page 73
manual setup may be wrong. Check your password. Check the setup in provider preferences. Check the setup in provider preferences. No images in the "Memory Stick Invalid Data Open Anyway? The clock is not set up on the camcorder. Set up the clock. Page Certification Error Invalid Data Open Anyway? - Sony PC120BT | Network Function Operating Instructions - Page 74
Automatically Loading... Retry Later Meaning Files modified with a computer may not be deleted by the camcorder. User authentication is required to access the page. Enter your user name and password. Check the Network Options setup (p. 26). The page memo cannot be stored while the unit is loading - Sony PC120BT | Network Function Operating Instructions - Page 75
time for being connected with an Internet service provider using a dial-up connection. Most Internet service providers charge for the time connected. Cookie ", etc. This is a server that replaces a domain name with an IP address. This is specified by an IP address. Download (p. 54) Load information - Sony PC120BT | Network Function Operating Instructions - Page 76
Glossary Link (p. 49) A related page address listed on a Web page as a Web link. Password (p. 23) Used to access the provider in combination with a user ID. POP3 (p. 25) An abbrebiation for Post Office Protocol, Version 3. This is a server used to receive email. PPP (p. 23) An abbrebiation for Point - Sony PC120BT | Network Function Operating Instructions - Page 77
Setup memo Be careful not to reveal these entries. Network Menu Network Setup Provider Setup PPP ID Password DNS1 DNS2 TEL No. 1 TEL No. 2 TEL No. 3 Mail UserID Password Address POP Server SMTP Server Browser Proxy Port Example [email protected] hcHZ7yd 192.168.0.1 192.168.0.2 XXXXXXX abc123 - Sony PC120BT | Network Function Operating Instructions - Page 78
2-FR À propos des marques commerciales •"Memory Stick" et sont des marques déposées de Sony Corporation. •Les marques commerciales BLUETOOTH appartiennent à leur propriétaire et sont utilisées sous licence par Sony Corporation. •NetFront by Access Co., Ltd. est adopté pour la fonction Internet - Sony PC120BT | Network Function Operating Instructions - Page 79
4 Présentation de la technologie sans fil Bluetooth 5 Opérations de base en mode NETWORK 6 Utilisation du Network Menu (Menu réseau 6 Utilisation du bouton de pages Web 54 Mémorisation de la page Web sur un "Memory Stick" - Page Memo (Mémoire de page 61 Quitter le navigateur 66 - Sony PC120BT | Network Function Operating Instructions - Page 80
de communication du caméscope et les profils compatibles Bluetooth sont "Generic Access Profile" et "Dial-up Networking Profiles". Votre caméscope Un équipement Bluetooth, comme l'adaptateur pour modem avec fonction Bluetooth Vers Internet • Accédez facilement à Internet Vous pouvez visualiser - Sony PC120BT | Network Function Operating Instructions - Page 81
peut bloquer l'accès de ce réseau aux utilisateurs non spécifiés. Lorsque vous essayez d'établir une communication avec un appareil Bluetooth non enregistré, les appareils doivent d'abord s'enregistrer mutuellement en entrant un code d'accès commun sur chaque appareil. Lorsque vous vous - Sony PC120BT | Network Function Operating Instructions - Page 82
utiliser le caméscope, plus précisément celles qui sont utilisées pour les opérations réseau. Utilisation du Network Menu (Menu réseau) Pour accéder au Network Menu (Menu réseau), reportez-vous à la section "Accès au réseau" du mode d'emploi du caméscope. [a] [b] [c] [d] [a]: envoi et réception de - Sony PC120BT | Network Function Operating Instructions - Page 83
Introduction Opérations de base en mode NETWORK Utilisation du bouton de commande La plupart des opérations réseau sont effectuées via le bouton de commande. Sélectionnez un bouton sur l'écran à l'aide - Sony PC120BT | Network Function Operating Instructions - Page 84
Opérations de base en mode NETWORK Saisie de caractères Vous aurez souvent besoin de saisir des caractères, comme pour les adresses de messagerie électronique ou les adresses de page - Sony PC120BT | Network Function Operating Instructions - Page 85
Introduction Opérations de base en mode NETWORK (2) Appuyez sur z au centre du bouton de commande pour entrer le caractère. Appuyez plusieurs fois de suite pour sélectionner les autres caractères de - Sony PC120BT | Network Function Operating Instructions - Page 86
Opérations de base en mode NETWORK Par ex., saisissez "Hello" dans l'option Subject (Objet) de l'écran Send (Envoyer) (1) Sélectionnez l'onglet abc. (2) Sélectionnez [ghi], puis appuyez cinq fois sur z au centre du - Sony PC120BT | Network Function Operating Instructions - Page 87
Introduction Opérations de base en mode NETWORK (5) Sélectionnez [ ], puis appuyez sur z au centre du bouton de commande. Le curseur se déplace sur la position suivante. , (6) Sélectionnez [jkl], puis appuyez trois fois sur z - Sony PC120BT | Network Function Operating Instructions - Page 88
Opérations de base en mode NETWORK Liste des caractères disponibles Caractères alphabétiques Touche Caractère abc a t b t c t A t B t C t a t... def d t e t f t D t E t F t d t... ghi g t h t i t G t H t I t g t... jkl j t k t l t J t K t L t j t... mno m t n t o t M t N t O t m t... - Sony PC120BT | Network Function Operating Instructions - Page 89
Introduction Opérations de base en mode NETWORK Caractères numériques Touche Caractère 0/ 0 1 1 2 2 3 3 4 4 5 5 6 6 7 7 8 8 9 9 Utilisation de la barre de menus du navigateur Lorsque vous accédez à Internet et que vous visualisez une - Sony PC120BT | Network Function Operating Instructions - Page 90
Opérations de base en mode NETWORK Boutons de la barre de menus Boutons de la partie sup de la page en cours. (Page Memo, Mémoire de page) Mémoriser la page en cours dans le "Memory Stick". Vous pouvez alors visualiser la page sans accéder à Internet. Remarque Suivant la page Web à laquelle vous - Sony PC120BT | Network Function Operating Instructions - Page 91
l'URL suivant : • http://www.sony.ca/service •http://www.sony-europe.com/imaging, puis cliquez sur "support" • http://www.sony-asia.com.sg/helpdesk Modèle DCR-IP7BT/PC120BT uniquement L'adaptateur pour modem BTA-NW1 Sony avec fonction Bluetooth est fourni avec le DCR-IP7BT/PC120BT. Cet appareil - Sony PC120BT | Network Function Operating Instructions - Page 92
2 Spécification de l'adaptateur pour modem avec fonction Bluetooth comme équipement de connexion (1) Ouvrez le Network Menu(Menu réseau). Pour plus de détails sur l'ouverture du Network Menu (Menu réseau), reportez-vous à la section "Accès au réseau" dans le mode d'emploi fourni avec votre cam - Sony PC120BT | Network Function Operating Instructions - Page 93
), puis appuyez sur z au centre du bouton de commande. Le caméscope commence à rechercher les appareils Bluetooth. Lorsque la recherche est terminée, la liste des appareils Bluetooth disponibles apparaît. , Remarques • La recherche prend entre 10 à 60 secondes. La durée dépend du nombre d'appareils - Sony PC120BT | Network Function Operating Instructions - Page 94
modem BTA-NW1 avec fonction Bluetooth, le code d'accès appareil Bluetooth Conseil entre deux appareils Bluetooth. La connexion sera Bluetooth", "NIP", "NIP Bluetooth", etc. Pour plus de détails, reportez-vous au mode d'emploi fourni avec l'adaptateur Bluetooth avec fonction Bluetooth, reportezvous au - Sony PC120BT | Network Function Operating Instructions - Page 95
dans la section "Si vous utilisez l'adaptateur pour modem avec fonction Bluetooth" page 15 à partir de l'étape 4. Affichage des informations sur votre caméscope Vous pouvez afficher les informations de votre caméscope. (1) Ouvrez le Network Menu(Menu réseau). Pour plus de détails sur l'ouverture du - Sony PC120BT | Network Function Operating Instructions - Page 96
. Indication des ondes radio indique le statut des ondes radio de l'appareil Bluetooth connecté. (Cette indication doit vous servir de guide.) Sélection d'autres appareils Bluetooth dans la liste Sélectionnez l'appareil Bluetooth que vous souhaitez spécifier, puis appuyez sur z au centre du bouton - Sony PC120BT | Network Function Operating Instructions - Page 97
) apparaît. , (4) Sélectionnez [Select] (Sélectionner), puis appuyez sur z au centre du bouton de commande. La liste des appareils Bluetooth apparaît. , (5) Sélectionnez l'appareil que vous souhaitez supprimer, puis appuyez sur z au centre du bouton de commande. Le nom et l'adresse de l'appareil - Sony PC120BT | Network Function Operating Instructions - Page 98
votre fournisseur. Si vous ne comprenez pas les options de configuration, consultez votre fournisseur d'accès. (1) Ouvrez le Network Menu (Menu réseau). Pour plus de détails sur l'ouverture du Network Menu (Menu réseau), reportez-vous à la section "Accès au réseau" dans le mode d'emploi fourni avec - Sony PC120BT | Network Function Operating Instructions - Page 99
Préparation Configuration des préférences réseau (4) Configurez les options suivantes : ID: saisissez le nom d'utilisateur utilisé pour accéder à votre fournisseur d'accès via une connexion par ligne commutée. Conseil concernant l'option "ID" "ID" est également désignée par les termes "ID - Sony PC120BT | Network Function Operating Instructions - Page 100
option si vous souhaitez utiliser APOP. Conseil concernant "APOP" APOP est un protocole d'authentification pour assurer la sécurité. Cochez cette option si votre fournisseur d'accès supporte APOP. Renseignez-vous auprès de votre fournisseur d'accès pour savoir s'il - Sony PC120BT | Network Function Operating Instructions - Page 101
fournisseur d'accès. (9) Sélectionnez [Exit] (Quitter), puis appuyez sur z au centre du bouton de commande. La configuration est terminée, l'écran Network Setup (Configuration réseau) réapparaît. (10) Sélectionnez [Exit] (Quitter), puis appuyez sur z au centre du bouton de commande. L'écran Setup - Sony PC120BT | Network Function Operating Instructions - Page 102
les options de l'écran Network Options (Options réseau). (1) Affichez l'écran Setup (Configuration). (2) Sélectionnez [Network Options] (Options réseau), puis appuyez sur z au centre du bouton de commande. L'écran Network Options (Options réseau) apparaît. , 26-FR (3) Configurez les options - Sony PC120BT | Network Function Operating Instructions - Page 103
visionnez une page Web. Cette option est vérifiée dans la configuration par défaut. Reset: réinitialise toutes les options de l'écran Network Options (Option réseau) à l'exception de "Signature" et "Modem Init". Remarque Aucun message de confirmation n'apparaît lorsque vous essayez de réinitialiser - Sony PC120BT | Network Function Operating Instructions - Page 104
-vous au tableau ci-dessous. Messages1) Cause et/ou actions correctrices Memory Stick Memory Full (Mémoire du Memory Stick pleine) Vous avez essayé de télécharger un message électronique alors que le "Memory Stick" est déjà plein. 2) c Supprimez le courrier et supprimez les courriers inutiles ou - Sony PC120BT | Network Function Operating Instructions - Page 105
vous pouvez également envoyer des images mémorisées sur un "Memory Stick" en les joignant à un message. Envoi de courrier électronique En le carnet d'adresses" page 45. (1) Ouvrez le Network Menu(Menu réseau). Pour plus de détails sur l'ouverture du Network Menu (Menu réseau), reportez-vous à la - Sony PC120BT | Network Function Operating Instructions - Page 106
Utilisation du courrier électronique (3) Sélectionnez [To] (À), puis appuyez sur z au centre du bouton de commande. La liste des adresses apparaît. La liste affiche les adresses enregistrées dans le carnet d'adresses. Pour plus de détails sur le carnet d'adresses, voir la section "Utilisation du - Sony PC120BT | Network Function Operating Instructions - Page 107
Fonctionnement du réseau Utilisation du courrier électronique Conseil Si vous remarquez que l'adresse de messagerie est incorrecte, vous pouvez la corriger dans le carnet d'adresses. Pour plus de détails sur le carnet d'adresses, voir la section "Modification du carnet d'adresses" page 43. (7) Si - Sony PC120BT | Network Function Operating Instructions - Page 108
Utilisation du courrier électronique 2 Saisie de l'objet d'un message (1) Sélectionnez [Subject] (Objet), puis appuyez sur z au centre du bouton de commande. La liste des objets apparaît. La liste indique jusqu'à six objets. , Si vous souhaitez utiliser un objet indiqué sur la liste, sélectionnez l' - Sony PC120BT | Network Function Operating Instructions - Page 109
Fonctionnement du réseau Utilisation du courrier électronique 3 Saisie du texte d'un message Saisissez le texte du message. Vous pouvez sélectionner le texte à partir de la liste des messages ou le modifier pour qu'il corresponde à vos besoins. La liste affiche jusqu'à six messages. (1) Sé - Sony PC120BT | Network Function Operating Instructions - Page 110
[Send] (Envoyer), puis appuyez sur z au centre du bouton de commande. L'écran permettant de vérifier la connexion apparaît. Mettez préalablement l'appareil Bluetooth en attente de connexion avec le caméscope. Pour plus de détails, reportez-vous également au mode d'emploi fourni avec l'appareil - Sony PC120BT | Network Function Operating Instructions - Page 111
Fonctionnement du réseau Utilisation du courrier électronique (5) Sélectionnez [Connect] (Connecter), puis appuyez sur z au centre du bouton de commande. Le caméscope commence à composer le numéro de téléphone sélectionné. Après l'envoi, le message "Sending Mail Complete" ("Envoi du message termin - Sony PC120BT | Network Function Operating Instructions - Page 112
Utilisation du courrier électronique (3) Sélectionnez le message que vous souhaitez vérifier ou modifier, appuyez ensuite sur z au centre du bouton de commande. L'écran suivant apparaît. , (4) Vérifiez ou modifiez le message. Lorsque le message est long, sélectionnez la zone du message, appuyez - Sony PC120BT | Network Function Operating Instructions - Page 113
à des messages. Préparation Mémorisez les images souhaitées dans le "Memory Stick" et insérez-le dans le caméscope. (1) Suivez ces procédures souhaitées. Déplacez la flèche jaune sur l'image que vous souhaitez télécharger, puis appuyez sur le bouton de commande. L'image sélectionnée est indiquée - Sony PC120BT | Network Function Operating Instructions - Page 114
signature dans un message Vous pouvez insérer votre signature dans la dernière colonne du message. (1) Ouvrez le Network Menu(Menu réseau). Pour plus de détails sur l'ouverture du Network Menu (Menu réseau), reportez-vous à la section "Accès au réseau" dans le mode d'emploi fourni avec votre cam - Sony PC120BT | Network Function Operating Instructions - Page 115
sur z au centre du bouton de commande. L'écran Setup (Configuration) apparaît. , (3) Sélectionnez [Network Options] (Options réseau), puis appuyez sur z au centre du bouton de commande. L'écran Network Options (Options réseau) apparaît. , (4) Sélectionnez [Signature], puis appuyez sur z au centre du - Sony PC120BT | Network Function Operating Instructions - Page 116
bouton de commande. L'écran Setup (Configuration) réapparaît. (8) Sélectionnez [Exit] (Quitter), puis appuyez sur z au centre du bouton de commande. Le Network Menu (Menu réseau) réapparaît. Utilisation du carnet d'adresses Une fois que vous avez enregistré les adresses que vous utilisez fréquemment - Sony PC120BT | Network Function Operating Instructions - Page 117
Fonctionnement du réseau Utilisation du courrier électronique (2) Sélectionnez [ Mail] (Message), puis appuyez sur z au centre du bouton de commande. Si l'écran Address (Adresse) n'apparaît pas, sélectionnez l'onglet Address (Adresse). L'écran des adresses apparaît. , (3) Sélectionnez [New] ( - Sony PC120BT | Network Function Operating Instructions - Page 118
Utilisation du courrier électronique (6) Sélectionnez [Enter], puis appuyez sur z au centre du bouton de commande. L'écran Address Book: New (Carnet d'adresses : nouvelle entrée) réapparaît. , (7) Sélectionnez [Address] (Adresse), puis appuyez sur z au centre du bouton de commande. L'écran de saisie - Sony PC120BT | Network Function Operating Instructions - Page 119
du réseau Utilisation du courrier électronique (11) Sélectionnez [Exit] (Quitter), puis appuyez sur z au centre du bouton de commande. Le Network Menu (Menu réseau) réapparaît. Conseils •Les adresses apparaissent dans l'ordre alphabétique. •Lorsque vous répondez à l'adresse d'un message reçu pr - Sony PC120BT | Network Function Operating Instructions - Page 120
bouton de commande. L'écran Address (Adresse) réapparaît. , (7) Vérifiez le nom ou l'adresse. (8) Sélectionnez [Exit] (Quitter), puis appuyez sur z au centre du bouton de commande. Le Network Menu (Menu réseau) réapparaît. 44-FR - Sony PC120BT | Network Function Operating Instructions - Page 121
Fonctionnement du réseau Utilisation du courrier électronique Sélection de l'adresse de destination dans le carnet d'adresses Vous pouvez sélectionner l'adresse de destination dans le carnet d'adresses. (1) Suivez les étapes 1 et 2 de la section "Enregistrement des adresses de destination dans le - Sony PC120BT | Network Function Operating Instructions - Page 122
paration •Insérez un "Memory Stick" dans le caméscope pour mémoriser des images. •Ouvrez le verrou du "Memory Stick". Vérification de votre corbeille réseau" page 26. (1) Ouvrez le Network Menu(Menu réseau). Pour plus de détails sur l'ouverture du Network Menu (Menu réseau), reportez-vous à la - Sony PC120BT | Network Function Operating Instructions - Page 123
[Receive] (Recevoir), puis appuyez sur z au centre du bouton de commande. L'écran permettant de vérifier la connexion apparaît. Mettez préalablement l'appareil Bluetooth en attente de connexion avec le caméscope. Pour plus de détails, reportez-vous également au mode d'emploi fourni avec l'appareil - Sony PC120BT | Network Function Operating Instructions - Page 124
dans un format incompatible. Visualisation d'une image jointe Quittez le mode NETWORK (réseau), visualisez ensuite l'image en suivant la même procédure que celle permettant de visualiser une image enregistrée sur un "Memory Stick". En pareils cas, le fichier attaché est mémorisé à côté de la derni - Sony PC120BT | Network Function Operating Instructions - Page 125
Fonctionnement du réseau Utilisation du courrier électronique URL inclus dans un message Lorsqu'un URL (http://...) est saisie dans le message, sélectionnez-la, appuyez ensuite sur z au centre du bouton de commande. Le navigateur démarre automatiquement et accède à la page Web indiquée. Remarques • - Sony PC120BT | Network Function Operating Instructions - Page 126
Utilisation du courrier électronique (2) Sélectionnez la zone où un message apparaît, puis sélectionnez le message auquel vous souhaitez répondre à l'aide de b/B sur le bouton de commande, appuyez ensuite sur z au centre du bouton de commande. Le message sélectionné apparaît. , (3) Sélectionnez [ - Sony PC120BT | Network Function Operating Instructions - Page 127
Utilisation du courrier électronique Transmission du message à une autre personne - Forward (Transmettre) Vous pouvez faire suivre un message téléchargé à une autre personne. (1) Affichage de l'écran Receive (Recevoir). Fonctionnement du réseau (2) Sélectionnez la zone où un message apparaît, puis - Sony PC120BT | Network Function Operating Instructions - Page 128
" sur lequel le message que vous souhaitez supprimer est mémorisé. •Ouvrez le verrou du "Memory Stick". (1) Ouvrez le Network Menu(Menu réseau). Pour plus de détails sur l'ouverture du Network Menu (Menu réseau), reportez-vous à la section "Accès au réseau" dans le mode d'emploi fourni avec votre - Sony PC120BT | Network Function Operating Instructions - Page 129
Fonctionnement du réseau Utilisation du courrier électronique (3) Sélectionnez la zone où un message apparaît, puis sélectionnez le message que vous souhaitez supprimer à l'aide de b/B sur le bouton de commande, appuyez ensuite sur z au centre du bouton de commande. Le message sélectionné apparaît. - Sony PC120BT | Network Function Operating Instructions - Page 130
unique sur Internet. L'adresse est appelée URL. Cet URL est nécessaire pour accéder au site Web. (1) Ouvrez le Network Menu(Menu réseau). Pour plus de détails sur l'ouverture du Network Menu (Menu réseau), reportez-vous à la section "Accès au réseau" dans le mode d'emploi fourni avec votre caméscope - Sony PC120BT | Network Function Operating Instructions - Page 131
Sélectionnez [Enter], puis appuyez sur z au centre du bouton de commande. L'écran permettant de vérifier la connexion apparaît. Mettez préalablement l'appareil Bluetooth en attente de connexion avec le caméscope. Pour plus de détails, reportez-vous également au mode d'emploi fourni avec l'appareil - Sony PC120BT | Network Function Operating Instructions - Page 132
. Cette option indique également une durée de connexion et l'adresse de la page Web. L'indication de la durée de connexion doit être utilisée comme guide. Off Line: hors ligne Loading: Chargement d'une page Web On Line: en ligne Remarques •Si l'adresse est trop longue pour être affichée, la totalit - Sony PC120BT | Network Function Operating Instructions - Page 133
Fonctionnement du réseau Visualisation de pages Web (2) Si la barre de menus n'apparaît pas, appuyez sur BROWSER MENU sur le caméscope. La barre de menus apparaît. (3) Sélectionnez (Bookmark, Signet), puis appuyez sur z au centre du bouton de commande. La liste des signets apparaît. , (4) Sé - Sony PC120BT | Network Function Operating Instructions - Page 134
Visualisation de pages Web (2) Sélectionnez le signet que vous souhaitez modifier, puis appuyez sur z au centre du bouton de commande. Le titre et l'URL sont indiqués. , (3) Sélectionnez [Edit] (Modifier), puis appuyez sur z au centre du bouton de commande. L'écran de saisie des caractères apparaît. - Sony PC120BT | Network Function Operating Instructions - Page 135
Fonctionnement du réseau Visualisation de pages Web Suppression de signets Vous pouvez supprimer des signets. Nous vous recommandons de supprimer les signets inutiles car vous ne pouvez mémoriser que 30 signets au maximum. (1) Sélectionnez (Bookmark, Signet), puis appuyez sur z au centre du bouton - Sony PC120BT | Network Function Operating Instructions - Page 136
Visualisation de pages Web Annulation de la suppression du signet Sélectionnez [Cancel] (Annuler), puis appuyez sur z au centre du bouton de commande à l'étape 4. 3 Atteindre la page Web spécifiée par le signet (1) Si la barre de menus n'apparaît pas, appuyez sur BROWSER MENU sur le caméscope. La - Sony PC120BT | Network Function Operating Instructions - Page 137
permettant de vérifier la connexion apparaît. Mettez préalablement l'appareil Bluetooth en attente de connexion avec le caméscope. Pour plus de page Web sur un "Memory Stick" - Page Memo (Mémoire de page) Vous pouvez mémoriser vos pages Web favorites sur un "Memory Stick". Une fois qu'elles sont - Sony PC120BT | Network Function Operating Instructions - Page 138
sur z au centre bouton de commande. Le message "Saving Page Memo Do Not Remove Memory Stick" ("Enregistrement de la mémoire de page en cours, ne retirez pas le Memory Stick") apparaît. Après la disparition du message, la mémorisation est terminée. , (5) Sélectionnez [ Return] (Retour), puis - Sony PC120BT | Network Function Operating Instructions - Page 139
Fonctionnement du réseau Visualisation de pages Web (1) Sélectionnez (Page Memo, Mémoire de page), puis appuyez sur z au centre du bouton de commande. La liste des mémoires de page apparaît. , (2) Sélectionnez la mémoire de page que vous souhaitez modifier, puis appuyez sur z au centre du bouton de - Sony PC120BT | Network Function Operating Instructions - Page 140
car vous ne pouvez mémoriser que 30 mémoires de page au maximum. Préparation •Insérez un "Memory Stick" dans le caméscope pour mémoriser des mémoires de page. •Ouvrez le verrou du "Memory Stick". (1) Sélectionnez (Page Memo, Mémoire de page), puis appuyez sur z au centre du bouton de commande. La - Sony PC120BT | Network Function Operating Instructions - Page 141
une page Web mémorisée dans la mémoire de page Vous pouvez afficher une mémoire de page stockée sur un "Memory Stick". Préparation Insérez dans le caméscope le "Memory Stick" sur lequel la mémoire de page que vous souhaitez afficher est mémorisée. (1) Sélectionnez (Page Memo, Mémoire de page), puis - Sony PC120BT | Network Function Operating Instructions - Page 142
Visualisation de pages Web (3) Sélectionnez [Open] (Ouvrir), puis appuyez sur z au centre du bouton de commande. La page Web mémorisée dans la mémoire de page est affichée. Sélection d'une autre mémoire de page Sélectionnez [Cancel] (Annuler), appuyez ensuite sur z au centre du bouton de commande à - Sony PC120BT | Network Function Operating Instructions - Page 143
Informations complémentaires - Informations complémentaires - Emplacements de la mémoire fichier et noms des fichiers Les fichiers sont regroupés dans les dossiers suivants. Vous pouvez visualiser ces dossiers sur un ordinateur uniquement. Les significations des noms de fichier sont les suivantes. - Sony PC120BT | Network Function Operating Instructions - Page 144
, vérifiez le statut certifié" est indiqué et le caméscope ne parvient pas à accéder à Internet. c L'appareil Bluetooth n'est peut-être plus enregistré. Reconfigurez-le. Le message "Low Battery" ("Batterie insuffisante") apparaît et le caméscope ne parvient pas à accéder à Internet. c Chargez la - Sony PC120BT | Network Function Operating Instructions - Page 145
des messages téléchargés. Vérifiez la configuration de l'option "Restrict" ("Restriction") sur l'écran Network Options (Options réseau). c Vous pouvez mémoriser jusqu'à 50 messages téléchargés sur un "Memory Stick". Si vous souhaitez mémoriser un 51ème message, supprimez les messages inutiles ou ins - Sony PC120BT | Network Function Operating Instructions - Page 146
co.jp/xxxx/, essayez http:// www.sony.co.jp/) La page Web ne peut pas faire de transition. c L'option "Cookie" n'est peut-être pas cochée. Cochez l'option "Cookie" sur l'écran Network Options (Options réseau). Le cookie n'est pas enregistré. c Quittez le mode NETWORK (Réseau), le cookie sera supprim - Sony PC120BT | Network Function Operating Instructions - Page 147
Spécifications Bluetooth Nombre d'appareils enregistrés disponibles 3 Messagerie électronique Envoi de caractères dans un message Environ 4000 Nombre maximum de messages enregistrables sur un "Memory Stick" 50 Navigateur Nombre de signets disponibles 30 Nombre maximum de caractères d'un titre de - Sony PC120BT | Network Function Operating Instructions - Page 148
Bluetooth, vérifiez la ligne téléphonique) Low Battery (Batterie insuffisante) Profile Error Reset Profile (Erreur de profil, réinitialisez le profil) Memory Error (Erreur de mémoire) Memory Stick Error (Erreur de Memory Stick) Memory Stick Error Outgoing Mail Canceled (Erreur de Memory Stick - Sony PC120BT | Network Function Operating Instructions - Page 149
de la façon suivante : quittez le mode NETWORK (Réseau), mettez le caméscope hors tension, retirez et réinsérez le "Memory Stick", puis faites fonctionner le caméscope. Si le message réapparaît, utilisez un autre "Memory Stick". Formatez le "Memory Stick". Pour plus de détails sur l'option "Verify - Sony PC120BT | Network Function Operating Instructions - Page 150
accéder à la page. Saisissez votre nom d'utilisateur et votre mot de passe. Vérifiez la configuration Network Options (options réseau) (p. 26). Impossible d'enregistrer la mémoire de page tant que l'appareil est en train de télécharger une page Web. Enregistrez-la de nouveau une fois que la page Web - Sony PC120BT | Network Function Operating Instructions - Page 151
", etc. Il s'agit d'un serveur qui remplace un nom de domaine par une adresse IP. Ce nom est spécifié par une adresse IP. Durée de connexion (p. 56) Temps nécessaire pour se connecter à un fournisseur de service Internet à l'aide d'une connexion par ligne commutée. La plupart des fournisseurs de - Sony PC120BT | Network Function Operating Instructions - Page 152
Internet pour les transactions par carte de crédit. SSL permet également de vérifier la propriété et de chiffrer les données. Télécharger (p. 54) Charger des informations depuis le serveur via la ligne téléphonique. Transférer (p. 51) Faire suivre un message reçu à une autre personne. L'indication - Sony PC120BT | Network Function Operating Instructions - Page 153
ne devez en aucun cas révéler ces entrées. Network Menu Network Setup Provider Setup PPP ID Password DNS1 DNS2 TEL No. 1 TEL No. 2 TEL No. 3 Mail UserID Password Address POP Server SMTP Server Browser Proxy Port Exemple [email protected] hcHZ7yd 192.168.0.1 192.168.0.2 XXXXXXX abc123 hcHZ7yd - Sony PC120BT | Network Function Operating Instructions - Page 154
- Sony PC120BT | Network Function Operating Instructions - Page 155
- Sony PC120BT | Network Function Operating Instructions - Page 156
Sony Corporation Printed in Japan 307113212
-
 1
1 -
 2
2 -
 3
3 -
 4
4 -
 5
5 -
 6
6 -
 7
7 -
8
-
9
-
10
-
11
-
12
-
13
-
14
-
15
-
16
-
17
-
18
-
19
-
20
-
21
-
22
-
23
-
24
-
25
-
26
-
27
-
28
-
29
-
30
-
31
-
32
-
33
-
34
-
35
-
36
-
37
-
38
-
39
-
40
-
41
-
42
-
43
-
44
-
45
-
46
-
47
-
48
-
49
-
50
-
51
-
52
-
53
-
54
-
55
-
56
-
57
-
58
-
59
-
60
-
61
-
62
-
63
-
64
-
65
-
66
-
67
-
68
-
69
-
70
-
71
-
72
-
73
-
74
-
75
-
76
-
77
-
78
-
79
-
80
-
81
-
82
-
83
-
84
-
85
-
86
-
87
-
88
-
89
-
90
-
91
-
92
-
93
-
94
-
95
-
96
-
97
-
98
-
99
-
100
-
101
-
102
-
103
-
104
-
105
-
106
-
107
-
108
-
109
-
110
-
111
-
112
-
113
-
114
-
115
-
116
-
117
-
118
-
119
-
120
-
121
-
122
-
123
-
124
-
125
-
126
-
127
-
128
-
129
-
130
-
131
-
132
-
133
-
134
-
135
-
136
-
137
-
138
-
139
-
140
-
141
-
142
-
143
-
144
-
145
-
146
-
147
-
148
-
149
-
150
-
151
-
152
-
153
-
154
-
155
-
156
 |
 |

3-071-132-
12
(1)
DCR-IP7BT/IP7E/
PC120BT/PC120E
Network Function Operating Instructions
Mode d’emploi de la fonction réseau
© 2001 Sony Corporation